In many apartments, a heated towel rail serves not only to dry things, but is also responsible for maintaining the desired indoor climate. Over time, he becomes unusable or simply does not suit the owners with his appearance. And in old apartments it happens that it is simply unsuccessfully located. Then the question arises: how should a heated towel rail be replaced correctly and is it really possible to do it yourself?
The complexity of the work will depend on many factors. In the simplest case, the services of a locksmith will cost one and a half to two thousand rubles, and the work will not take more than two hours. But if you need to make changes to the hot water supply system, then the cost of installing a heated towel rail will increase quite significantly. Even if you doubt your abilities and decide to hire professionals, it will be useful to know how to replace a heated towel rail in the bathroom. This will help to control the quality of the work being carried out and to avoid problems in the future, the primary source of which is an illiterate installation.
Choosing a new heated towel rail
How to change a heated towel rail in a bathroom with your own hands in the quickest and easiest way? The replacement process will cause the least complications if the new model does not differ much from the old one. What should you pay attention to here?
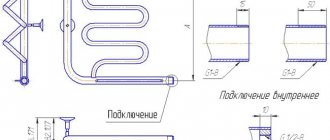
The most important parameter can be considered the distance between the liners. If it matches, then there is no need to modify the water supply system to the device, and this is the most difficult and costly part of the work when replacing a heated towel rail. All manufactured varieties fit into a standard range of sizes between the supply pipes: 400, 500, 600, 700 and 800 mm. Having carefully measured the distance between the liners of the old heated towel rail, you can go to the store to buy a new one.
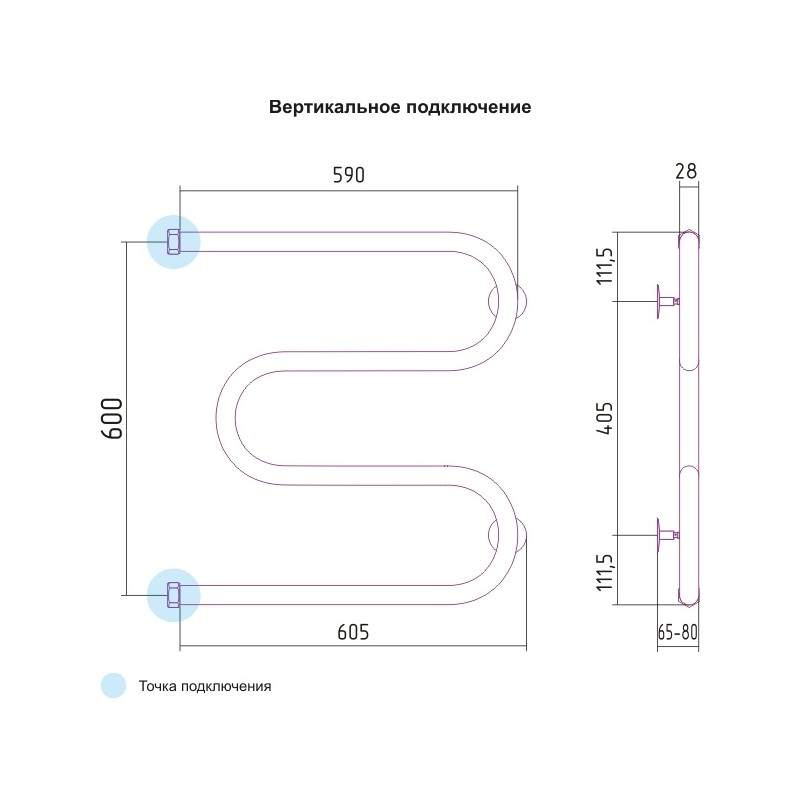
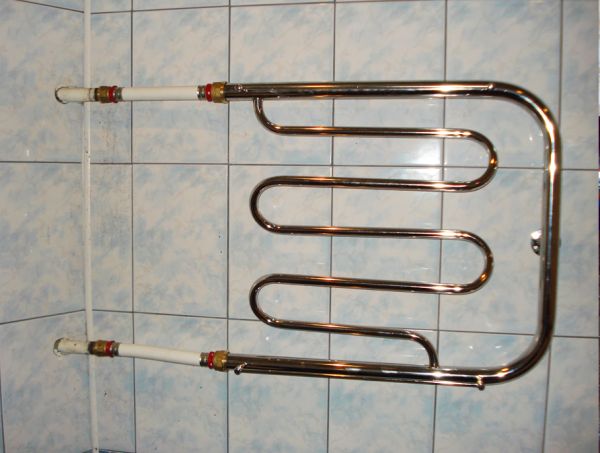
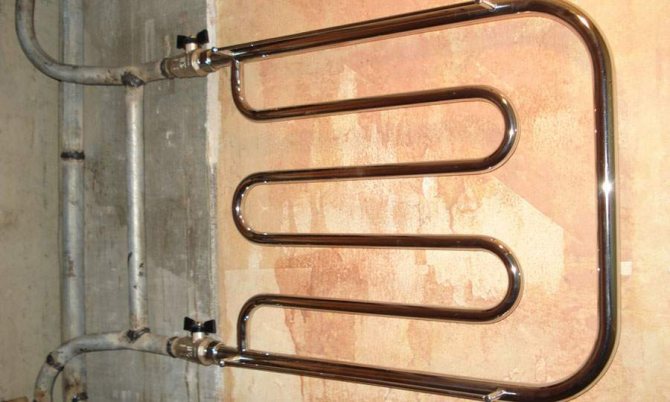
Another important point. There are two types of heated towel rails: the heating element can be in the form of a ladder or a coil. Changing one view to another is problematic: hot water is supplied to the coil from the side, and in the model by a ladder - from above or below.
The dimensions of the heated towel rail and the attachment points are not decisive. Even a mismatch in the diameter of the supply pipes can be easily eliminated using adapters.
USEFUL INFORMATION: How to improve the external design of the bathroom: hide the pipes

Preparing to replace the heated towel rail
Heated towel rail
If the decision is made to replace the heated towel rail yourself, the first step is to make sure that there is no water in the system if it is drained at the end of the heating season.
In the event that the replacement is carried out during the heating season, or the water from the heating system is not drained, you should agree with the organization responsible for heating (for example, the housing office) to temporarily shut off the necessary heating riser and drain the water from it, if possible.
Tools
Heated towel rail
To complete the work, you will need the following tools:
- Keys - pipe and adjustable;
- Soldering iron for polypropylene pipes;
- Perforator;
- Bulgarian;
- Thread cutter;
- You may also need a set of hex keys.
Training
Installed heated towel rail
First, we will consider in stages the preparation for replacing a heated towel rail:
- It is better to make strobes before dismantling the old heated towel rail, since cutting them takes quite a long time;
- In order to prepare a place for cutting or welding threads for winding the transition to a plastic pipe, you should also destroy the concrete slab in the place where the pipe enters it;
Important: if there is a floor screed in the bathroom, it is also broken.
- Threaded metal connections are also packed in advance. They should be carefully sealed, since repacking the connection may again require draining the water from the mains, cutting out a piece of pipe, etc.
Connecting a heated towel rail
Important: the tightness of the connection is checked only by drawing water into the system and applying pressure.
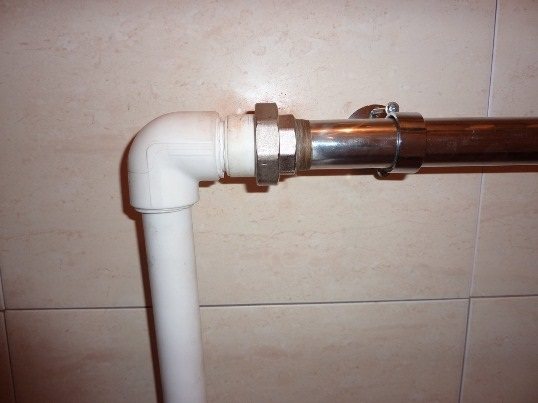
- In advance, it is possible to seal the connections of taps with a heated towel rail and chrome-plated extension cords with MRN (male threaded coupling for transition from metal to plastic).
Removing an old heated towel rail
The heated towel rail can be connected to heating or hot water pipes. The second option is preferable - then the bathroom will be warm and dry all year round.
In any case, you will have to contact the housing office or a local service company. Only their locksmith can shut off the hot water in the riser. Of course, no one will allow you to turn off the heating in winter. In this case, the replacement of the heated towel rail in the bathroom is carried out in the summer. But you still need to check if the water is drained from the heating system. We open the tap on any radiator, substituting a convenient container under it. After checking, you can proceed to dismantling.
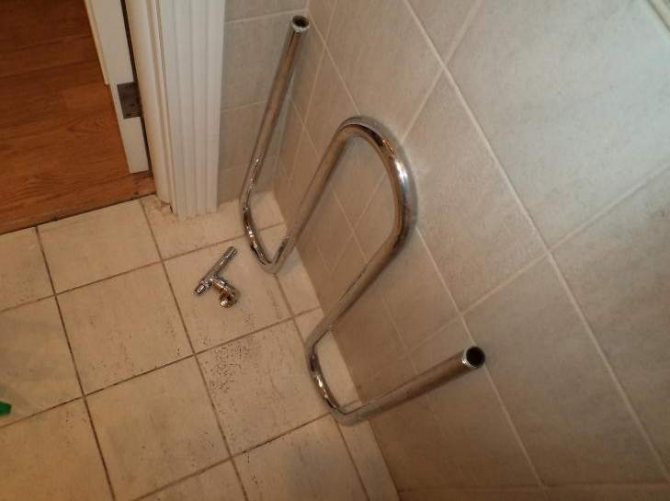
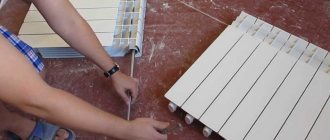
It is good if the old structure was attached to the pipes using threaded connections. Then they can simply be unscrewed after draining the water from the system. But what if the thread can no longer be unscrewed or the old heated towel rail was simply welded on? We'll have to cut pipes with a grinder. It is important not to forget that these pipes will then have to be threaded. To do this, leave a piece of sufficient length.
It is better if the cuts on both pipes of the heated towel rail are located strictly vertically. To do this, we first outline the cutting line using a level. The cut itself must be perpendicular to the pipe. Having cut off, we make small chamfers at the ends at an angle of 45˚, they will be needed for free entry of the cutter when cutting threads.
It is necessary to dismantle at least two people: one works as a grinder, and the other supports a heated towel rail. Otherwise, it may fall or pinch the disc in the grinder, which can lead to very sad consequences.
After disconnecting from the pipes, dismantle the fasteners and remove the old heated towel rail.
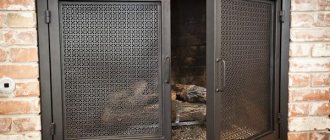
Features of installing an electric heated towel rail
As mentioned above, the do-it-yourself installation of a device with electric heating is much easier, but it is imperative to remember about the features associated with the safety of its operation. These tips are few, but the importance of each of them can hardly be disputed.
Installing a device with electric heating
- If the socket to which the device is connected is in the bathroom, it must be waterproof and have a special cover that insulates from water.
- Grounding is a prerequisite to prevent the formation of static electricity on the surface of the dryer.
- Use an automatic power cut-off device. The condition is indisputable, if you do not want to get an electric shock during water procedures!
- It is advisable to use hidden wiring to prevent moisture from entering the wire.
- When buying, you need to pay attention to the type of electric dryer. Oil-containing ones - they require rigid fastening in one position, they heat up for a long time and cool down slowly, but the installation of grounding is an indispensable condition. Cable - can be turned as conveniently, they heat up quickly and cool down quickly, grounding is desirable, but not necessary.
Source https://remoskop.ru/ustanovka-polotentsesushitelya-vannoy-svoimi-rukami-zamenit.html
(Visited 663 times, 1 visits today)
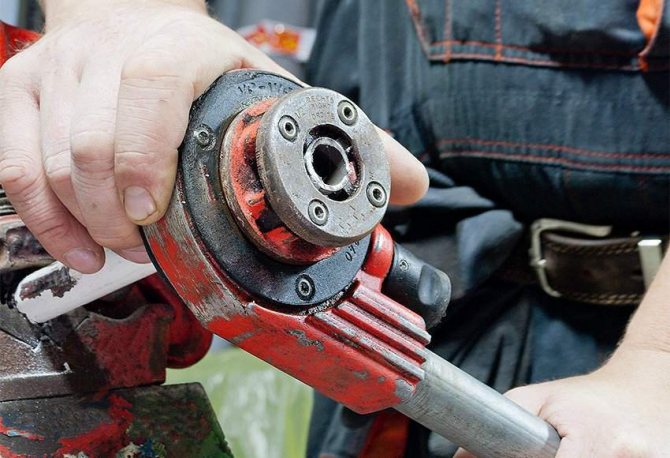
Thread cutting and pipe fastening
To connect to the riser, the remaining parts of the pipe must be threaded.It is most convenient to use a ratchet with a long handle. Any lubricant must first be applied to the pipe. It is important to make sure that the lerka runs smoothly.
The thread is cut as follows: half a turn of the scraper forward - a quarter turn back. There is no need to rush this operation.
Which pipes are best to use?
- To supply water to the heated towel rail, it is more convenient to use reinforced plastic pipes. It is not necessary to buy a soldering iron for their welding, you can take it from friends or rent
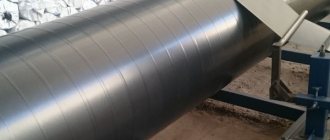
- Steel pipes can be used, but their connection will require rather complicated welding work. They weigh a lot and are prone to corrosion.
- Copper pipes do not rust, but they will have to be connected by soldering, and they cost a lot.
USEFUL INFORMATION: How to install a heated towel rail in the bathroom yourself
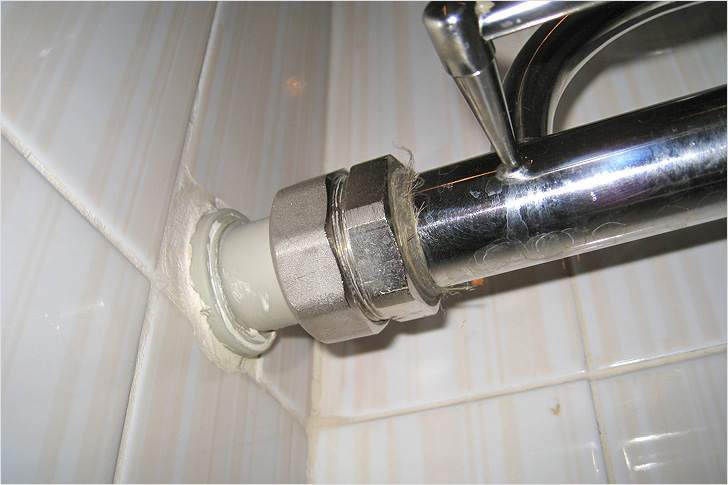
Fittings are screwed onto the resulting thread on the pipes. Linseed tow and Unipak paste are used for compaction. There are recommendations to use waterproof sealants, but then the connection will turn out to be non-separable.

Installation of polypropylene pipes is simple. Various fittings, corners and couplings are used to connect them. An instruction is attached to the welding soldering iron, where the entire process of pipe soldering is described in detail. There are several important points:
- When soldering plastic pipes, it is strictly forbidden to turn them.
- It is not recommended to use tow to seal polypropylene pipes.
- The liner must be mounted in such a way as to provide the heated towel rail with a distance of at least 35 mm from the wall. With a coil diameter exceeding 23 mm, the indent increases to 50 mm.
- Tightening of plastic fittings should be done with special strap wrenches, the use of gas can lead to damage to the connecting element.
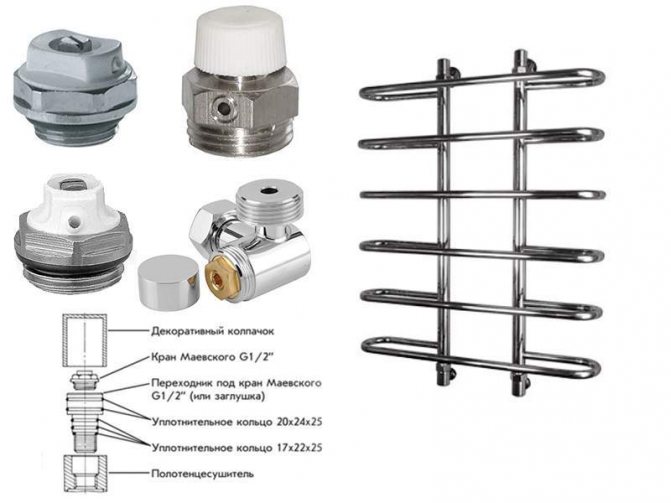
- It is imperative to install a Mayevsky valve to bleed air into the system.
- The shut-off valves on the pipes must be reliable.
- When installing, it is better to use "American" (fittings that allow you to connect the elements of the system by tightening the union nut), so that later you can easily disassemble the entire system if necessary.
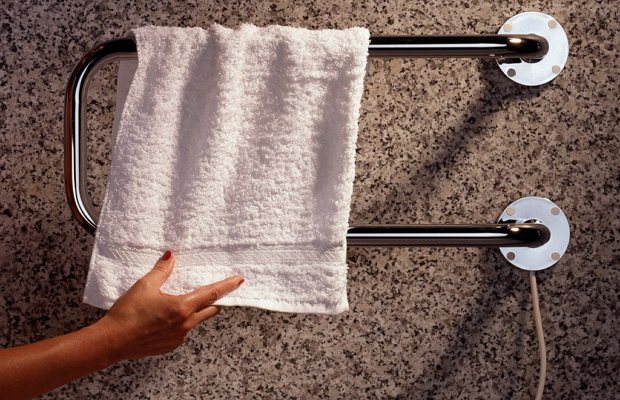
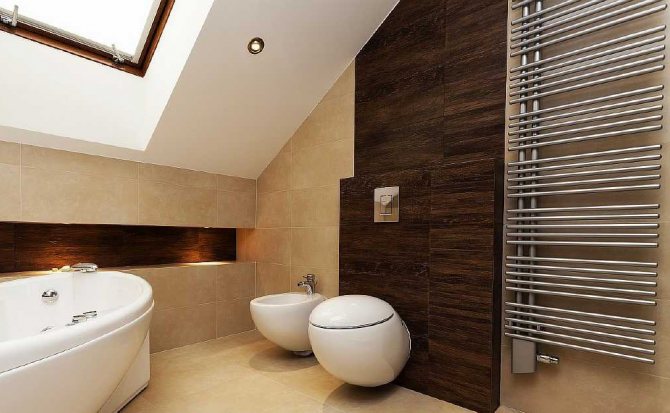
Why do you need a heated towel rail?
The heated towel rail in the bathroom has several functions:
- serves as a device for drying clothes;
- heats the room, maintaining a pleasant microclimate;
- prevents dampness and unpleasant odors;
- protects against the growth of mold and other pathogenic bacteria.
Important! Equally valuable is the aesthetic function of a heated towel rail in the bathroom. Therefore, it is necessary to correctly approach the choice of a new system so that it becomes a full-fledged element of the interior and serves not only as a practical device, but also as a decorative part of the entire bathroom design.
Installing a bypass on a heated towel rail
This is a kind of jumper that will allow you not to block the water in the entire riser, if, for example, you notice that a heated towel rail is leaking. It can take a long time to shut off the water supply to the coil without a bypass. There is no need to specify at whose expense the flooded apartments will be repaired in this case.
Installing a bypass allows you to quickly shut off the water supply to a damaged heated towel rail without disrupting its general circulation in the house. It is a bypass pipe that is installed at the junction of the coil and the riser, but before the ball valves that regulate the water supply.
It is not recommended to install a crane on this pipe. It can impair the circulation of water in the entire riser, so a representative of the housing office may require it to be removed.
USEFUL INFORMATION: Stylish bathroom design options: hi-tech, modern, Scandinavian, nautical
Organizational difficulties when replacing and moving a heated towel rail
To obtain a high-quality result, the replacement of a heated towel rail should be carried out taking into account a complete change:
- All pipes;
- Heat appliance;
- Shut-off valves.
Before purchasing all the components and the heating equipment itself, it is necessary to scrupulously study the work area:
- Talk to neighbors about the condition of their pipes that go to your apartment and the likelihood of their damage;
- If the neighbors did not change the old pipes, it is advisable to solve with them the issue of bringing new pipes out of your apartment to them, that is, to the adjacent apartments of the neighbors living above and below;
- In this matter, it is very important to replace the old pipe cuttings inside the ceilings and walls;
- Agree with neighbors to provide access to their communications for the duration of the renovation work.
If you decide to transfer the heated towel rail to another place or wall, you need to take these works more seriously, since they imply:
- Implementation of an individual project;
- Hydraulic calculations;
- Agreeing with the housing office.
Attaching a new heated towel rail
Installation of a heated towel rail is carried out as follows:
- The mating parts of the American are screwed into the purchased heated towel rail. All joints are sealed.
- The coil is attached to the wall, the attachment points are outlined.
- Holes are drilled in the wall for attaching brackets, which are usually mounted on dowels.
- The heated towel rail is connected to the riser, after which the fasteners are fixed to the wall. It is recommended to first level the coil. The connections must be tightened carefully so as not to damage the threads. But their insufficient sealing can lead to the fact that the system will leak.
- To check the tightness, we fill the coil with water. Cranes must be opened smoothly to avoid water hammer.
- If leaks are detected in the pipes, we shut off the shut-off valves and eliminate the imperfections.
Thus, knowing how to replace a heated towel rail, you can do the work yourself or supervise the work of professionals.
What is a heated towel rail for?
Despite the obvious and understandable name of this plumbing fixture, it should be borne in mind that its functional purpose is not limited exclusively to drying wet towels after taking a shower, or to drying small clothes after hand washing.
- First of all, I want to draw your attention to the fact that a bathroom usually does not have its own heating system, and a heated towel rail is often the only heating device;
- In addition to heating the room itself, it improves natural air circulation and helps to ventilate the room faster.
- This allows you to get rid of water vapor and condensation in a short time, which will certainly form on the walls after taking a hot bath;
- Taken together, all of these factors allow you to maintain an optimal microclimate in the room, and not freeze while taking water procedures, and after their completion, normalize the high humidity of the air, which can lead to the appearance of an unpleasant odor and the development of mold;
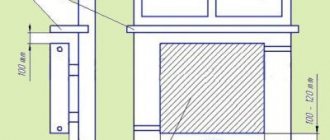
For those who do not know at what height to hang a heated towel rail in the bathroom, I recommend doing this in such a way that any adult family member can freely reach with his hand to the uppermost bar or shelf, while the optimal distance from the bottom edge to the floor should be in the range of 1100-1200 mm.
Stage 1. Buying a heated towel rail
In fact, all household heated towel rails are universal and can be used for installation in almost any bathroom or combined bathroom, however, according to the connection method and the type of heat carrier used, they can be conditionally divided into three types:
- Water models of heated towel rails are connected to a common vertical heating or hot water supply, therefore, the coolant in this case is circulating hot water:
- The advantage of such systems is their high reliability and durability, good heat transfer and high energy efficiency, as well as a relatively low operating cost;
- To the main disadvantages of such models, I can attribute the rather high complexity of installation and connection, as well as the fact that during seasonal or unscheduled shutdown of hot water supply and centralized heating, the heated towel rail pipes will also remain cold;
- Electric models are connected to the household power supply, and they are heated exclusively by built-in tubular electric heaters (TENs). Such devices cannot be called plumbing fixtures, since they do not require a connection to a hot water supply or to a centralized heating system, and have nothing to do with domestic plumbing;
- The main advantage of such a heating device is that it can operate practically without restrictions at any time of the year, regardless of the presence of water pressure in the pipes of centralized heating or hot water supply;
- Also, the advantages of electrical models include simple and quick do-it-yourself installation, since no plumbing work is required to install and connect it;
- The main disadvantage of an electric heater is that during operation it constantly consumes expensive electricity, therefore the total average annual cost of operating such devices will cost much more than water ones;
- Combined heated towel rails on sale are rare, however, in my opinion, this option can be considered the most successful, since it combines all the positive qualities of the two previous models. The fact is that such devices can be connected simultaneously to a hot water supply or centralized heating system, and to a household electrical network.;
- During the heating season, heating is carried out from circulating hot water, so most of the time the device works in normal mode and does not require any additional costs;
- After the end of the heating season, or in case of an unscheduled shutdown of hot water, power is connected to it from electricity, and further heating occurs from tubular electric heaters;
- The only drawback of combined models, at first glance, may seem to be their rather high price, but this drawback is compensated by the ease of use and economical mode of operation.
Flowing water heated towel rails can be connected not only to a centralized heating system, but also to the water circuit of an autonomous heating system for residential buildings, along with conventional heating radiators or underfloor heating systems.
Stage 2. Choosing a connection method
Having decided on the purchase of a suitable option, and choosing a water or combined model, you need to understand how to properly install a heated towel rail in the bathroom, since one of the two methods presented below can be used to connect it to home communications.
- Connecting to a district heating riser is, in my opinion, an undesirable option., because in this case, for several months a year, the heated towel rail pipes will remain cold. Such a connection can be found in old houses of the Soviet period of construction, but at present such a scheme is practically not used anywhere;
- Connection to a centralized or autonomous hot water supply system is considered the preferable option.... With this connection scheme, the heating of the heated towel rail pipes is uninterrupted throughout the year, since the coolant circulates in them constantly, as the hot water is consumed by domestic consumers.
In the event that the renovation of the bathroom is carried out in an old residential building, where the coil is connected to a heating riser, I recommend immediately abandoning such a scheme. To do this, before replacing the old heated towel rail with a new one with your own hands, connect the supply and return pipes to the domestic hot water system.
Step 3. Dismantling the old coil
Despite the fact that primary housing in new buildings is most often sold without plumbing fixtures, almost all bathrooms in residential apartments in the secondary real estate market are initially already equipped with all household plumbing fixtures. For this reason, before you change your own towel dryer, in most cases, you must first dismantle the old coil pipe:
- First of all, you need to completely shut off the water supply to the common vertical riser, to which the old heated towel rail is connected, and wait a while until the pressure in the system decreases;
- If the existing pipe is installed relatively recently, and is attached to the main riser using union nuts, you just need to unscrew the threaded connection, and, if necessary, cut off the old mounting brackets with a grinder, and then remove the old coil from the wall;
- In houses of an earlier period of construction, the supply pipes in most cases are welded to the common riser using gas welding. In this case, they need to be carefully cut with a grinder, then also cut off the mounting brackets, and remove the old heated towel rail;
- If the old pipe is connected to the DHW riser, it must be cut in such a way that small bends with a length of 80-100 mm remain near the riser, on which it will be possible to cut threads, or weld new threaded pipes to them;
- If the old coil was connected to the heating system, the pipe can be cut off at the very base, and the resulting holes in the riser can be sealed with metal plugs.
To replace a heated towel rail connected to a centralized heating system, I advise you to plan the work in the spring and summer. This is due to the fact that in the absence of an emergency, the housing management company is unlikely to agree to turn off the entire heating riser during the cold season.
Step 4. Connecting water pipes
If you have the opportunity to use gas acetylene welding, then the supply and removal of hot water to the heated towel rail is best done using metal water pipes. If this is not possible, then polypropylene water pipes with appropriate shut-off valves can be used to connect the coil to a common riser.
- On the outer part of the remaining metal bends, an external thread must be cut with a length of at least 40 mm, and then shut-off ball valves must be screwed onto them;
.
- If for some reason it is difficult to do this, you can weld ready-made threaded nozzles to them, after which ball valves can also be installed on them;
- Often there are situations when the heated towel rail coil is connected in series, in the rupture of the hot water riser pipe. In this case, between the inlet and outlet nozzles, in front of the stopcocks, you need to install a jumper (bypass) from the same water pipe with another stopcock in the middle. It is necessary for the free passage of hot water bypassing the coil, in case of failure or dismantling of the heated towel rail;
- Before you hang the coil in its place, you need to attach it to the wall, and mark the location of the inlet and outlet pipes, and then make a markup for laying water pipes;
- In order to carry out the hidden laying of the supply pipes, it is necessary to grind shallow channels in the wall with the help of a puncher and a grinder, and after laying the pipes, fill them with a gypsum putty mixture.
After connecting, laying and connecting the supply pipes, it is necessary to install sealed plugs on the outlet openings, and test the system under the working water pressure. I highly recommend doing this prior to finishing, as in the event of any faults or leaks, it will be very difficult to fix them behind the laid wall tiles.
Step 5. Installing a new heated towel rail
Different types of heated towel rails can have different options for wall mountings, and different sizes of threaded nozzles, however, in general, the general principle of installation and connection for all models is approximately the same.
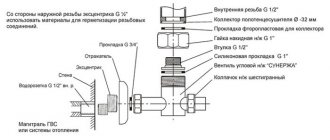
Wall mounts are most often presented in the form of clamps or telescopic brackets, which allow you to adjust the distance from the wall, as well as the position of the coil relative to the vertical and horizontal. For connection to the threaded water pipes, union nuts with a rubber gasket, which are popularly called "American", are used.
Eccentric thread adapters are installed to correct the horizontal and vertical position. At the same time, I must remind you that the final installation and connection of the heated towel rail can be performed only after the complete completion of the interior decoration of the bathroom walls:
- After the corresponding threaded adapters are installed at the outlet of the supply pipes, the heated towel rail must be attached to its place, and after making sure that the supply pipes are coaxial, fix it to the wall using the mounting brackets from the standard delivery set;
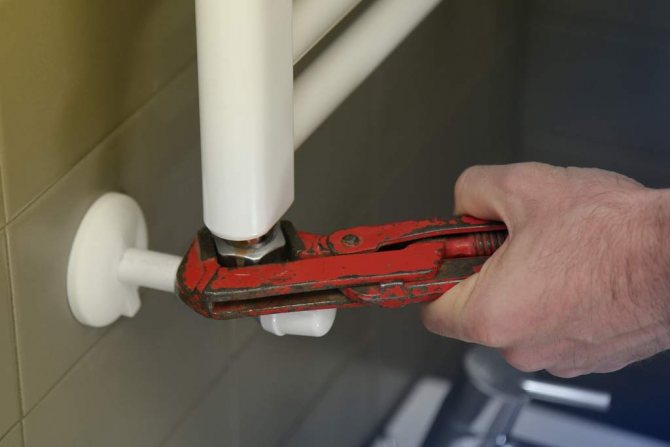
- The union nuts located on the nozzles of the coil must be screwed onto the threaded branches that protrude from the wall, and if everything went well the first time, tighten them to the right moment using an adjustable wrench;
- If, for some reason, a misalignment occurs, then before installing the coil, a threaded eccentric adapter must be installed between each union nut and the supply pipe. It will allow, within acceptable limits, to correct the position of the heated towel rail relative to the horizon;
- After connecting and aligning the coil, tighten the threaded pipes, and finally fix the adjusting screws of the mounting brackets in the desired position;
- This must be done in such a way that the distance between the wall tiles and the rear surface of the heated towel rail is at least 35 mm for a coil with a diameter of less than 23 mm, and 45 mm for a coil with a diameter of more than 23 mm;
- Before connecting the hot water supply to the common riser, you need to slightly open the bleeder valve (Mayevsky's tap)located in the upper part of the device in order to release the air accumulated in the pipes outside;
- After de-airing and flushing the system by draining a certain amount of hot water from the nearest tap, the water heated towel rail will be completely ready for use.
All connecting and shut-off valves, during the operation of the heated towel rail, are under the working pressure of hot water, therefore, soldering and pressure testing of polypropylene pipes must be performed in full compliance with the technology, and when assembling all threaded connections, use a fluoroplastic sealing tape (FUM).
Step 6. Installation and connection of models with electric heater
As for the installation and connection of electrical models, in this case, installing a heated towel rail in the bathroom with your own hands is considered much simpler, since it does not require the supply of water pipes, and does not limit the choice of the location of the device in any way.
The only difficulty lies in the hidden electrical wiring, however, if the outside finish has not yet been done in the bathroom, then there should not be any problems with this at all.
- First of all, you need to decide on the exact place of installation of the heated towel rail, and bring to one of the attachment points, near which the terminal block is located, a three-core electrical cable of a suitable section;
- The cable for hidden wiring should be laid in a plastic corrugation, laid in a pre-cut groove, by analogy with the hidden laying of water pipes;
- Safety regulations and rules for installing household electrical equipment in the bathroom require the mandatory use of protective grounding, therefore the connection of such devices must be carried out with a three-core cable through a separate differential circuit breaker or residual current device (RCD);
- After finishing the finishing of the walls, you need to connect the power cable to the terminal block. At the same time, I want to remind you that the conductor in brown insulation is connected to the phase terminal, the conductor in blue insulation is connected to the working zero terminal, and the wire with yellow-green insulation is connected to the protective earth screw;
- After connecting the wires, you need to make a test connection of the device to the electrical network, and after making sure that it is working properly, mount it on the wall using the mounting brackets that come with the delivery.
Some potential buyers are wondering if it is possible to remove or reduce the heating of an electric heated towel rail in order to reduce energy consumption. I can say that many models are equipped with a built-in thermostat and voltage regulator, which allows you to either turn it off completely, or to perform step temperature control.
obustroeno.com