Basic (valuable and useful) information about the installation of steel heating radiators: sequence of actions, features and methods of installation, floor mount for panel batteries, advantages and disadvantages of equipment.
For many years in a row, panel heaters have been popular with consumers.
This is primarily due to their price and technical characteristics, but no less important is the installation of steel radiators, which is so simple that even a beginner can handle it.
Features of steel radiators
As a rule, when it comes to buying heating batteries, in most cases the advantages and disadvantages of steel panels are discussed:
- They are best suited for closed heating systems, but they are not hopeless for centralized heating, if they coincide with it in terms of such parameters as the pressure and Ph of the heat carrier.
- Installation of steel heating radiators does not cause problems even for people who are not versed in this matter.
- Steel radiators, depending on the type, are suitable for one-pipe and two-pipe heating systems, which expands their scope.
- They are lightweight, so fastenings for steel radiators do not need additional reinforcement or complex installation.
- As a rule, most panel battery models have side and bottom connection options, which allows owners to choose which method is preferable for them.
- These heating systems have a small volume for the coolant, which significantly saves money during their operation.
The quality of steel panel heating radiators does not depend on the country of origin, but on the composition of the steel that was used in their production.
Connecting a steel radiator to polypropylene pipes
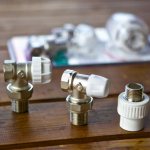
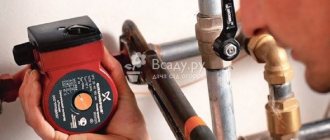
In order to properly connect a heating radiator to the system, a heating radiator installation kit is required. It consists of two special straight or angle cranes. Using the mounting kit, you can completely shut off the heating medium flow to the radiator, this allows it to be disconnected while the system is running.

To seal the threaded connections, I used a collapsible adhesive sealant. Before that, I already had to use it, I liked everything very much, conveniently, quickly and without leaks. The instructions say "apply glue on one thread of the thread", but where do we really need it)))
It will not be worse!
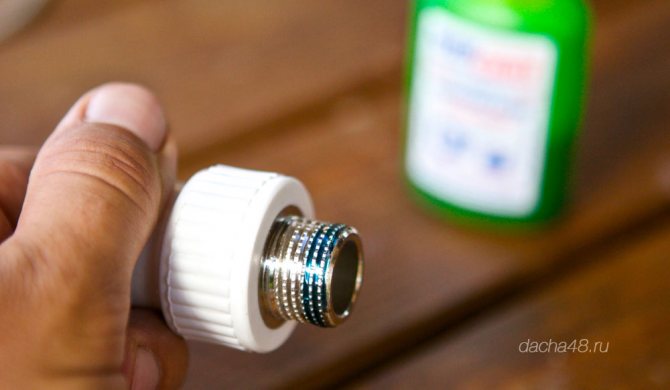

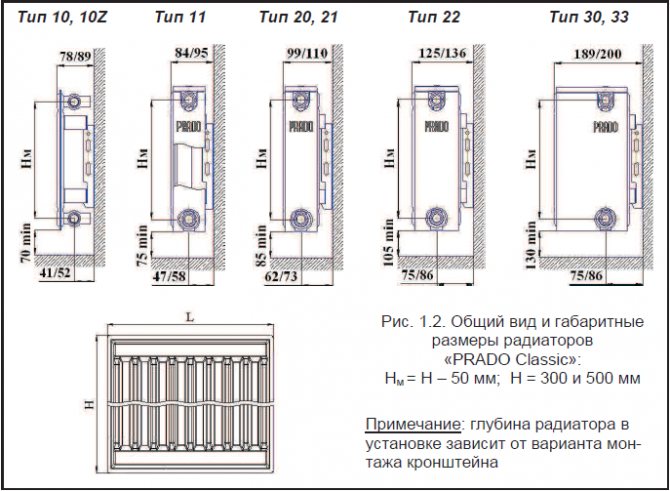
We twist it with a transition sleeve and measure the distance to the center. It turned out 58 mm, this is exactly the distance indicated in the documentation for the radiator. Take a look above PRADO Classic Type 11.
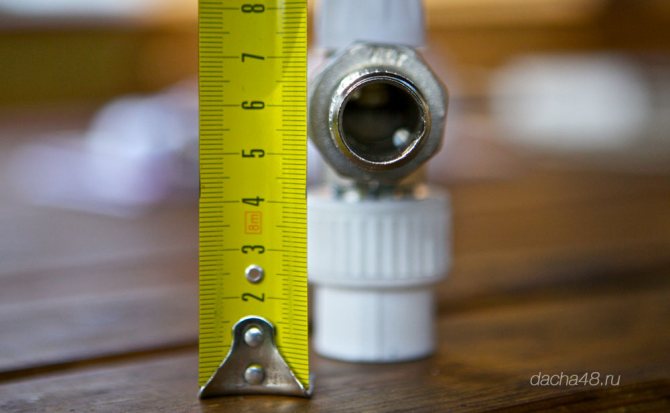

Indicated 47/58 is the distance from the wall to the center. The first number indicates the distance if the fastening strip is screwed with a wide shelf to the wall, the second - with a narrow one. Accordingly, in order for the battery to stand correctly, it is necessary that the adapter sleeve actually touches the wall.
To do this, cut off all unnecessary, leave 10-11 mm
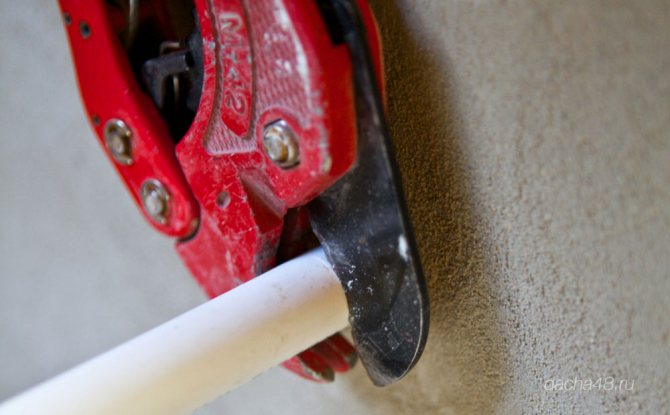

Great, cut it off, now it would be nice to install everything without deviations in axes and angles. I didn't want to let it go, so I set the laser level. A crane can be clearly installed on it.
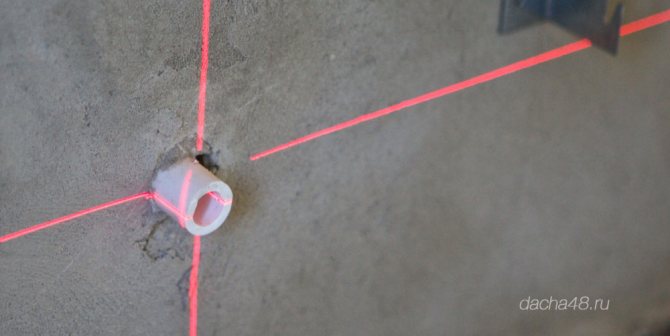

Then everything is as if on a knurled one. Of course, if you have previously used a soldering iron for PPR pipes.
Installation methods for panel radiators
The types of connecting batteries to the heating system have long been defined.
It can be:
- Diagonal.
- Side.
- Lower.
The first way minimizes heat loss, therefore it is considered the best.
With lateral connection, the supply pipe and return are connected from one side of the radiator.
Bottom way requires a "sacrifice" in the form of 15% heat loss, but at the same time allows you to hide the pipes in the floor, which gives the room a more aesthetic appearance, and any losses can be replenished by purchasing a more powerful radiator.
The connection of steel panels depends on the type of product, so before buying them, you need to think in advance about what it will be like. If the installation is to be done in an apartment with central heating, then it is better not to change the method, but to choose radiators with the required connection method.
Installation of fittings and connection of the radiator to the system
As a result, we have installed two cranes that should fit perfectly to the battery. The crane consists of two parts, we glued one, and the second, with a nut, must be screwed to the battery. It's time to unscrew the nut and screw the small part of the tap into the hole in the radiator. Don't forget about the sealant.
The threads should be screwed in the same way unless you intentionally need to adjust something. You can screw it with pliers, they are directly created for this, it is not as usual, but by inserting closed pliers into the hole of the tube. They will catch on the edges.
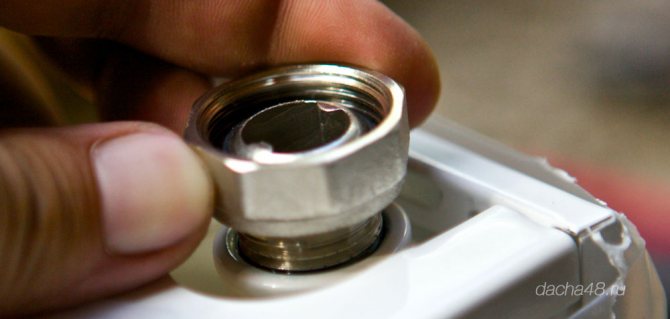

Wait 5 minutes until the sealant dries up and put the radiator in place. Everything must match.
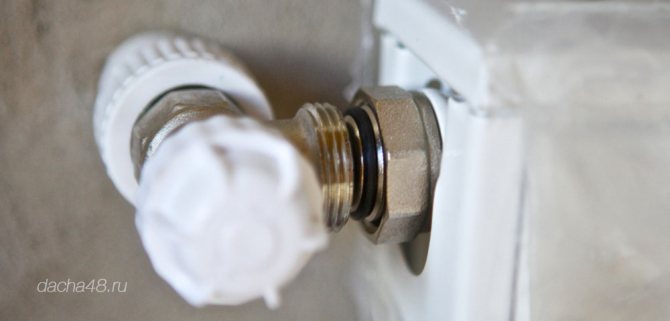

We tighten the nut, the key is tricky enough so you have to use a gas one.
Now it remains on the other side of the battery to screw Mayevsky's tap on top,
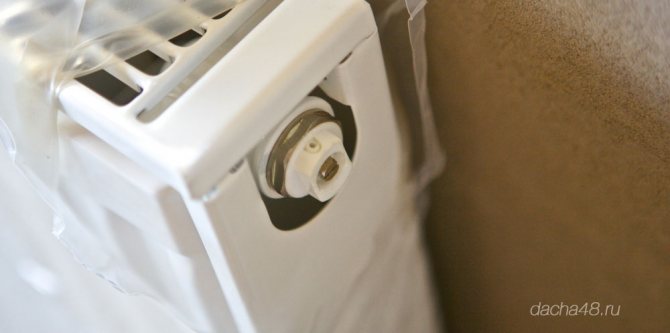

And at the bottom there is a plug.
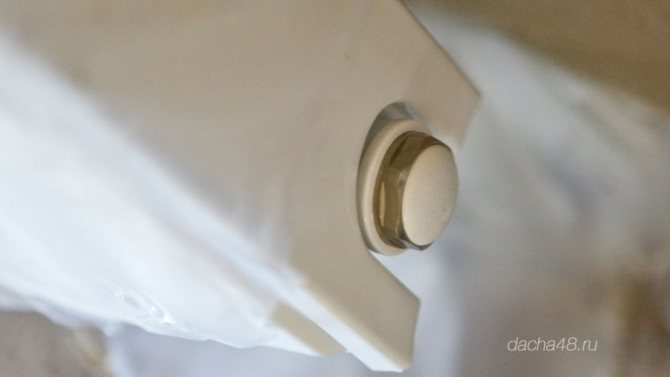

In the end, it turns out like this.
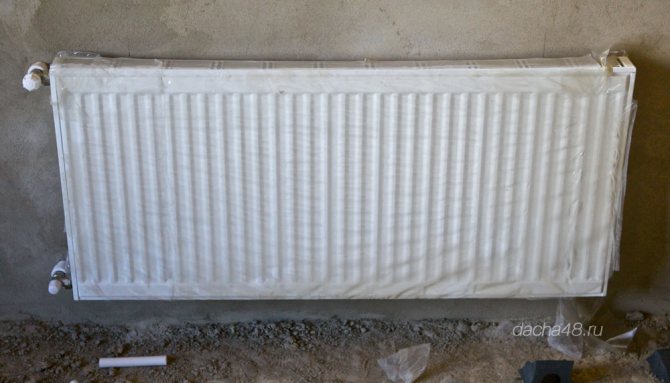

Thus, we install all the radiators in the house. If the radiator differs from Type 11, then the distance from the wall to the center of the radiator is greater. Pay attention to this and do not cut right away.
After everything is installed, it is necessary to pressurize the system. You can do this with a borehole pump, it gives out about 6 atm, and inspection of leaks at this time gives an adrenaline rush which I do not know what to measure))))
When pressing, nothing leaked from under the plaster or from the threaded connections. Hope you can do it too.
Panel battery installation
If you need to install steel radiators instead of old cast iron, then you need to take into account some of the nuances and sequence of actions when replacing them:
- First of all, you should protect the "weakest" sides of the system - close all taps and connections with sealant and tow.
- The next stage is the dismantling of the old batteries, which is performed after the entire medium has been drained from the system.
- Marks the location where the steel radiator bracket will be located. The number of clips depends on the length of the battery.
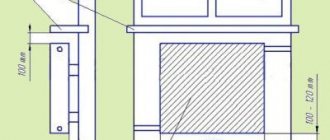
Before you mark with a pencil where the mount for panel heating radiators will be located, you need to measure the distance from the floor to its bottom (11 cm) and from its surface to the window sill (10-15 cm). These parameters are mandatory when installing radiators, since it is this ratio that maximizes the spread of heat throughout the room.
It is equally important to keep the distance from the panel radiator to the wall. If it is less than 20 cm, then part of the heat will go into the wall, which will increase heat loss, and thus require more energy to maintain the desired temperature.
Installation sequence of panel batteries:
- Prepare holes and fix self-tapping screws, on which each mount for steel radiators will be hung. There should be a distance of 4-5 mm between the self-tapping screw and the wall.
- After all the brackets are hung, it is necessary to fix them by screwing the self-tapping screws all the way.
- The next stage is hanging the structure on the upper brackets and only then is it installed on the floor mount for steel radiators.
- Adjust the distance from the wall and connect the radiator to the heating system.
- Install the elements that come with the heating panelsuch as thermostat and air vent.
All work on the installation of a steel radiator must be carried out without removing the special coating from it. This will protect its surface from possible damage and contamination.
In the event that the steel panel is mounted to copper pipes, then brass or bronze fittings must be installed between them, and a sealant must be used as a seal.
Features of installation of Dia Norm radiators
When choosing a heating system, you should consider issues related to its installation. It is often not possible to carry out this procedure independently. There are many reasons for this, ranging from a banal experience that an ordinary person does not have in this matter, and ending with a special tool. Buying the latter is economically unprofitable due to its one-time use. Having analyzed all the pros and cons, in order to perform the installation work, it is better to contact a specialized company, where professionals will competently install the entire system, start it up and carry out maintenance in the future. Having given these questions to more experienced people, one cannot completely withdraw from the process. After all, the nuances associated with the installation of the system arise even at the stage of its selection.
Which mounts should you prefer? What will be the system wiring: one - or two-pipe (see "Introduction to heating")? What kind of connection should I use? These and other questions immediately begin to arise, as soon as you start selecting radiators for your home.
Most Dia Norm radiators are equipped with mounting plates at the back (DiaPlus, DUO FINESSE, Plan-Ventil). Their number depends on the length of the device. So if it is 180 cm, then there are 4 such plates, in the opposite case - 6. Installation is carried out using a height-adjustable set for quick installation. To do this, first, at a distance of 72 mm from the upper edge of the radiator, install spacers with screws on the wall, which should be tightened so that a gap of about 5 mm remains between the wall and the screw head. After that, push the radiator mounting plates onto the screw head and the spacer tube, the former can be easily tightened. The final tightening of the screws is carried out after the height of the radiator has been installed. During installation, the corresponding spacer brackets are fixed at the bottom, which allow you to adjust the distance between it and the wall. This is necessary to vertically align the radiator mounting system.
However, some models of Dia Norm radiators are not equipped with mounting plates (DiaVentil), so that the consumer has the right to choose which side to install them. Certain types of this equipment (type 10) can also be suspended using a spring attachment. It holds the radiator from below and from above by the longitudinal edges of its panels. This mounting system includes a fuse to protect the radiator from accidental removal.
Steel panel radiators Dia Norm are designed with an individual approach to their heating system in mind. For this purpose, they provide in their structure the possibility of several types of connection at once. Lateral - there are four side connections G 1/2 ". In the tables of the registered heat outputs, the values are given for the case of the "one-way" connection method. At the same time, it was determined with free installation of radiators on a wall without a window sill at a height of about 110 mm from the floor. If the installation distances are not observed or the device is installed in a niche, the heat output will be lower. If the radiator is more than two meters long, it is recommended to use a diagonal connection, because it is then that an even distribution of heat will be achieved throughout the appliance. Lovers of hidden liners will love the loop-through. However, it can lead to a decrease in the power of the radiator by 10% or more.One-pipe connection of Dia Norm devices is possible using special valve designs. These are all methods of side connection of devices. At the same time, the compact radiators DiaVentil and DUO FINESSE are connected from below. This creates a system that is safe, fast and easy to install. To connect them using a crimp threaded connection, copper, soft steel and plastic pipes can be used.
One of the main problems with cold radiators is the loss of pressure in the system, which causes it to cool. There may be several reasons for this process: the presence of air locks, insufficient heating of the coolant by the boiler, leakage. The way to solve these problems is intuitive. In the places where the radiators are connected to the pipes, large pressure losses also often occur. Dia Norm obtains a significant reduction in these losses by using special round inserts for welding the connecting part.
Pricing policy in the installation issue often plays an important role. The lighter the radiators and the more thoughtful the system is made, the less labor-intensive and, consequently, the cheaper the installation work. Dia Norm radiators are a particularly good option in this regard. After all, plugs, air vent valves and a mounting kit are supplied with the radiator. With a small weight of Dia Norm heating devices, the installation of the system turns out to be the simplest and most convenient.
Battery installation: installation features
Usually the batteries are placed under a window. This feature of placement is dictated by the need to cut off the cold coming from the window by a curtain of rising heated air. If you do not want the windows to fog up, then make sure that the width of the radiator is up to 75% of the width of the window opening.
It is recommended to observe the following rules:
- the distance from the floor covering to the device is up to 12 cm;
- the distance required to the windowsill is no more than 12 cm;
- the middle of the radiator corresponds to the middle of the window - the deviation is no more than 3 cm;
- the distance from the wall surface to the device to be installed is no more than 5 cm.
Compliance with these recommendations will make it possible to ensure effective heating of the room due to the normal circulation of the air heated by the coolant.
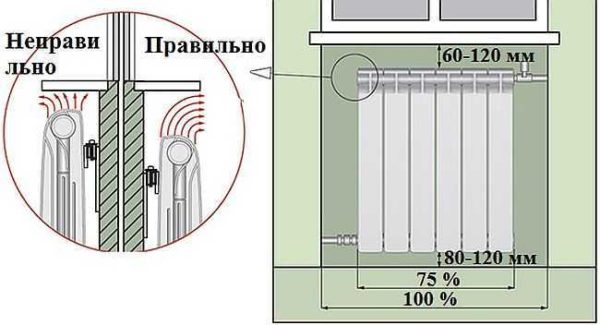

Battery Installation Guidelines
Heating battery installation rules
It is recommended to level the walls before hanging radiators on them. This greatly simplifies the work process. On the surface, mark the middle of the window opening and draw a horizontal line under the window sill (about 12 cm from it). Along this line, you can align the top edge of the radiator. The brackets are driven into the wall so that the device is positioned horizontally. This arrangement is optimal for rooms where a forced-type heating system with circulation of a coolant is installed. If there is no pump in the system, it is better to provide for a slight slope of the radiator (up to 1.5%) along the direction of hot water flow. If the slope is greater, then there may be problems with the stagnation of the coolant.
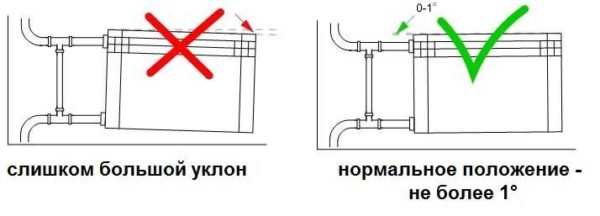

Installation rules for heating radiators
Attaching the battery to the wall
Installation of hooks is carried out by analogy with the installation of dowels. A hole of the required diameter should be drilled in the wall. Then a plastic holder is inserted into the hole, and a hook is screwed into it. If necessary, by screwing or unscrewing the hook body, you can change the distance from the battery to the wall. Due to their weight, hooks for cast iron radiators are thicker than products for metal or aluminum radiators.
When installing hooks for hanging batteries, you need to remember that the overwhelming part of the load falls on the upper fastener. The lower one helps to fix the radiator in the position selected relative to the wall.The hook on the bottom should be screwed in 1.5 cm below the collector location.
A few words about brackets
Before installing the brackets, they must be attached to the wall for marking. For this purpose, the radiator is moved to the wall surface, and a mark is made in the place where the bracket will be located. Drilling is then performed at the fastener locations on the bracket. Plastic dowels are inserted there, and the bracket is screwed onto screws or self-tapping screws. At the end of the work, a radiator is hung.
Fixing to the floor
In some cases, the wall cannot withstand the load created by the battery (especially, cast iron). Then choose a floor-standing installation. A number of radiators made of steel and cast iron are equipped with legs at the factory, but many do not like their appearance or technical characteristics.
For floor mounting of aluminum batteries or radiators made of aluminum and steel alloy, special brackets are used. They are mounted on the floor surface, and then a radiator is installed on them. Mounts are provided that make it possible to adjust the height of the battery installation. The brackets are attached to the floor using dowels, nails or screws.
