


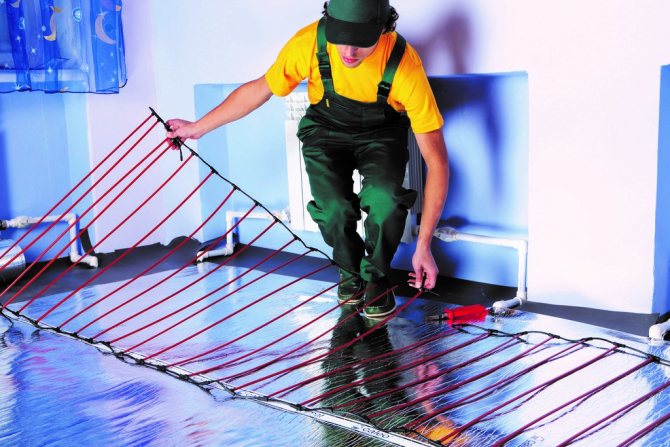
Electric underfloor heating has recently become widespread, since it can be used both as the main and additional source of heat in the house. The arrangement of such a heating system has its own characteristics, therefore, we will dwell in detail on the installation of a warm electric film floor with step-by-step instructions and photo examples.
How does a warm film floor work?
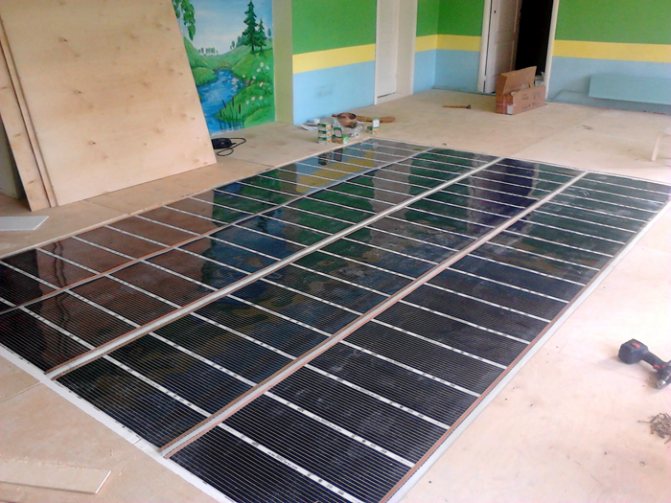
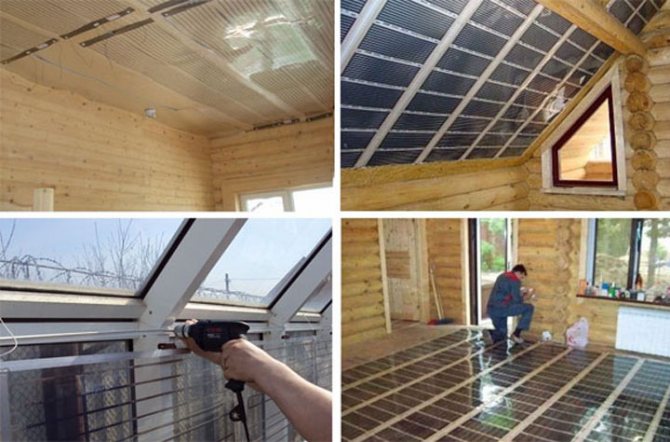
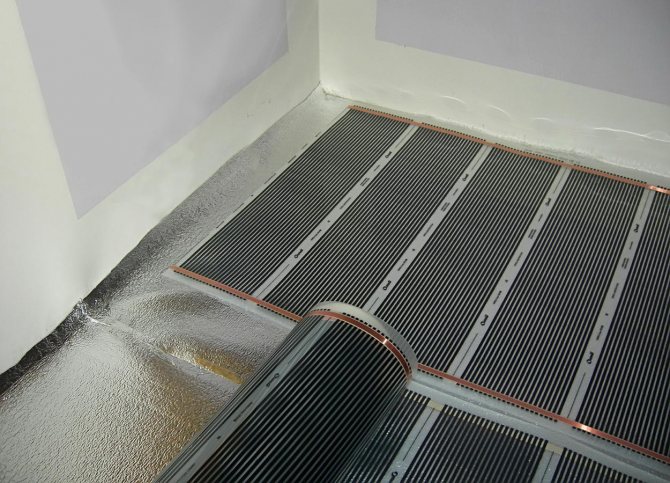
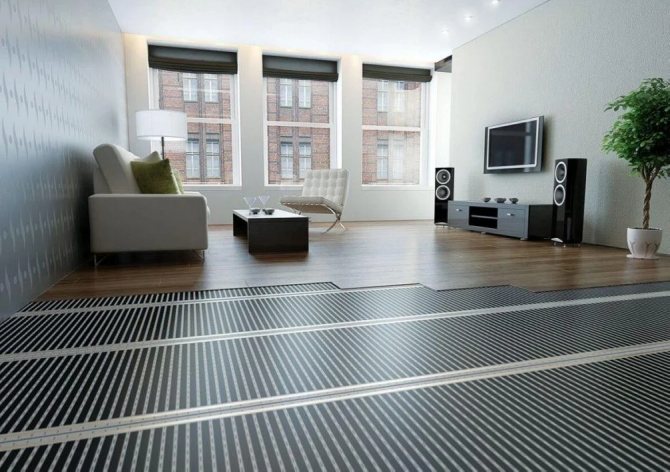
Electric underfloor heating made of foil works on the principle of infrared radiation. Today, this heating technology is widely used for various floor coverings: linoleum, laminate, carpet, ceramic tiles, etc. In addition, it is possible to use the film in wooden or plasterboard suspended ceiling structures.
Heating with a film warm floor is perceived by a person as heat from the sun due to the same nature of the source. Structurally, the system is made of several sheets of film, which are mounted on the floor surface. When the installation is completed, the finishing material is laid, after which the film is connected to the mains.
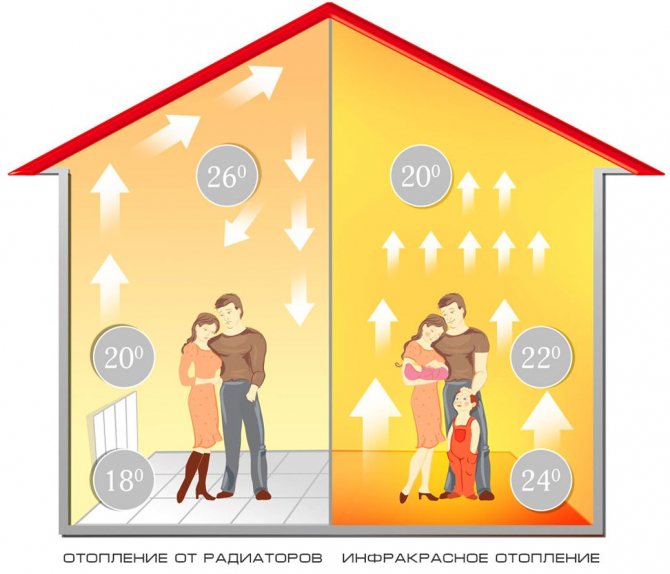
Such a warm floor works somewhat differently than conventional convection systems. Infrared radiation does not heat the air, which reduces the cost of heating furniture and other items located in the heating zone.


Electric underfloor heating
Advantages of electric underfloor heating:
- in terms of ease of installation, it is only slightly inferior to the film floor;
- fits either in a self-leveling floor or in a screed, so you can put any floor covering on top;
- suitable for rooms with high humidity;
- keeps warm well.
Cons of electric underfloor heating:
- requires a lot of electricity;
- like a water floor, an electric floor is poorly repairable. Replacing the heating element will result in the destruction of the entire base;
- the declared service life of the electric underfloor heating is 15 years, but less than half of the systems pass this time threshold without breakdowns. You can increase the operating life if you keep the system turned on, and not turn it off and turn it on often (this burns out the joints of the heating elements of the supply cables).
Since the film floor is best suited for loggias and is afraid of moisture, and the water floor can be installed mainly in private houses, it is the electric underfloor heating that is usually the only suitable option for living rooms and bathrooms in apartments.


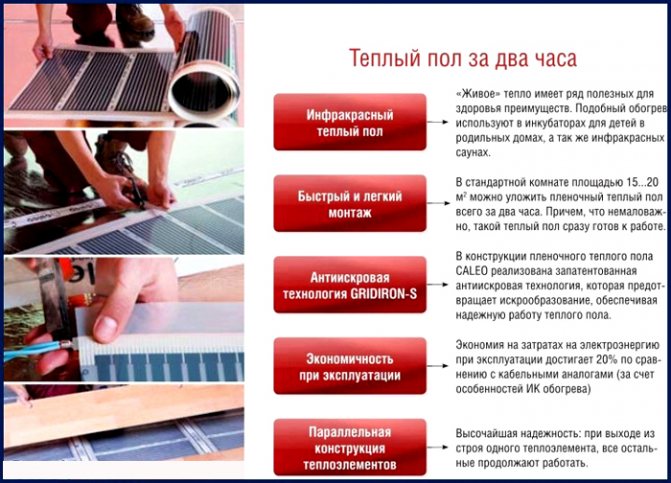
Pros and cons of IR film floor
A warm film floor has a number of advantages:
- relatively low cost of components;
- simple and quick installation, which can be performed even without special knowledge;
- the possibility of using the film for both additional and main heating source;
- according to experts, infrared heat has a positive effect on human health.

Among the shortcomings, it can be noted:
- high power consumption (depending on the area of heating, insulation);
- compared to a water heating system, the film cools down almost immediately after the power is turned off
When choosing underfloor heating based on a film, you need to take into account that their functioning is directly related to the presence of electricity.


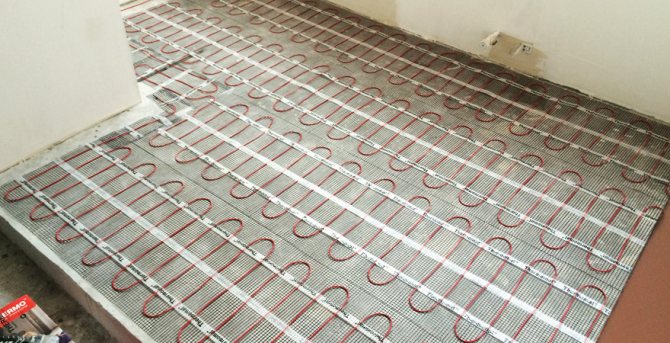
What is needed for laying underfloor heating under tiles
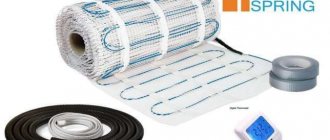
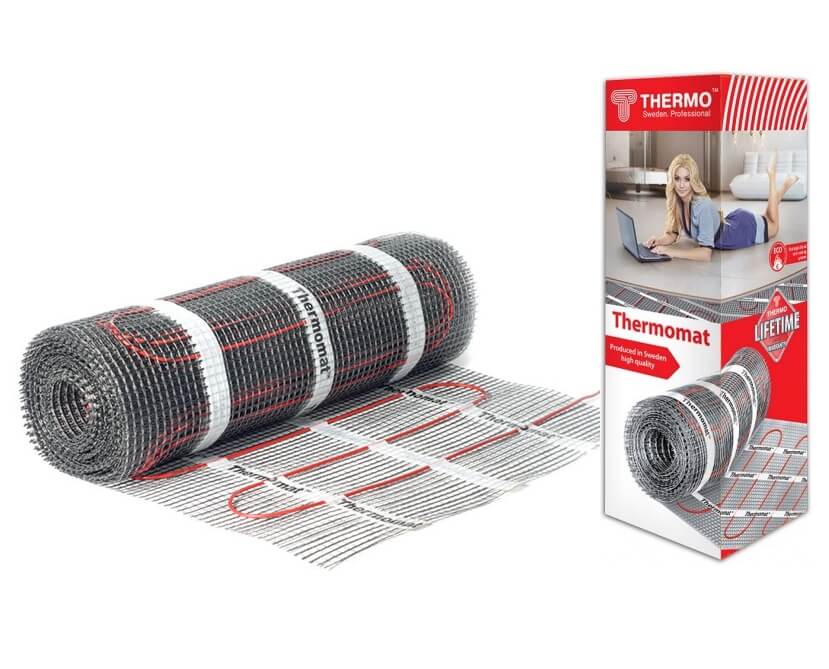
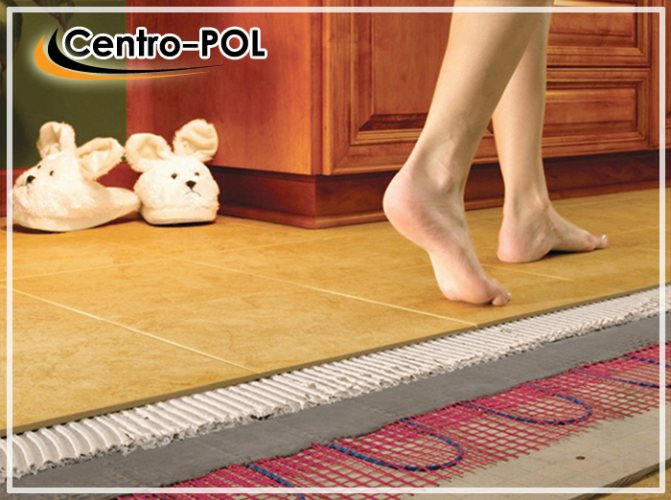
There are several ways to equip yourself with warm floors under tiles, but for laying in an apartment the simplest, inexpensive and effective of them is the use of so-called heating (or heating) mats for floor heating.Heating mats are a thin electric heating cable in a special screen (to protect against electromagnetic radiation), which is "snake" fixed to a fiberglass mesh; For connection to the power supply network, the heating mat is equipped with a so-called "cold" end - a piece of ordinary electrical wire. This design greatly simplifies the selection and further installation of a warm floor. As a rule, all manufacturers produce mats with a width of 50 centimeters (the width of the fiberglass mesh), and the length of the mat depends on the heating area for which it is designed. The thickness of the mat is from 3 to 5 mm (depending on the manufacturer). This allows you to equip yourself with a system of underfloor heating with minimal losses in the height of the room.
One of the main characteristics of a heating mat is its power. It is worth paying attention to this parameter when choosing the right heating mat. In general, the following values are recommended for heating systems such as underfloor heating:
- For additional comfortable heating of the floor surface in a dry room - 110-140 W / m2
- For floor heating in wet rooms - 140-160 W / m2
- For underfloor heating on loggias, balconies in winter gardens - 180-220 W / m2
Heating mats for all types of applications are on the market today.
When arranging a heated floor system under a tile (except for the actual heating mat for a certain heating area), we will need:
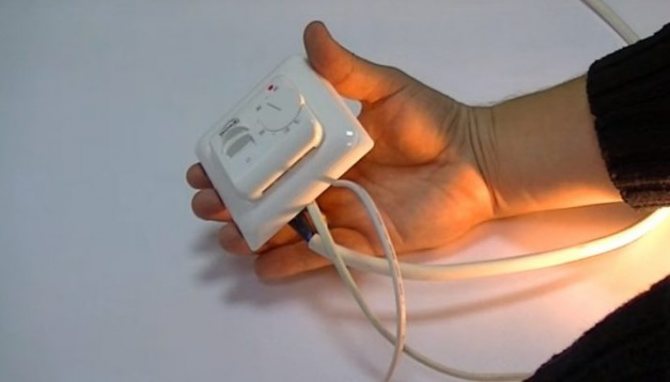
- Thermostat... This is a device that is used to control underfloor heating. The thermostat, using an external temperature sensor installed in the floor “pie”, measures the floor temperature, compares it with the set one and, depending on the result, turns the heating on or off. Example... For a room with a constant stay of people, the floor temperature is not higher than 26C (according to the current SNIPs). We set this temperature on the thermostat, and if the current floor temperature is lower, then the thermostat turns on the heating, heats the floors to 26 degrees and turns off the power to the floors. After the floors have cooled down to a temperature of 24-25 degrees, the thermostat will turn on the heating again and heat the floors to the set temperature. Then the whole process will be repeated. The use of a thermostat allows you to achieve maximum comfort and significantly save energy.
- Standard socket (mounting box) for installing the thermostat into the wall.
- The "cake" of the floor. In order to be able to replace it in case of failure, the sensor is not walled up in the floor layer, but is installed in a corrugated tube, so that, if necessary, it can be removed and replaced with another. Some manufacturers have a corrugated tube included with a heating mat.
- Tile and tile adhesive. You can use tile, porcelain stoneware or natural stone. The glue is chosen depending on the type of tile and operating conditions.
- A drill with a crown for installing a thermostat, a grinder with a circle on concrete or a wall chaser, a construction tool.
- Resistance multimeter.
- Residual current device (RCD) with a leakage current of not more than 30 mA. The underfloor heating connection under the tiles (especially in humid rooms) must be carried out through an RCD with a leakage current of no more than 30 mA.
- Additionally, you may need: a glue gun for attaching the mat mesh to the rough floor surface, metal tape for attaching the heating cable when bypassing the drain holes, etc.
Mechanical regulators
Programmable regulators
WiFi - thermostats
Thermal film power consumption
Before installing an infrared heating system, many often have a question: how much electricity does a warm electric floor consume? For IR-film, the power per 1 m² of floor surface is about 0.2 kW.Energy consumption will largely depend on the thickness of the screed, heat loss, thermal insulation. To calculate the consumed power, use the formula:
W = S * P * 0.4,
where - S is the floor area of the room, P is the total power of all film elements, 0.4 is a coefficient that takes into account only the usable area for heating.
So, if the housing is not very well insulated, the film should be used with a maximum power, for example, 0.2 kW W per m². For a room with an area of 20 m², the power consumption will be as follows:
W = 20 * 0.2 * 0.4 = 1.6 kWh.

Most often, such heating is used for about 7-10 hours a day, usually in the morning and evening. According to calculations, electricity consumption per day will be 15 kW, per month - 480 kW. And this is the power of only one room! It is enough to multiply the obtained results by your tariff in order to calculate the financial costs for such heating.
How to choose accessories
The main elements of an IR-heated floor are a film and a thermostat with a temperature sensor.

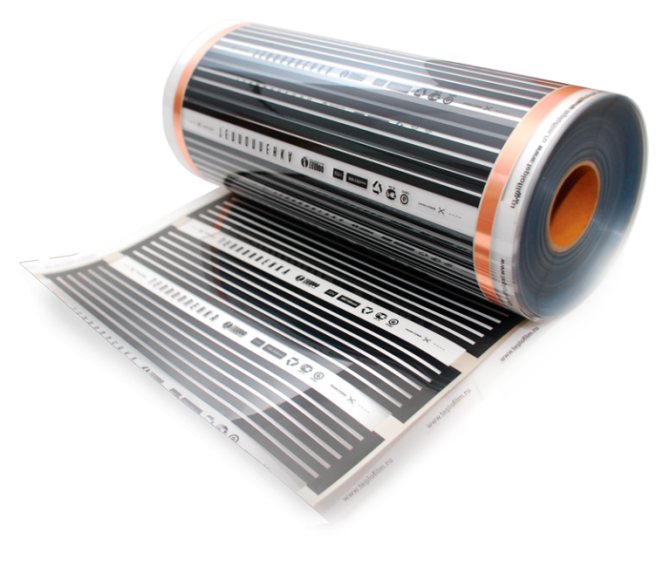
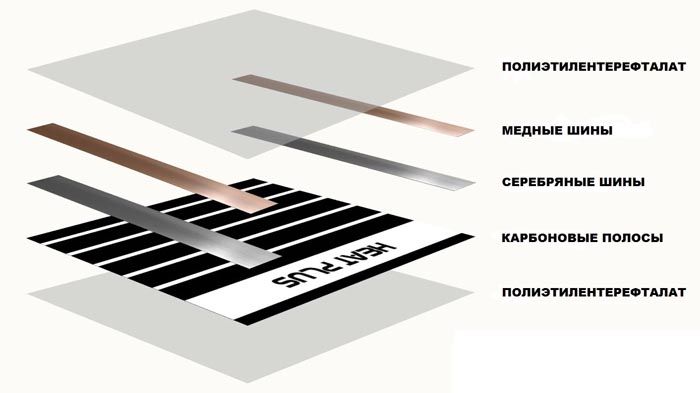
Varieties of film
There are two main types of films offered today:
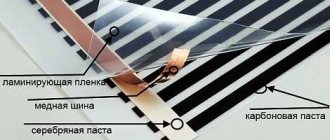
- solid - the material has a solid carbon coating;
- Stripe - Carbon fiber coating applied in stripes.
Since the infrared floor has different thicknesses, it is recommended to choose a thicker material to increase the reliability of the system. The thickness, as a rule, does not exceed 1 mm.
You can learn more about choosing a film from the video.
Thermostat
Using the thermostat, you can control the operation of the heating system. The kit includes a thermal sensor that is installed between the film mats and connected through the corresponding contacts. With the help of a temperature sensor, a signal is transmitted from the surface of the heating elements to the thermostat to turn on the system.

Thermostats are represented by such devices:
- mechanical - equipped with keys and mechanical wheels;
- electronic - equipped with a display and controlled by buttons.

Today, there are touchscreen devices that allow you to set multiple time modes to save energy. Inexpensive thermostats operate from the mains and cannot start work on their own when the power is turned off. In this case, it is better to choose models where battery use is possible.

Temperature sensors can be of two types. Their choice depends on the flooring and the type of device. If the coating is soft (carpet, linoleum), then the sensor looks like a small cylinder. For hard coatings, the thermal sensor has a larger size and is protected by a gel sheath.
Installation of film underfloor heating
Laying a warm floor based on a film has certain nuances that should be considered in more detail.
Preparation of the base
One of the crucial stages in the installation of the IR coating is the preparation of the base for its installation. The process boils down to the following step-by-step actions:
- Remove old finish and floor screed. If the screed is in good condition, it may not be removed under the film floor. The base is cleaned of dust and dirt.

- If the floor surface has differences in height of more than 2 mm per linear meter, leveling is performed with a leveling mixture.
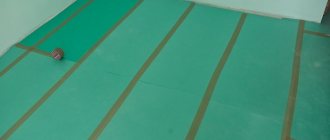
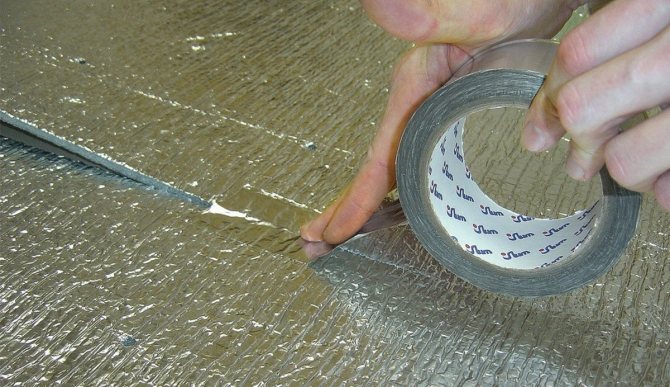
- Spread a layer of waterproofing. As such, you can use Penofol, which is also a heater. The substrate is laid over the entire surface of the floor, and the joints are fastened with aluminum tape.

When using underfloor heating as an addition to the main heating, foamed polyethylene with a foil layer can be used for insulation. In other cases, expanded polystyrene is used.
Drawing up an installation diagram
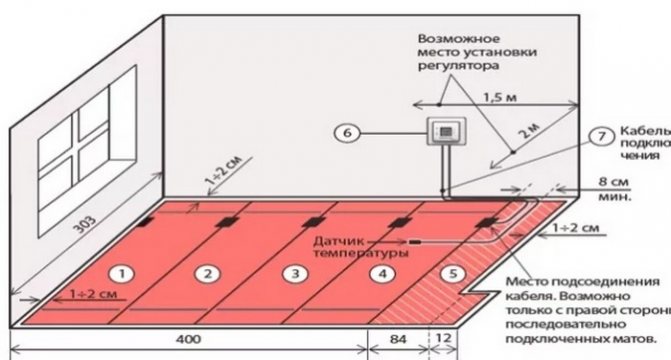
To connect the film floor heating with your own hands to be correct, you need a diagram and adherence to the installation technology. First you need to determine the location of the thermostat. Most often, it is mounted at a height of 15 cm from the floor.After that, they draw up a scheme for laying the film and make calculations of the material.
In the process of drawing up a diagram, you need to take into account a number of nuances:
- the laying of the first row of film is carried out with a distance from the wall of at least 100 mm and a maximum of 400 mm;
- when using the film as the main source of heating, it must be laid on 75% of the floor area;
- if a warm floor from a film is used as an addition to the main source of heating, then a coverage area of 40-45% will be quite enough;
- the strips of the film during installation must not intersect and overlap each other.

To determine the total length of the heating material, a layout diagram of the film on a sheet of paper is drawn up. After counting the length of each section and adding them, the total length of the coating film can be calculated.
When drawing up a diagram and calculating the length, it must be borne in mind that each strip in length must be a multiple of 17 cm, which corresponds to the cutting lines.
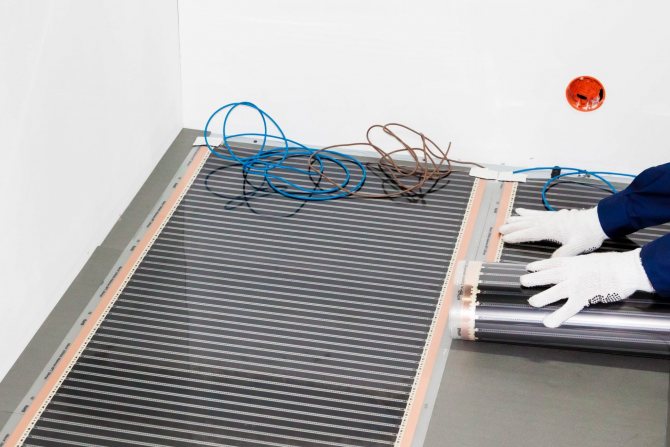
Laying and connecting thermal film
To figure out how to mount the film, you need to adhere to the following instructions:
- Lay the film on top of the insulation according to the drawn up scheme. If necessary, the film is cut along the lines applied from the factory. The mats are laid with the copper part to the floor in the direction of the thermostat installation site, while the maximum length of the mat should not exceed 8 m.
- Clips are fixed to the copper strip and the wires are connected.
- Areas of connection of clamps and wires are insulated using special mastic. Some of the clamps are mounted on a conductive surface, and the rest are placed inside the film.
- The temperature sensor is connected from the bottom of the film and is reliably insulated. The connection cables are best placed under the skirting board.
- After completing the installation and connection of the film, install the thermostat in the prepared place.


↑ Warm floor: how to choose?
Warm floors are divided into electric and water. The indisputable advantages of the former include an inexpensive and quick installation principle. Electric floors are characterized by high operating costs. As a result, in 5 years, the costs of design and installation work and electricity will be 2 times higher than those for the installation of water floors. This is most often the main criterion for determining the choice.
In the piggy bank of the advantages of a water floor, the possibility of a low-temperature mode of use, environmental friendliness and safety should be added.
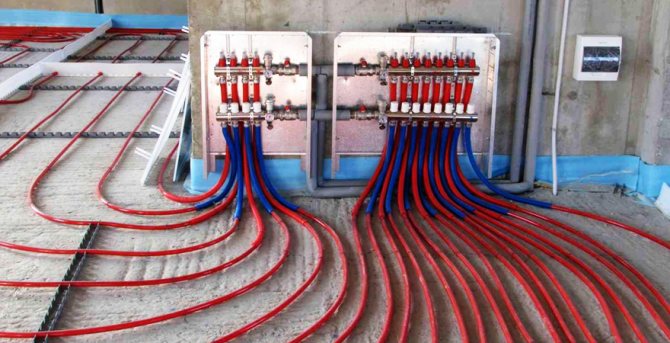
↑ Water floor
It should be noted right away that it is forbidden to connect to the centralized water supply when choosing a water floor. And this is connected with this. First, the pipes will inevitably increase the load on the system. Secondly, the water, having passed along the contour, will get to the neighbors not as hot as they would like. This is not good for obvious reasons. It turns out that the installation of a water floor is advisable in country houses where there is an autonomous water supply, or in new buildings, where special individual risers are provided.

Water floor - the best solution for country houses
Components of the Water Pie
The structure of a water-heated floor consists of the following components:
- base (wooden sub-floor or concrete slab);
- waterproofing, supplemented with a damper tape;
- thermal insulation, which prevents the penetration of heat from the pipes into the base and reflects heat to the floor covering;
- pipes;
- bearing layer (concrete screed, dry screed made of plywood or moisture-resistant plasterboard);
- topcoat.
The thickness of the structure varies from 70 to 150 mm.
It is important! The thickness of the water-heated floor depends on the diameter of the pipes, the power of the screed and the thickness of the heat insulator.
Installation features
The installation of underfloor heating begins after the end of the plastering work. Installation should be done on a clean, dry surface. Difference in height - no more than 5 mm (for one module).If the vertical drop in the base is greater, then a footing or freshly laid concrete screed is used to eliminate the defect. 1. Waterproofing. A polyethylene film with a thickness of about 250 microns will cope with the role of a steam and waterproofer. We lay it with an overlap (120 mm) and connect the canvases with tape. Leaving an allowance for the walls, we form a "trough". The surplus can then be cut off. In order to exclude the possibility of the formation of "cold bridges", the perimeter of the walls is covered with a damper tape.

Pasting with damper tape
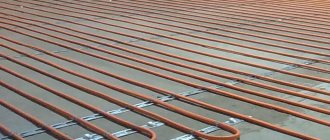
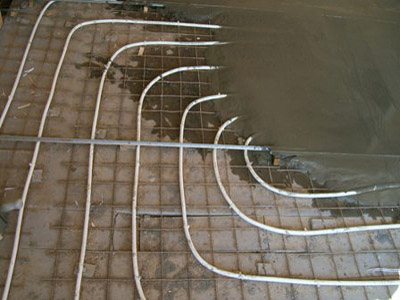
2. Laying a reinforced mesh, attaching the contour of the future underfloor heating to it by means of wire or fastening clips with a step of 1 meter. 3. Pipe laying. You can use both metal-plastic and high-density polyethylene pipes. The latter are preferable, because flexible structure minimizes the possibility of cracking, but reinforced-plastic pipes heat the floor better. There are 2 variations of styling: meander (zigzag or snake) and bifilar (spiral or snail). Laying step - 100-300 mm, near walls, windows and doors - not less than 150 mm.

Laying method "snail"
4. Pressing. After connecting the pipes to the water supply system, a pressure test is carried out, for which water is supplied to each circuit through the collector. We leave the system under pressure for 48 hours, if there are no traces of leaks, we proceed to the final stage of work.
It is important! During pressure testing, the air in the pipes is released not through automatic air vents, but through drain valves. Otherwise, there is a great risk of damage to the pipes.
5. Finishing screed. On top of the pipes, we lay a reinforced mesh with a cross section of 3 mm (cells 100x100). Sheets should not intersect with expansion joints. For pouring, you will need a solution of concrete and plasticizer or a leveling mixture. The solution is poured at a temperature of at least +50 degrees and kept for a week. Drying period (after liquidation of moisture protection) - 28 days. The "warm floor" system is launched after the installation of the floor covering.

Laying method "snake"
↑ Electric floor
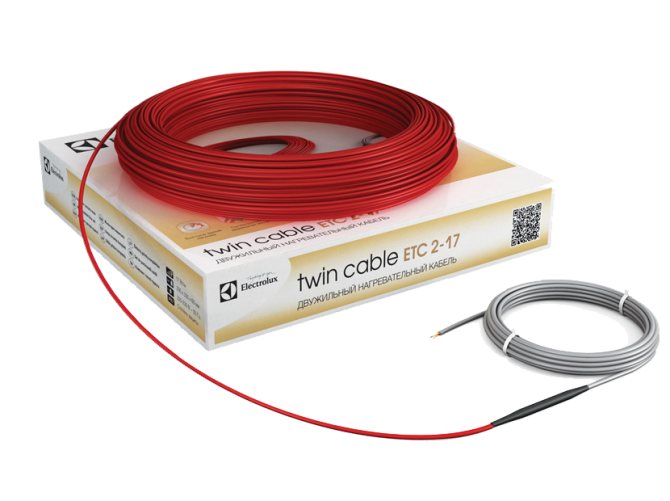
If you are thinking about the problem of which warm floor to choose for efficient heating of an apartment, where there are no individual risers, then the answer is unequivocal - electric. A cable acts as a heating element, which can be:
- single core. It has a low cost, but it is not very convenient to carry out installation activities;
- two-core, which is not only strong, safe and reinforced, but also equipped with a foil shield to eliminate electromagnetic radiation.
Electric floor is good for heating apartments

Installation technology
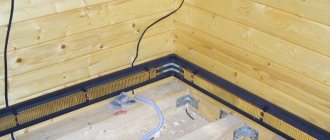
1. Investigation of the base for detecting potholes and cracks. The subfloor must be level without a slope. Then a plan is drawn up indicating the location of the thermostat, temperature sensor and indicating the area of the heated area. 2. At a distance of 100 cm from the floor on the walls, we drill holes for the thermostat box, from which the phase, zero and ground are supplied to the installation site. Also, a groove for 2 pipes is punched in the wall: one with power cables, the other with sensor wiring. 3. On the prepared subfloor, an insulating material is laid, a metal mesh or mounting tape is laid.
It is important! The metal mesh is convenient in that it does not allow the cable to sink into the insulator layer and significantly increases the strength of the tie.
4. Marking the territory. We transfer the layout of plumbing, furniture, household appliances to the floor. Use brightly colored tape for convenience. 5. We mount the cable from the thermostat - the connection points. Adhere to the cable manufacturer's specified pitch and bend radius recommendations. Install the temperature sensor into the plastic tube and pull it along the previously made groove at a distance of 40 cm from the wall. 6. Testing is an important step that should not be neglected.The cable resistance is measured by a tester and compared with the data indicated in the passport - the deviation should not exceed 10%. 7. Arrangement of the screed. The prepared cement mortar is applied to the surface and evenly distributed over it. Alignment must be done along the cable lines. The thickness of the screed is 3-5 cm. Please note that the cement mortar should not contain voids, this will not only reduce heat transfer, but also lead to a malfunction of the system.
The cement slurry must not contain voids
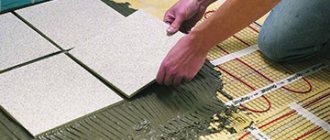
8. Laying of the coating is carried out after the final drying of the screed, on average - after a month.
↑ Film warm floor
Not so long ago, a new type of heating system appeared on the building materials market - a film floor. He immediately won the favor of the public, because he does not need a tie and is much more economical than cable samples. And it is also easy to install, which will be to the liking of amateurs to do everything with their own hands.

Film warm floor is easy to install
The film floor is a polymer film with embedded carbon polymer strips, which functions in the infrared range.
It is important! An infrared film floor is optimal where there is no centralized heating system and is especially valuable in the off-season, when it is cold outside, and they don't even think about turning on the heating.
Do-it-yourself installation of a film floor
1. Attach the metallized heat-reflecting material to a clean substrate. Cut the foil according to the shape and size of the room. Seal the cut edges and points of contact with tape. Tape the wiring harness to the reflector. 2. Install the thermostat. You can do it permanently, under external or hidden wiring. Check the resistance, which should be a multiple of the film volume, with a tester. If everything is in order, turn on the mounted system and check the functionality. Then cover the wiring with a protective film with an overlap (10 cm), and secure the edges with tape.

Secure the edges with tape
When installing the film floor, strictly follow the building codes and manufacturer's recommendations. For example, when installing under a tile, a reinforced mesh should be laid on the film.
Film floor testing
After finishing the installation of the infrared system, you need to make sure that it functions. First, they check the reliability of the insulation at the connection points, for which they use a special device. The values must correspond to those indicated by the manufacturer. Turning on the heating, check the uniformity of heating of each of the elements. If areas are found where there is no heating, troubleshoot or replace the film with a new one.
If, when the system is turned on, the film heats up evenly over the entire area, there is no sparking and no smell of insulation on the contacts, proceed to laying the finishing coating. It is advisable to save the previously drawn up plan for laying the film. It may be needed in case furniture is rearranged.
Features of installation and operation of thermal film
To keep the infrared heating system working for as long as possible, it is recommended to adhere to the following tips:
- When cutting a strip, you cannot make a diagonal cut or make a rectangular cut. It is prohibited to cut the conductive strips;
- it is prohibited to place objects that can retain heat, for example, thick carpets, oversized furniture without legs, etc., on top of the floor covering above the heated film floor. Such items will lead to overheating and system failure;
- heavy furniture and other objects should not be located above the film material. Excessive pressure on the IR sheet can damage the heater;
- based on what kind of floor covering is used, for example, laminate, with combined heating, simultaneous heating may be prohibited;
- It is not recommended to lay the film material close to the walls and to the overall furniture: it is necessary to retreat about 3-10 cm. The indent depends on the power of the heating elements.
Film electric underfloor heating, installation and step-by-step instructions with photo examples of which were considered in this article, is an effective way to heat your home. If you reduce heat loss to a minimum and properly lay the system, then the cost of such heating will not be so great. In addition, underfloor heating is often installed only in bathrooms and toilets, which will absolutely not ruin the owner.
Similar publications
- To read
Do-it-yourself floor insulation on the balcony
- To read
DIY infrared floor heating
- To read
Leveling the floor with your own hands
- To read
Do-it-yourself warm floor in the garage
- To read
Do-it-yourself water floor heating
- To read
Water heat-insulated floor
Water or liquid is the best floor heating in many respects:
- reliable and durable - manufacturers declare a shelf life of up to 50 years;
- cools slowly, is most effective during prolonged work;
- compatible with every floor covering, since it is mounted in a screed (any finish can be laid on the screed);
- suitable for wet rooms;
- most economical - utility bills won't shock.
In addition, a modern water floor is not very difficult to install. It can be installed in one small room in just one day. Despite this, the work must be entrusted to specialists in order to minimize the risk of leaks and flooding.
Cons of a water-heated floor:
- unsuitable for repair: to replace the heating element, the entire base must be destroyed;
- if a pump is installed, then there is a little noise.
It is forbidden to connect the water floor to the central heating system and place it above the living quarters. In apartments, it is used only when the apartment is on the ground floor and has autonomous heating. Therefore, a water heat-insulated floor is used almost exclusively in private houses.