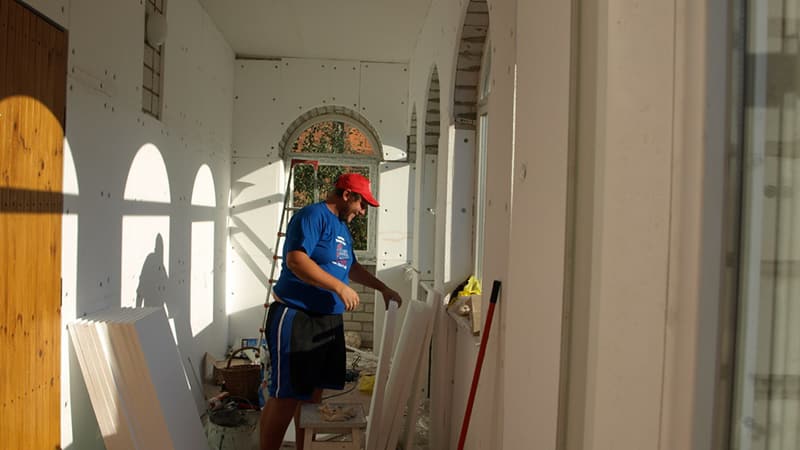
Many of us have faced poor-quality repair work carried out in our apartments and houses. This often happens because the work is carried out by unskilled specialists who have no idea about the technologies for carrying out the type of work that they carry out.
In particular, this applies to the "flying" teams that produce insulation and glazing of balconies and loggias. What are the mistakes made during these works.
The main mistake is ignorance of the rules of insulation, as a result of which, despite the fact that insulation is laid along the entire perimeter of the balcony, it is cold on the balcony in winter. As a result, it is necessary to turn on an additional heat source, which is engaged in the fact that he warms the air not only inside the room, but also outside. As a result, such insulation will cost you a pretty penny.
Mistake # 1. Lack of permission
First of all, get permission from the BTI to work on the insulation of the loggia (balcony). It is foolish to start any work on the arrangement of the loggia or even the insulation of the outer wall without obtaining the appropriate permission from the BTI. Otherwise, the discrepancy between the actual layout and the technical passport of the housing can lead to serious problems during the sale of the apartment.
If you want to do something about the drafts walking around the apartment, but do not want or cannot get permission, glaze the balcony with sliding double-glazed windows with an aluminum profile. Such glazing does not require permission and will insulate the balcony.
Warming
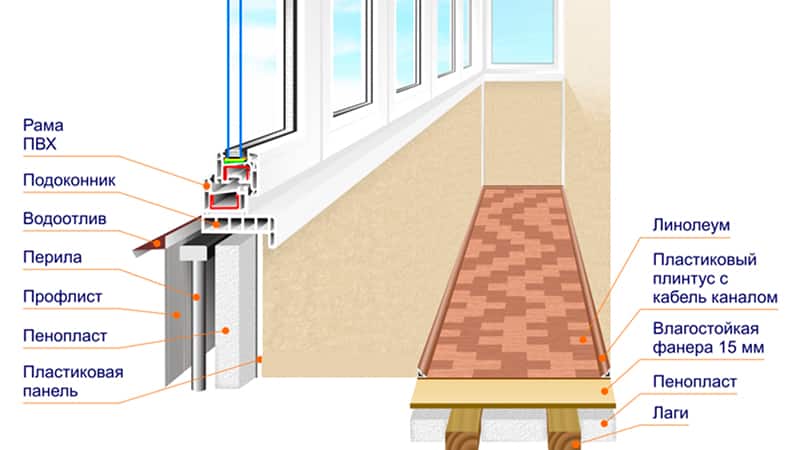
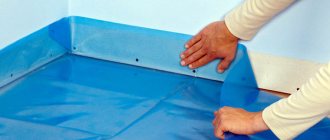
If you limit the arrangement of the loggia only with glazing, then you can get a slightly insulated room in which condensation will form and, as a result, fungus. Avoiding this problem will help the competent installation of thermal insulation materials, including the installation of waterproofing, vapor barrier.
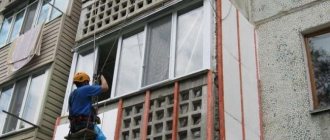
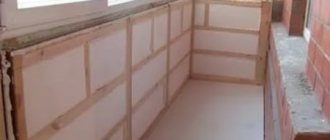
It is also important to re-equip the parapet, which is most often made of a sheet of slate or patterned brickwork with lace gaps. Such structures should be dismantled even at the stage of preparing the surfaces of the loggia for glazing. Instead of them, a reliable structure is being erected from aerated concrete blocks or brick. From the inside, it is insulated at the same time as the ceiling, walls, floor.
Mistake number 2. Location of the radiator on the loggia
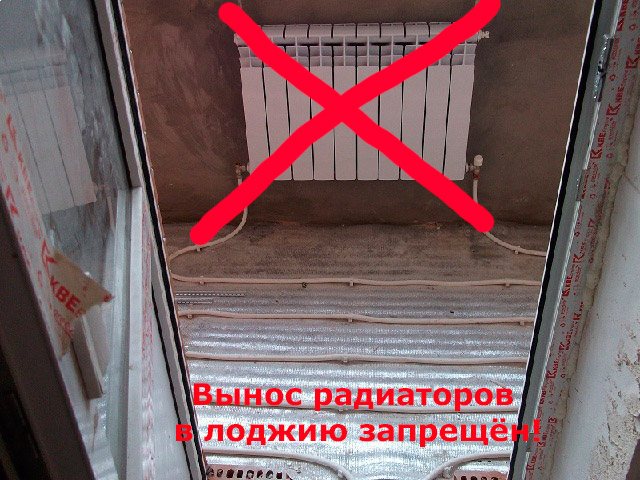
Do not take the battery out onto the balcony.
Installing a battery on a loggia is an extremely unwise decision. Firstly, there is a large heat loss, secondly, the pipes can freeze, and thirdly, the amount that you will pay according to an individual plan will be impressive.
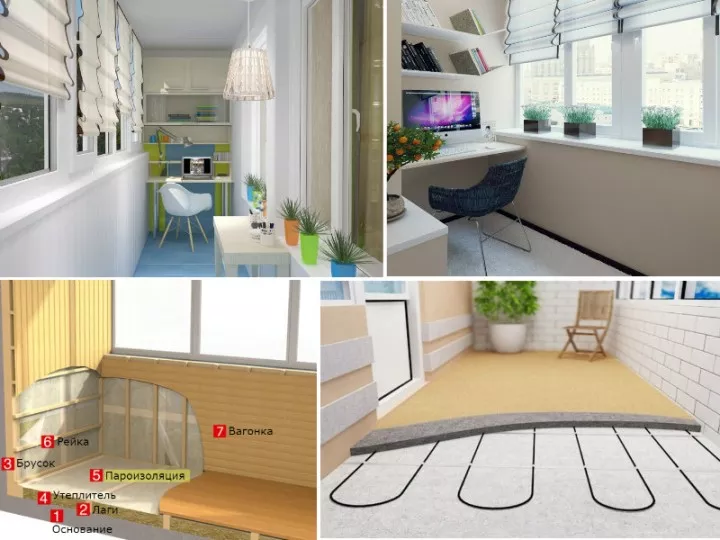
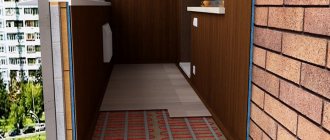
The solution to this problem can be a warm floor or an electric heater.
Final recommendations
Now you know how to insulate a balcony correctly. In conclusion, it should be noted that when planning the use of the balcony as a living area, along with the thermal insulation work, measures are taken to organize its autonomous heating. Most experts recommend placing heating elements in the floors (the best solution) or on the balcony ceiling (important when using infrared heaters). Placing heat guns, traditional portable electric heaters on the balcony, is generally considered ineffective.
Mistake number 3. Frameless glazing
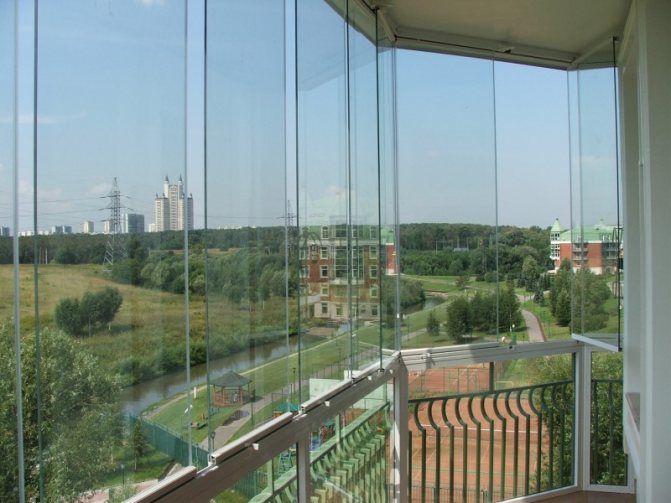

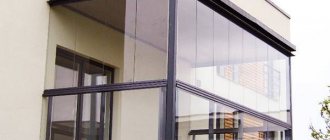
Frameless sashes look quite stylish, representing a smooth surface when closed and sliding the sashes with an accordion. But, given the fact that such glazing involves single double-glazed windows, noticeable gaps remain, and it cannot be called an ideal option for insulating a loggia.
According to most experts, PVC windows are the best option. After all, the swing-open doors do not take up as much space as it seems, and you only need to open them for airing.
Testimonials
Gennady Sinkov, 34 years old, Blagoveshchensk
We recently bought an apartment with a loggia. Everything would be fine, but the previous owners did not insulate it. And since such an extension has a common entrance to the room, leaving it cold is up with recklessness. Unfortunately, after the purchase there was not much money left, so my wife and I were looking for a budget option for insulation. First, we immediately replaced the windows with double-glazed windows, since sometimes we put a stroller there with our daughter - it breathes fresh air in bad weather. To insulate the inside, foam was used, which was sheathed with clapboard on top. It turned out quite well. Winter should come and then we will check how well everything turned out. If such measures are not enough, then next season we will collect money and carry out additional external insulation, but with the help of craftsmen.
Artem Kimslukhin, 36 years old, Salavat
We called the construction team to insulate the loggia. We were lucky and our metal-plastic windows have already been delivered. Since we use this area as my wife's study, we ordered some of the highest quality materials in terms of thermal insulation. We made warm floors, having previously filled them with a screed. The walls and ceiling were decorated…. Additionally, we carried out lighting, because I do not understand anything about this. But, as practice has shown, with frosts - 20 and above, such insulation was not enough. Therefore, we additionally put a wind blower there.
Andrey Kanichin, 40 years old, Severodvinsk
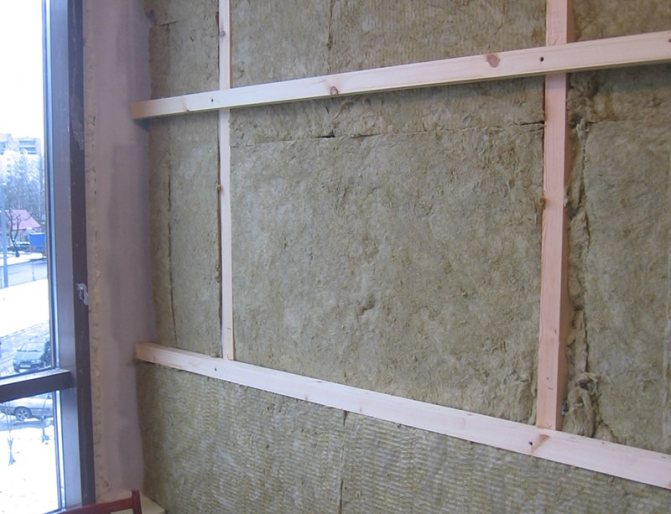
We have an old house, so the loggia is quite impressive in size - it occupies two full rooms from the outside. I did the insulation myself, except for the installation of new windows - here I had to invite professionals. First, he blew out all the cracks, of which there were a lot, with polyurethane foam. The walls were insulated with mineral wool. As for the ceiling, I put foam plastic there, since there is already one loggia above us, the owners of which have long taken care of the issue of insulation. My wife and I thought about making warm floors, but financially it is very expensive for us. Therefore, we settled on the penoplex option. I used PVC panels for the external cladding. In general, it turned out not bad.
Mistake number 6. Lack of vapor barrier
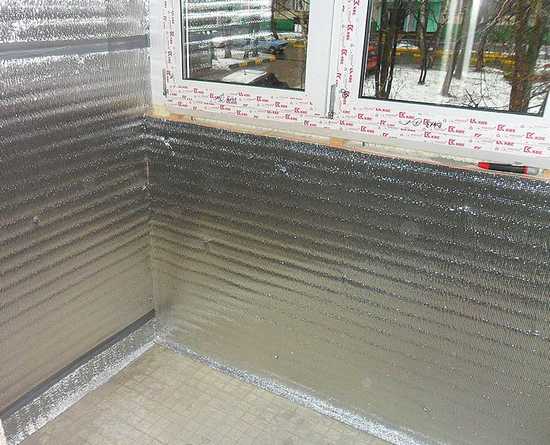

Lack of vapor barrier can ruin the floor and walls on your loggia and lead to condensation on the ceiling of your neighbors below. The process of condensation formation on such a loggia is a matter of time, and a very short one.
Even if you use a moisture-resistant material, the vapor barrier film will not be superfluous. This is especially important if mineral wool is chosen as a heater.
Necessary materials and tools for work
It is necessary to buy building materials all at once, so as not to be distracted later by purchasing the missing material. Therefore, it is advisable to make a list before purchasing.
At the very beginning, special attention should be paid to the choice of insulation. You can stay on foam, mineral wool, foam rubber, which are quite affordable. But their technical data will not completely satisfy you. Therefore, if there is such an opportunity, opt for improved insulation options that are more effective.
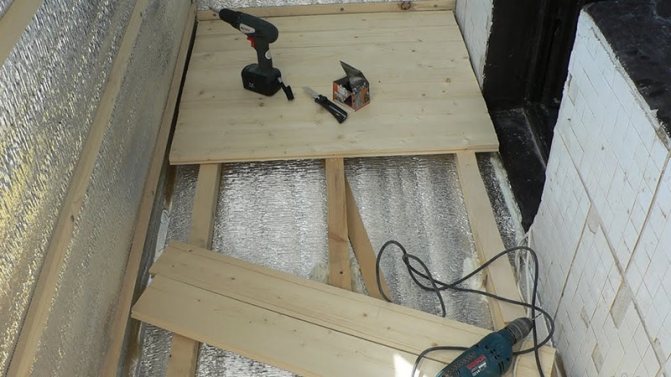

Correct floor insulation on the loggia with your own hands
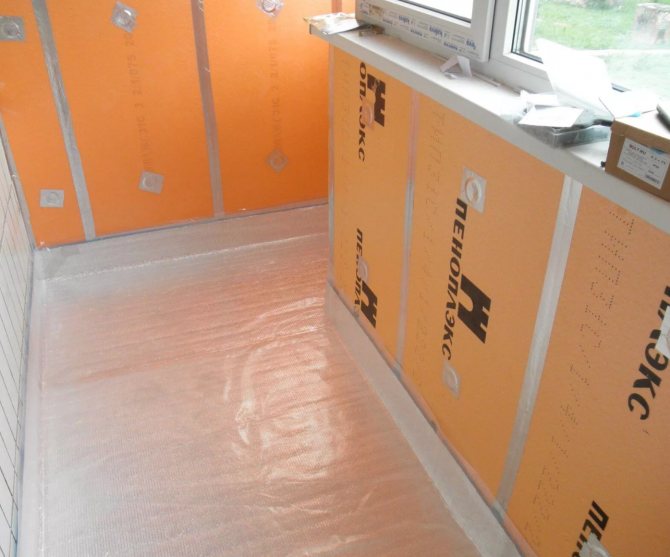
Builders prefer extruded polystyrene foam today. The name of this material is "Penoplex". It is produced either in rolls or in slabs. The advantages are as follows:
- small volume;
- excellent thermal insulation;
- high moisture insulation.
Due to the volume, it will be possible to save the already small space of the loggia.
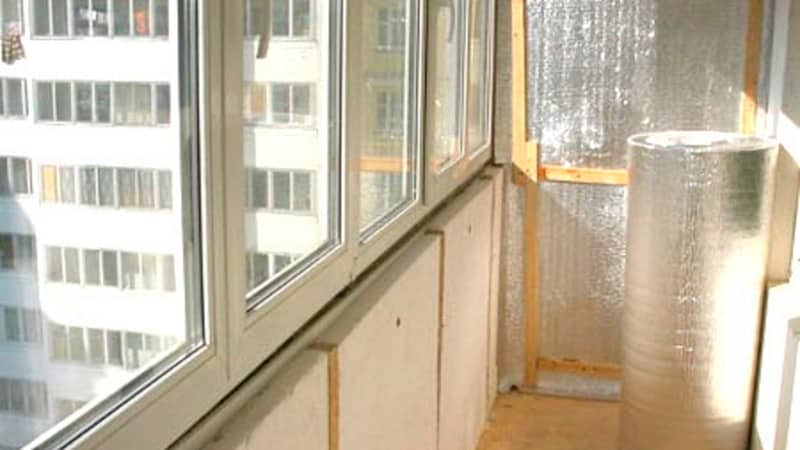
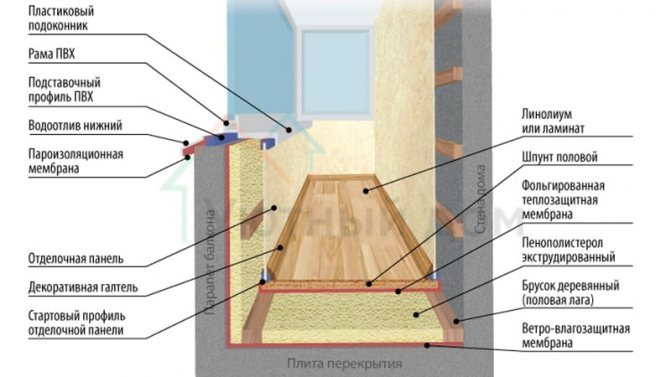
Quite good reviews of experts about polyethylene foam, which has good soundproofing properties. By combining these two materials together, specialists manage to achieve an excellent insulation effect. Due to the fact that the penoplex passes steam, the layer of polyethylene foam, which is covered with foil on one side, will play the role of a vapor barrier, as well as an additional insulation. Polyethylene foam with one foil side is known in the construction market as Izolon, Penofol.
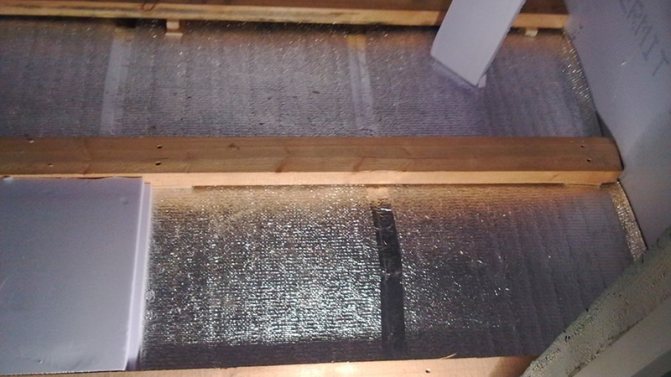

Do-it-yourself floor insulation on the balcony
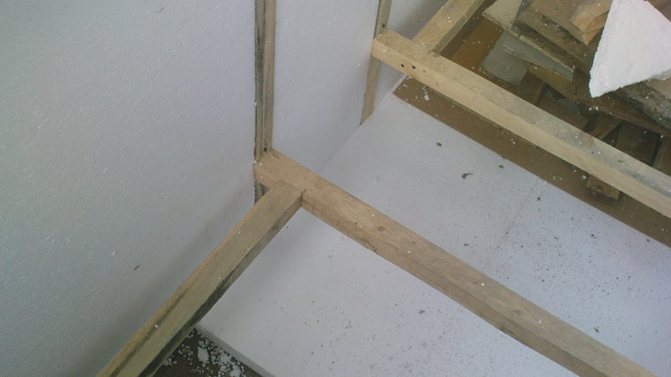
It is better to make the floor from a bar, for which it is necessary to purchase an antiseptic. Senezh has proven itself quite well for these purposes.
During work, you cannot do without metallized adhesive tape, as well as polyurethane foam and glue. We pay special attention to the fact that any sealant will not work. It must match the insulation, since some foams are a solvent for expanded polystyrene. This nuance also applies to glue.
To fix the building material, you need to stock up on nails, dowels (including "fungi"), corners.
To perform construction work you will need:
- electric drill;
- puncher;
- screwdriver;
- jigsaw;
- gun for polyurethane foam;
- building corner;
- medium level;
Don't forget a hammer, pliers, tape measure, scissors, and a marker. We advise you to carry out repairs with gloves. Before starting work, be sure to check that the power tool is working properly.
Mistake # 7: Sealant abuse
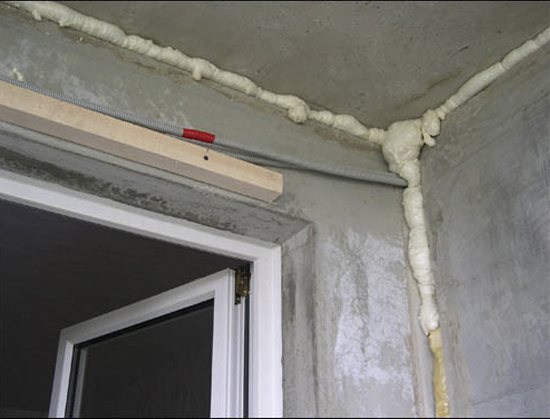

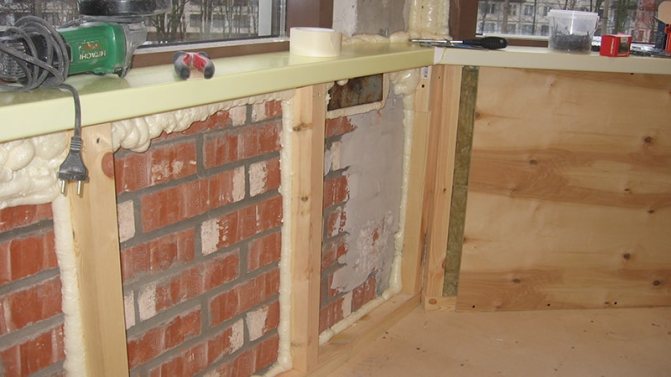
Seams filled with polyurethane foam bubbles look unaesthetic. Moreover, under the influence of direct sunlight and moisture, the foam breaks down and creates large gaps.
After foaming the seams between the windows, properly handle the foam itself. Cut it off carefully, sand it with sandpaper and cover with putty or acrylic paint. As a last resort, you can use mounting tape. It should be remembered that this option is only suitable when you are sure that you will not paint the area.
Classic mistakes of new settlers when insulating a loggia
There are a number of common mistakes that are made not only by self-taught craftsmen, but also by professional teams. To avoid problems with the loggia, it is worth learning about them and understanding how to fix them, if any.
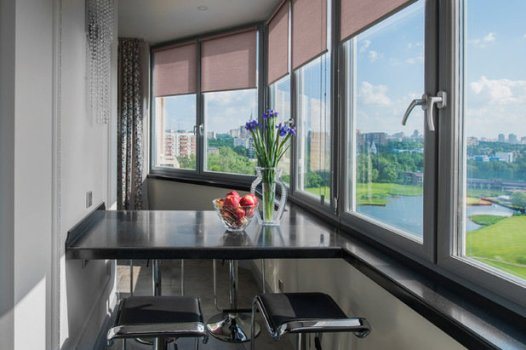

When insulating a loggia, the following problems may arise:
- Resolution. When buying an apartment, you need to check with the owners for permission to reorganize the apartment. If the living space is own, then the demolition of the wall must be approved by the BTI. The office is worth a visit, even with simple internal insulation. Otherwise, problems may arise when selling an apartment in the future. A permit is not required only for simple glazing.

- Radiator. Many owners of loggias are trying to add heat by bringing a radiator or other heating device to the loggia, which requires re-equipment of communications. But few people know that such actions need a separate permission, which no one will give. This is justified by the fact that the loggia is distinguished by high heat loss, therefore there is a high risk of pipes freezing. And this is fraught with emergencies. In addition, you will need to carry out an individual recalculation of heating. And this service is not cheap. Therefore, even if permission has been received for reconstruction, it does not apply to the creation of an additional radiator on the loggia. Alternatively, you can create a floor heating system or use an autonomous heater. Well, in extreme cases, just lay a warm carpet on the floor.
- Frameless glazing. This type is a smooth surface, which sometimes does not even have edges. When such valves are closed, a kind of "accordion" is formed.Of course, it does not take up extra space on the loggia, but it should be understood that single glazing of this option implies the presence of cracks in the sashes. And this is already open access to drafts and cold. Also, as practice shows, they very quickly collect dirt and dust on themselves, not to mention the fact that the installation of a mosquito net is simply not possible here. The best option for a loggia is metal-plastic windows. The number of packages depends on the frost indicators in the region.
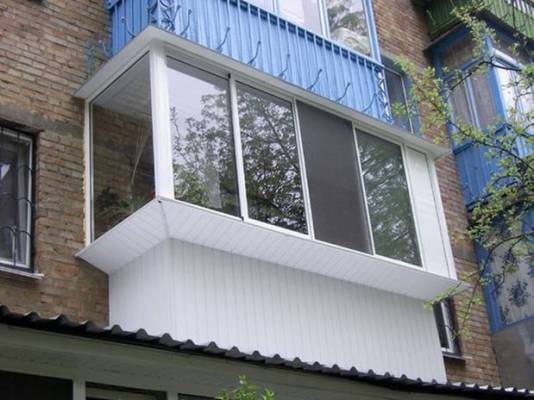
- External glazing on brackets. The loggia itself usually takes up a lot of space. However, many are looking to expand the space even more. Therefore, very often you can see such an option as the removal of glass frames beyond the threshold of the loggia by a few centimeters at once. A visor is arranged on top, which is a place of accumulation of snow and other natural precipitation. But in frosts, all these precipitations become a "decoration" of the visor, which can even be very dangerous, not to mention the fact that the load here will be very impressive. But for the sake of objectivity, it should be said that external glazing has more an aesthetic nuance than a functional one. Simply, if the facade of a residential building has only open balconies, then such a design may spoil it a little. Although, here the owner himself must decide.

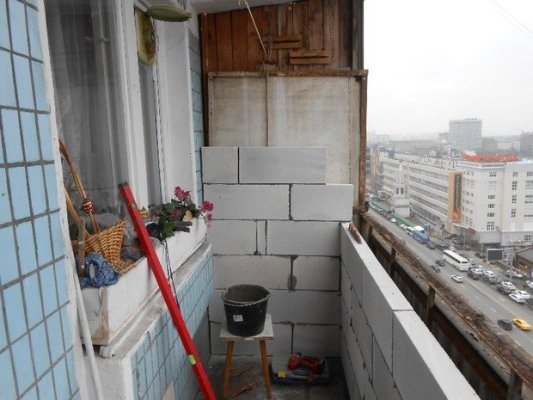
- One-layer insulation. In order for such a room to really be warm, you need to decorate the parapet and walls with double masonry from foam blocks. Their thickness should vary within 7-10 cm. Such material has high thermal insulation properties and is resistant to frost. But a 10 cm masonry can freeze through. Although, instead of the second layer of foam blocks, you can use extruded polystyrene foam panels or stone wool. Therefore, experts advise to sacrifice a small space, but do everything conscientiously.
- Lack of vapor barrier. Many people think that since the loggia is an adjacent building, then some layers of the insulating "pie" can be skipped. And this is the main mistake. One of these points is vapor barrier. For example, when insulating with mineral wool, there is a high risk that it will become damp. And if this material absorbs moisture, it will not dry out, which means it will be very cold on the loggia. We'll have to re-insulate the entire room. Without such a layer, condensation will quickly appear and accumulate, and this threatens to damage the base walls and floor. Not to mention the fact that neighbors may be welcome to visit with a claim regarding drips on their ceiling. Therefore, even when using foam or other foam material, in no case should the vapor barrier film be neglected. Even if it will be laid in one thin layer.
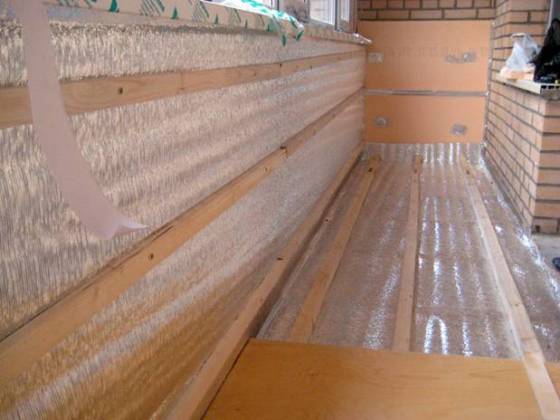

- There is a lot of unprotected sealant. Of course, the first step in arranging a loggia is to eliminate all cracks. For these purposes, polyurethane foam is used. But any man knows that after applying it, it begins to bubble, which is why the attractive appearance of the room is lost. But few people are aware that this sealing can also disrupt the climate in the apartment. If such material is exposed to direct sunlight, the sealant will quickly deteriorate. The same goes for moisture. Therefore, it needs protection. To ensure it, all protruding excess is first cut off. Then the foam is covered with putty or acrylic paint, but in extreme cases, with mounting tape. True, paint is very bad on it.
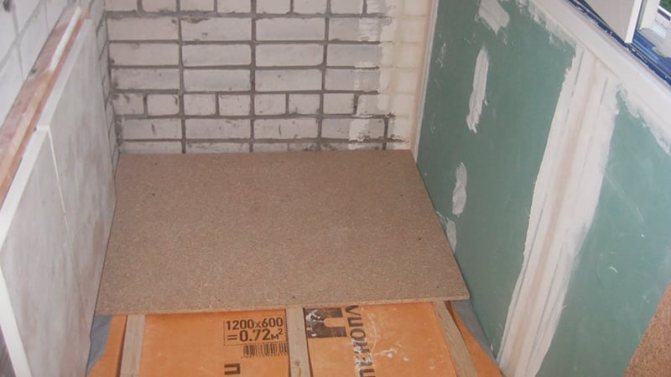
- Errors in the arrangement of the floor. This point is especially important for those whose loggia is at the bottom. Many are trying to make a perfectly flat surface using sand concrete screeds. On top of such an impressive base, fixing glue and tiles are then placed. And now you just have to imagine what the floor weight will be in the complex ... And overloading the floor is very dangerous, especially in old houses.The most optimal and budgetary option is to use a soft insulation. It is laid directly on a concrete base. On top of this layer, equip another layer of insulation and then waterproofing. The last layer should overlap by about 10-15cm. before the finishing coating, equip a thin screed or lay plywood sheets. The latter option is used for those rooms where there is no significant slope. Well, as for the finish coat, then everyone chooses for himself. But to enhance the effect of insulation, carpet is well suited.
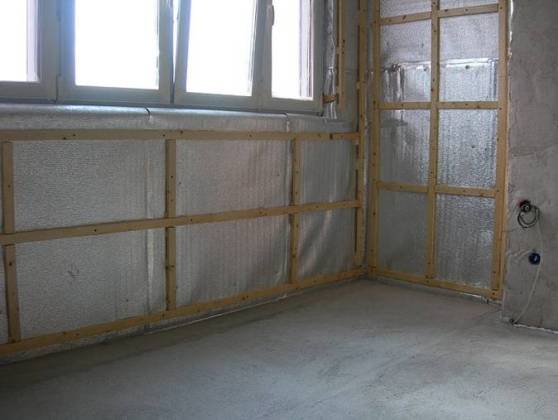

- Insulation of the wall adjacent to the apartment. Many people spend extra money on the insulation of the unifying wall, which is external to the apartment. Such work will not affect the climate of the dwelling in any way. And with this trick, many construction crews breed their clients. Such a wall only needs a finishing finish, which will be used throughout the loggia.
- Improper ventilation. Despite the fact that this is a loggia, here you also need to think about the free circulation of air masses. Otherwise, warm air from the room will enter the balcony, and when it cools down, it will turn into fine steam. To avoid such a nuisance, you should still take care of the doors, which will become a barrier for rooms with different temperatures.
- Improper insulation. This moment also leads to the formation of excess moisture. Despite the fact that polyurethane foam has its own characteristics for giving an aesthetic appearance, it is much more practical than putty. The fact is that in the latter case, "bridges" of cold will be formed, which are excellent heat conductors. Well, this will definitely lead to condensation. Therefore, it is better to suffer with foam once than to redo the entire loggia later.
These are the most common mistakes that can be found in the work of insulating a loggia.
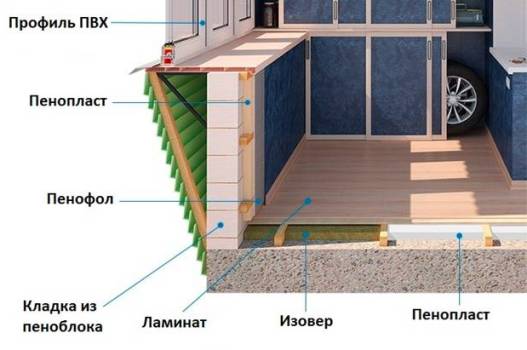

Mistake number 8. Incorrect floor installation
You should not even try to perfectly level the floor on the loggia using a sand concrete screed. Due to the fact that the balcony slab cannot boast of a more or less flat surface, the thickness of the screed in certain places can reach several centimeters. And if we take into account that additional weight in the form of tiles and glue to it will then be installed on the screed, then this is not quite the right decision. The balcony slab is not designed for such loads.
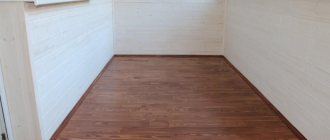
The floor on the loggia must be insulated with a soft and light insulation, installing waterproofing on top of it. If desired, then you can put a layer of plywood, laminate or carpet.
How to get rid of condensation on the balcony
To get rid of condensate accumulated on the balcony, a special vapor barrier is well suited. Such a barrier is installed directly in front of the insulating layer, and wet vapors no longer get into this layer. As a vapor barrier, polyethylene film or just foil is well suited. This method is quite applicable for absolutely any heaters used on the balcony, even with not very high vapor tightness. The only drawback of this option is that the enclosing structure will no longer be able to "breathe". To avoid this disadvantage, a material with very low or low vapor permeability can be used. Styrofoam is suitable, but mineral wool, due to its properties, is no longer there.
The appropriate thickness of materials for insulation is determined depending on the climate conditions, technical and thermal standards on the ground and the thermal calculation of the entire protective structure. For example, for ordinary expanded polystyrene, it is 80 millimeters, and for extruded - already 50-60.
Mistake number 9. Excessive wall insulation between the loggia and the room
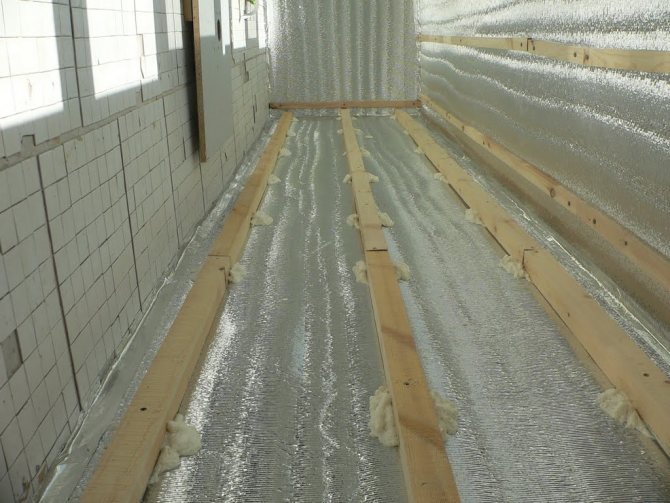

Many craftsmen, trying to achieve maximum thermal insulation, also insulate the wall between the room and the loggia. If the loggia is already insulated, there is no need for this, since this wall automatically becomes inside the apartment.
It is better to spend the saved money on a stylish and competent decoration of this wall.
An integrated approach to thermal insulation of panoramic balconies and loggias
The highest resistance to heat transfer that an energy-saving double-glazed unit can provide is 0.78 m² · K / W (low-emission glasses and argon are used as filling the chambers).
A conventional single-chamber package is about 2 times colder - 0.35 m² · K / W. To understand the conditions of work on insulation, one should compare the given indicators with the values typical for structural building materials and heat insulators. So, the bearing wall in two bricks has an indicator of 0.586 m2 · K / W, and extruded polystyrene foam with a thickness of 30 mm - 0.882 mm² · K / W.
For non-insulated rooms with walls of two bricks, the heating rate in winter is 100 W / m² (with a ceiling height of no more than 2.7 m). Using the similarity method, we can approximately calculate the necessary qualitative and quantitative measures for the insulation of rooms with panoramic structures.
Balconies
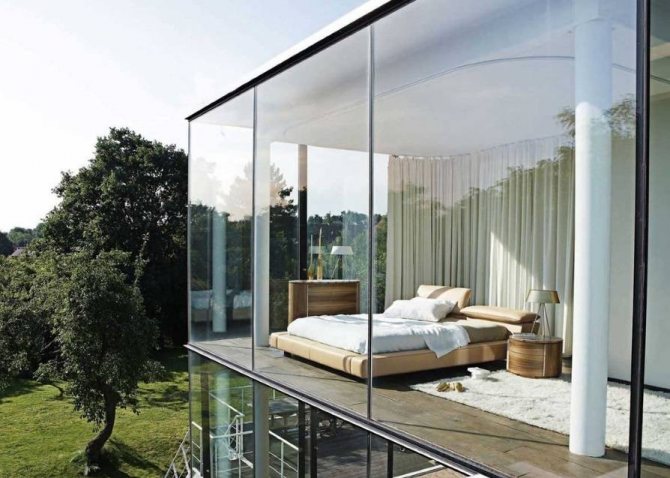
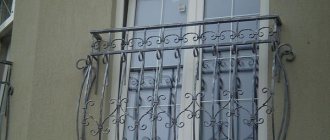
How to insulate a French balcony with panoramic glazing? A typical case involves framed glazing along the front and sides to the full height of the balcony. As a rule, limiting the load on the balcony slab does not allow the use of double-glazed windows. Therefore, using conventional single-chamber glazing, subject to high-quality thermal insulation of the floor and ceiling, we will get an area with an approximate thermal resistance, which is 0.586 / 0.35 (1.67 times) inferior to rooms with brick walls. Accordingly, to create a comfortable microclimate, it is necessary to exceed the specific heating power by 1.67 times in comparison with the baseline 100 W / m². We get 167 W / m², which corresponds to the average power of cable-type electric underfloor heating (150 - 200 W / m²).
French panoramic balcony
The use of single-chamber low-emission double-glazed windows (0.59 m² · K / W) allows reducing the required heating power on the same balcony to 90 - 100 W / m², which corresponds to electric mats installed without a concrete screed. In this case, the floor structure may look like this:
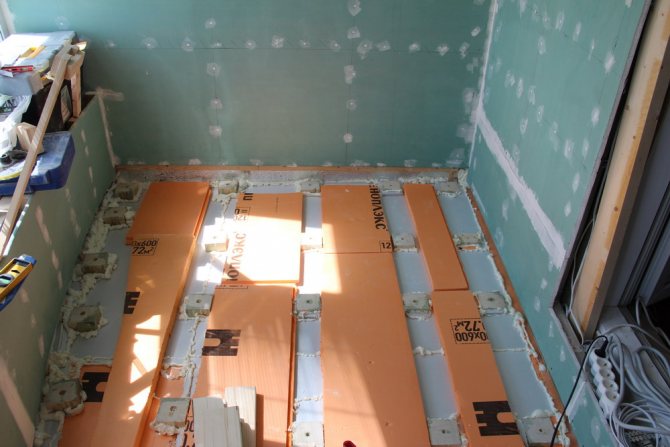
- waterproofing on a concrete slab
- a layer of polystyrene foam 5 cm thick
- vapor barrier
- moisture resistant plywood 10 mm
- laminated flooring.
Insulation of the floor on the balcony with expanded polystyrene
Thus, the absence of a concrete screed allows the floor to be raised by only 7 cm, creating high-quality insulation that matches the living space. In addition, the absence of a screed is no less important to prevent overloading of the balcony slab.
Loggias and transparent walls
The design of the loggias implies that only one plane can be glazed. The sides of these rooms are made of the same material as the load-bearing walls. The undoubted advantage of loggias in comparison with balconies is their large bearing capacity. We, by and large, are not limited either in the choice of window constructions or in the type of floor insulation.
How to insulate a wide loggia with panoramic glazing packages? With a ratio of its length to width of 3/1 - 2/1, the heat loss corresponds to those for a rectangular room with one translucent wall. Using low-emission double-glazed windows and insulating the sidewalls, floor and ceiling with expanded polystyrene (with a slab thickness of at least 5 cm for the floor and at least 3 cm for the sides and ceiling), you can refuse to equip electric warm floors under 2 conditions:
- First, the loggia must be combined with a heated room.
- Secondly, the area of the loggia should be no more than 15% of the area of the room.
With a larger relative area, a loggia with panoramic glazing must be heated, regardless of the degree of its insulation. Of course, if you want to achieve there a degree of comfort corresponding to the living space.However, the use of low-emission packages eliminates the need to mount cable heating. For a wide loggia, a supply of 70 - 80 W / m² is quite enough. On narrow ones (with a width of no more than 1.5 m) or with a length to width ratio of more than 4/1, it is sometimes sufficient to install a warm skirting board along the glazing plane. The power of the heat exchanger mounted in such a plinth should be at least 70 W for each square meter of the loggia area.
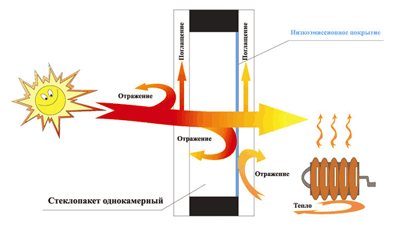

The principle of operation of low-emission (energy-saving) glass panes
An alternative to underfloor heating and skirting boards are floor convectors, which are heating radiators mounted flush with the floor plane along the panoramic glazing. Sometimes their warmth is enough for a large room with one transparent wall.
The specific efficiency of floor convectors is higher than that of underfloor heating and wall-mounted radiators, because they play the role of a vertical heat curtain.
Mistake number 10. Neglecting little things

This flaw is found in almost all novice craftsmen. To get rid of it, you need to devote more time to calculating materials and planning every detail, be it the height of the handles or the thickness of the insulation.
So, we have analyzed the TOP-10 of the most common mistakes when insulating loggias and balconies. Consider these points when planning insulation work. After all, as they say, it is better to learn from the mistakes of others than from your own.
And if you have your own experience of "stuffing cones" in the process of insulating a balcony or loggia, share your advice and recommendations with our readers in the comments below.
Other little things
Although, for the sake of fairness, it is worth saying that little things are said loudly. After all, the final result of the operation will depend on them. Such errors can be found in almost everyone. Therefore, it is better to get to know them right away in order to avoid them as much as possible.
Some potential punctures can be foreseen in advance:
- when glazing, you need to think in advance about the height at which the handles will be located and whether a window sill is needed in the loggia (the material of manufacture, thickness and installation method are selected);
- whether you need a mosquito net - experts recommend ordering it right away, since then it is quite difficult to adjust it separately to the size of the windows, although its cost is not so high;
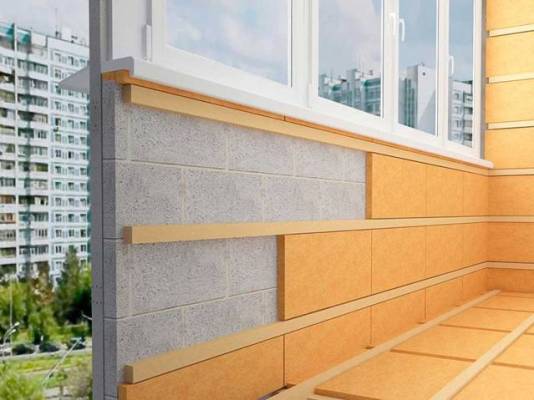

- when installing windows, in the upper part of the loggia, cracks can form under the ceiling, which must be laid and completed - they do this even before they start cladding the walls, ceiling and floor;
- if the "cake" salts are impressive in thickness, then additional profile extenders will be needed;
- gaps are eliminated not only in the walls, but also in the floor and in the ceiling;
- if the insulation implies the creation of a crate, then the bars used must be sufficiently dried, otherwise they will begin to deform over time.
Such "little things", if not taken care of in advance, can then come back to haunt with serious drafts.
How to insulate a glass panoramic balcony
According to statistics, most of the population lives in apartments with a remote balcony, but this fact does not in any way affect the need for its insulation. Although the loggia is more comfortable, both one and the other option need high-quality insulation.
The peculiarity of the houses that were erected up to the 90s is that the balcony structures, both external and loggias, were not intended for heating, and were equipped with metal profiles. In this case, we are talking about the complete replacement of both profiles and old wood or metal glazing, which implies a large amount of work.
It is necessary to completely replace the old glazing with highly efficient energy-saving, multi-chamber profiles, make the necessary changes to the balcony design, etc.Such work will reduce the rate of heat loss and prevent the metal from freezing.
In some situations, in order to carry out such work, you need to have the appropriate permits for reconstruction or making some changes in the construction of the balcony. Such documents are issued by the organizations for the supervision of the SES and the Ministry of Emergencies.
In the case of panoramic glazing in not new houses, the situation is even worse and it is not so easy to obtain such documentation.
Today, permission to dismantle the balcony railing is very rarely issued. Even if you manage to get such a permit, you may come across a variety of problems that specialists in various fields will have to solve, since it is simply impossible to solve them on their own.
Insulation implies not only the installation of heating elements, but also the work on calculating the ultimate loads on the balcony structure, the manufacture of the structure itself, its installation, etc.
If the design with a remote balcony does not allow the installation of heavy multi-chamber double-glazed windows, then you will have to turn to modern materials and technologies that can reduce heat loss indicators. Most often, infrared film is used in such a situation.
You also need to be prepared for the fact that in the case of even the best and warmest multi-chamber structures, the panoramic balcony will need additional heating, which will increase heating costs. This is due to the fact that a material such as glass is a good heat conductor.
