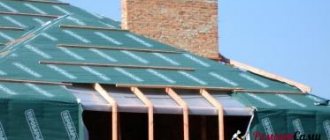
10/25/2017 4536 Pechnik (Moscow) The horizontal chimney, in its structure, differs from the classic vertical structures that we are used to seeing. The most commonly used and installed systems are of the coaxial type, since they are distinguished by ease of installation (it is enough just to drill a hole of a suitable diameter in the wall, insert and fix the pipe, seal all gaps). By watching the video in this article and reading the selected information, you will learn more about what such exhaust systems are.

Horizontal chimney - heat into the house, not into the chimney
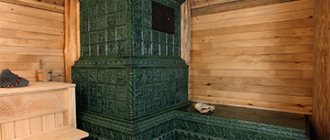
If it is more profitable for a gas boiler to install a metal chimney, then for a wood-burning stove the best option is a brick structure. If the brick pipe is strictly vertical, then most of the heat will go outside.
Many have probably heard the name horizontal chimney? No, we do not mean a chimney for a gas boiler "pipe-in-pipe", located horizontally and intended for the removal of combustion products from a gas boiler with forced draft. Such chimneys are called coaxial.
Especially if they faint and lie down, they improve that gas and inevitably get out of the survival cycle. It is a direct consequence of incomplete combustion, the lack of disposal in the atmosphere is the result of an ineffective drainage system and poor ventilation systems in the premises where the fireplace or stove is installed. It follows that the low temperature is 200 ° C. is: harmful to the poisonous gas it produces, not convenient because it uses only 30% of the energy contained in the wood. Heating this gas above 350 ° in the presence of new oxygen generates a significant amount of heat and makes the environment cleaner, since the resulting carbon dioxide is necessary for plants for chlorophyll synthesis.
Verticality is not always justified
Today we will talk about the arrangement of horizontal stove chimneys and the intricacies of their arrangement.
If a solid fuel or gas boiler is designed to heat heating radiators, which, in turn, give off heat to the interior of the room, everything is clear with their chimneys, the more vertical, the better.
So here are the first problems. To achieve optimal, complete, high temperature combustion for maximum performance, to maintain an adequate standard of home safety even in these conditions. Combustion of this type is more easily achieved when: the combustion chamber is not very large: ovens, kitchens. A modern "machine" that retains all of these functions, designed for high performance, must be able to evacuate vapors at temperatures of 200 ° or higher, for this reason.
The old chimney has to be checked by a neighbor who is no longer good. ... When you cook for the shelf, do you cry with your heart to see so many advanced food? Don't you know how to avoid having to throw fresh food when you go on vacation? Knowing how to preserve food is a very healthy and economical practice, especially if you have a habit of consuming large amounts of food or your family. Of course, to keep your food fresh, you need a tool designed for that purpose: a freezer.
Bigger is not better
How does a conventional brick oven work? Heated bricks give off their heat inside the room. Accordingly, the longer the maximum length of the heated brickwork, the more heat enters the room.
But this does not mean at all that it is imperative to build a large oven. You just need such a furnace device, which will maximize the use of the heat obtained from the combustion of fuel.
The reasons for choosing a particular freezer model may vary. The volume of liters is one of the main features to consider at the time of purchase, as it is imperative to meet your flow needs. However, the choice of energy class should not be overlooked if you are looking for a product that does not consume too much, or a climate class value that indicates, however, that the ambient temperature limits are allowed by the freezer. You no longer have to worry about defrosting your freezer.
Advantages and disadvantages
The advantages of a horizontal chimney are in the undoubted increase in the heat transfer of the furnace. The smallest boiler with this type of chimney is able to maintain the temperature even in a large room.
In addition to the obvious advantages, the horizontal pipeline has a number of disadvantages. These include:
- Complexity of installation,
- Turbulence
- Soot.
How to deal with the last two factors?
Swirl
Micro funnels of air appear as a result of temperature differences and masonry characteristics. Arising in the inner sharp corners of the snake, vortices greatly impede traction.
There is only one way to deal with turbulence by mechanically smoothing the sharp corners of the chimney.
Soot
The more bends, the more places for soot to settle. There are two ways to deal with it:
- Install metal cleaning doors. The method is not complicated, but due to the difference in heating the metal and brick, it significantly reduces the efficiency of the chimney,
- Provide knock-out bricks in the construction. It is more difficult, but reduces efficiency less.
Snake is an effective solution
This is how chimneys appeared, arranged according to the "snake" principle, or, more simply, multi-turn chimneys, the length of which is many times greater than the length of a straight pipe.
There are vertical and horizontal multi-turn chimneys. In vertical multi-turn chimneys, the location of the main ducts is directed strictly vertically. The main disadvantage of such a chimney is uneven heating.
And which do you prefer between 3 or 4 stars? It depends on the need: in the first case, the product is suitable for frozen food with a minimum of -18 °, and the 4 stars reach a temperature of -30 ° to ensure freezing of fresh food. There are so many questions we face before spending money, even because of the average cost of freezers. Waiting for deals on deals can help your portfolio, but for those looking to be confident throughout the year, you can always use discount codes.
Here are 5 best-selling freezer models that can help you! Its horizontal structure is capable of holding up to 104 liters in the interior, despite its 54 cm width and has 4 stars, which indicates the possibility of freezing fresh food at -30 ° in a short time. It is not only equipped with indicators that are triggered in case of rapid freezing or sudden temperature changes, which is useful for monitoring the correct operation of the appliance. Simple and substantial due to its small size, it can be placed in small spaces. food can be stored in suitable boxes with good storage capacity.
In contrast, a horizontal multi-turn chimney heats up much more efficiently.Since hot gases tend upward, and the upper area of the horizontal chimney is much larger than that of the vertical one, therefore, heating is carried out much better using the same volume of fuel.
Very compact, it measures 82 cm high, 5 wide and 53 inches. All this for a net volume of 65 liters. Three large drawers provide ample space for a small space. With adjustable legs and reversible doors, you can place it wherever you want.
Thanks to the kindness of your design, it keeps the temperature for 15 hours even in the event of a power failure, so you don't have any thoughts on the weekend. Consumption remains low thanks to its energy class A, which is critical for its important dimensions: 4 cm high, 5 wide and 8 inches.
Three basic rules
It is much more difficult to fold a multi-pass chimney for a stove than to assemble a modular flue system for a gas boiler. When performing work, you must follow strict rules:
- The chimney cross-section must be strictly the same size throughout the chimney.
- Sharp corners inside the chimney must be minimized.
- Observe the smoothness of the inner surface.
At first glance, these are very simple rules, but how can they be observed in practice?
Audible and visual alarms are ready to tell you if the temperature is too high, it is very useful to save everything you can put in 229 liters. Internal air circulation is also 40% more efficient. Key considerations for installing a rocket heater.
Installing chimneys is the most common way to connect solid fuel stoves. The hob is connected to the chimney using metal chimneys, which also act as heat exchangers. The total length and number of curves depend on the combined draft of the stove and chimney.
Brick and chimney - dimensions matter
Faced for the first time with the laying of a horizontal chimney (see. DIY chimney), even an experienced craftsman can get stumped when following these rules.
But let's look at everything in order.
- Standard brick has a size 250 × 120 × 65 mm
... What do we have in this case? - It is clear that half of the brick will have a size of 125 × 120 × 65 mm
... Since we block the horizontal section of the chimney with a brick, we decided on the size
125 mm. - Since the height of the brick is 65 mm
, it becomes clear that to create one channel, you will need to lay out two rows,
65+65=130
, add to this two mortar layers.
Our chimney will have a cross-section 125 × 125 × 140 mm
... This is very important to remember, since when laying this kind of chimney, many make a gross mistake.
The main considerations for installing a stove are. Fire resistance Maximum heat recovery Practical and aesthetic arrangement of chimneys. The stove and kettles, especially those close to it, must be kept at a safe distance from flammable materials such as wallpaper, carpets, etc.
Optimal stove connection takes patience and effort. The goal is to achieve a balance between cravings and heat. If we put the bowls down, the draft will be very good, but we will have significant heat loss through the chimney. The easiest way to judge is by touching the pipe right in front of the chimney. Your hand must be able to withstand the temperature. If the chimney money has already been lost a lot, and if it is hot, the difference between a rocket and a conventional stove in terms of stack losses is not great.
If the horizontal part of the chimney has a size 125 × 125 × 140 mm
, then the maximum length of the vertical section of the smoke circulation is arranged completely arbitrarily, i.e. the way it goes.
This cannot be allowed if, when laying the last brick of the floor, the size of the vertical transition does not correspond to the above parameters, cut the brick to comply with the size. Again, this is very important.
In a normal working chimney, we recommend using only "knee" radiators and radiators. For installations with a large elbow, you must try to find a balance. If we build a system with too much bowl, then the draft can lose a lot of weight, and the stove starts to burn lazily and often smokes when ignited and creates condensation. Long horizontal flue ducts are typical for installations with thermal mass.
It is important to leave space here for cleaning the ash pipes. Note that you are talking about ash, not potatoes. Ash carried by moving gases and deposited in horizontal pipe sections. Thermal settings are more emphasized on long horizontal sections, and the number of knees must be monitored. It is best to minimize their use and when the installation is complete to make a trial break. If you think the thrust is powerful, you can replace one of the vertical flat pipes with a straight pipe with an elbow or lyre radiator.
Vortices - Problem Solving Methods
The next question is how to minimize sharp corners. If we imagine the movement of combustion products inside the chimney as a water flow, it becomes clear that at the sharp corners of the brickwork, turbulence will occur, which will impede the normal movement of gases and, as a result, a deterioration in draft.
Features when working with a rocket heater. Ignoring fire can be a little tricky, especially for people with no experience. Here we will restrict ourselves to basic positions when firing a rocket. Fuel is the most important element in igniting and maintaining a fire. Kiln incineration must be done with dry and sticky material.
Here we have presented an example of a stove. To start the fuel, we use 3, 4 pieces of oak, squeezing nuts, some cones and a little paper. As you can see from the figure, the wood faces the bottom of the hole, the thickness of which is chosen so as not to completely cover the hole in the inner part of the horizontal chamber. At the bottom we put walnut shells on top of them and cones above them.
The only correct solution in this case is to smooth out the sharp corners inside the chimney.
Considering the transitions inside the chimney, it can be seen that it is possible to smooth out sharp corners only at the very overlap of the smoke channel. This is done by simply chipping off the sharp corners of the brick. This must be done very carefully and carefully.
Close the cover around ⅓ from the hole. This is important when we have low cravings. A basic requirement specifically for rocket heaters is to cover ⅓ to ½ the area of the wood inlet! Please note: you don't need to cover with a lid that can simply be filled with wood! But when we put some wood, it is recommended to use a cover to limit the free area. This accelerates the air and engages the chimney and smoke that bursts out of the tree, and also prevents the fire from creeping.
Note that this does not reduce the incoming air as with conventional stoves, but simply changes the speed and thereby ignites the fire. However, if we cover a very large area, the stove starts to "sink", this is immediately understood as the sound of burning. The burning rate is controlled by changing the size and amount of wood burning. For example, if we want strong combustion, we will supply more and finer wood. If we want to burn a little, we will place some thicker woods. It is good to have at least two burning trees when they have a tendency to extinguish.
Our tip: Use an electric sander to smooth out the sharp edges of the brick.It's much faster this way and the result will be much better.
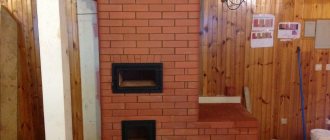
If there is a stove, there will be a chimney
The figure shows a part of the furnace for which it is necessary to arrange a horizontal chimney.
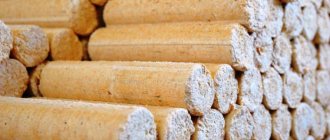
Eco-briquettes are good rocket fuel. The published fire note explains what the rocket mode is. It also introduces the features and effects of chimneys. Now we will only clarify that the rocket heater enters the operating mode within 15-30 minutes after ignition, depending on the intensity of combustion. This can be called the initial rocket mode, with only the first part of the central chimney being well heated. After a while, the entire inner chimney heats up and the stove reaches full operation, which is characterized by slow burning of wood.
As mentioned earlier, we must comply with all the parameters of the dimensions of the inner section. If experience in this kind of work is not enough, then you can build a mold of the appropriate size. With its help, it will be possible to successfully control the entire process of laying bricks.
As mentioned earlier, the cross-sectional area of the inside of our chimney will be 125 × 125 × 140 mm.
A very unpleasant phenomenon is the condensation of water vapor on the inner surface of the cucumbers. A brown liquid flows out of them, and it smells and smells. Condensation occurs when we burn wet or very damp materials in combination with cool baths. In principle, it is possible to burn wet material, but to do this, the stove must burn and burn with dry wood until the boilers are hot enough to prevent condensation.
It is advisable to remove ash from the chamber daily. A small ruler or wooden stirrer can be used for this purpose. When the stove flies frequently and accumulates more ash for a short time. When it burns for a long time, if used correctly, there may be very little ash left and not cleaned before the next flame.
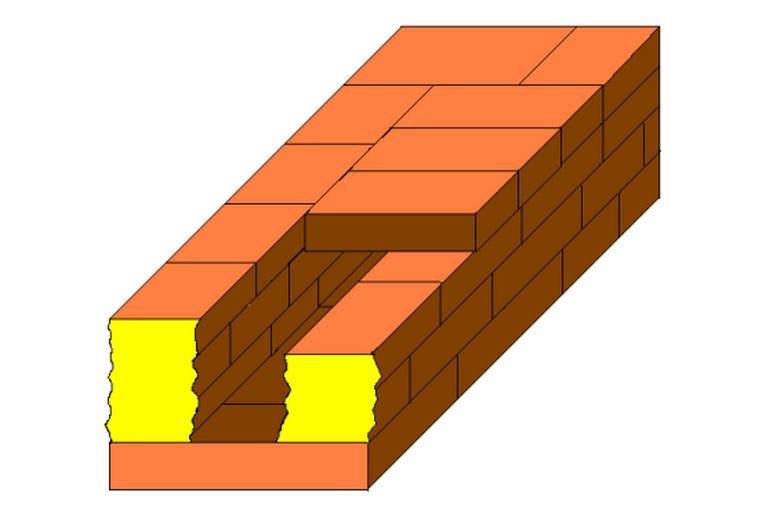
Setting up a horizontal channel
- To do this, we lay two rows of bricks in such a way that we get a horizontal chimney channel. The figure shows how to do this. The bricks are laid in the usual way for brickwork.
- The only thing that is required is strict adherence to the thickness of the seams. Since a difference of a few millimeters does not play a big role in an ordinary brick wall, in a chimney this difference will lead to a change in the internal section of the chimney.
- Therefore, when laying each brick, carefully check and adjust the thickness of the joint and the horizontal laying. This can be done using the building level.
If necessary, the brick is knocked out with a rubber tipped hammer or a conventional hammer with a wooden backing. We remind you that the thickness of the seam is 3 mm
.
Overlap preparation
The chimney duct is ready. Overlap is required. For this, we will prepare the channel. We lay another row according to the scheme shown in the figure.
Now everything is ready for laying the floor. What else is important to know. When laying bricks, pay close attention to the protruding mortar. Any leaking solution must be carefully removed.
If possible, the internal seams should be completely filled with mortar. Solution deficiencies form additional steps on which soot will subsequently accumulate.
Floor brick - skill, dexterity, desire, training
How to install floor bricks correctly? This requires a certain skill and knowledge. Getting started:
- We apply a brick without mortar and determine the part that is inside the chimney channel at revolutions.
- Using a grinder, round off sharp corners as shown in the early diagram.
Our advice: since not all bricks are subject to rounding, you can immediately prepare the required amount, according to the chimney diagram.They can always be cut to size if necessary.
- With regards to the solution. When laying the floor bricks, the mortar is applied to the brick to be laid and in no case to the masonry bricks.
- Place the brick and determine which parts it touches the chimney masonry. As can be seen from the figure, it adjoins the masonry with one butt and spoon part completely and half of the pastel.
- Apply mortar to these parts and spread as evenly as possible. Please note that in order for the brick not to sink to the sides, there should be a little more mortar at the edges than in the center.
- The mortar is applied upside down on the brick. When the mortar is applied, we lay the brick and press it tightly with the spoon and butt part.
Precision matters
Then, using the level, we make the necessary measurement. If necessary, hammer the brick with a rubber hammer. Under no circumstances should you hit the part above the flue duct.
You can support the brick from below with one hand and carry out the necessary manipulations. Thus, the entire row fits. In the end, you should get as shown in the picture.
Let's repeat, laying the last floor brick, check the size of the vertical turn. If necessary, trim the brick just enough to match the vertical channel to the horizontal channel.
Reference: compliance with the dimensions of the chimney is a guarantee of good and efficient operation of the chimney.
Now everything can be repeated in the opposite direction. This is how the entire chimney fits.


Masonry features
It is important that the thickness of the seams does not exceed 5 mm. It is better if the stove-maker can maintain a thickness of no more than 3 mm. Increasing the parameter leads to a decrease in the internal dimensions of the pipe. During work, they constantly monitor the horizontalness of the masonry with a building level. Use a rubber hammer to knock bricks. It is forbidden to knock bricks from top to bottom.
The overlap of the horizontal channel is done in the following sequence:
- One side of the channel should be one brick higher. This will ensure that it is placed on the bed on the lower side and butt to the opposite side.
- The prepared brick is laid on the lower wall so that it butts with the butt side flush with the opposite wall. This is a brick fitting, which must be done.
- Then the mortar is placed on the butt side of the brick and on the lower wall of the channel in an even layer. The brick is pressed, and the mixture released from the seams is immediately removed.
- It should be remembered that the last brick must have rounded and sanded corners on the underside. It is better to process them directly during masonry, and if this is done in advance, the exact number of such bricks should be calculated. The next channel runs in the opposite direction.
Requirements for horizontal chimneys
Angles inside the duct cause the gases to swirl and soot settles on the duct walls. Chimneys of this design are distinguished by the highest degree of soot formation, so their inner surface should be as smooth as possible. The channel cross-section should not change throughout. For masonry, only refractory bricks and mortar are used, the characteristics of which correspond to the following parameters:
- gas-tight structure,
- maintaining tightness,
- resistance to mechanical stress,
- resistance to condensate and its acids.
The horizontal part of the chimney is equipped in heating and cooking furnaces, in which the design provides for the presence of a drying chamber. It is precisely its location above the horizontal channels that provides optimal drying conditions. Also, this type of chimney is the main one in the device of drying ovens. It should be noted that heating units of this design are rarely installed, since the work is considered difficult and requires experience. The weight of such ovens is the largest compared to other options.
Soot: brick or doors
In such a chimney, the issue of soot will surely arise. The main disadvantage of such a chimney is the need for a large number of doors for cleaning (How to clean a chimney).
Doors greatly reduce the efficiency of the chimney. Uneven heating of brick walls and metal doors leads to large temperature differences inside the chimney and, as a result, to a deterioration in draft.
Our advice: instead of metal doors, install knock-out bricks. Of course, this will slightly complicate the maintenance of the chimney, but in any case, it will significantly improve its performance.
The work does not require haste. The main thing in the construction of this chimney is care and accuracy. Using the above tips and tricks, you can successfully build a horizontal chimney for your stove.
>> ?
Having dealt with the boilers, it's time to talk about how to make a chimney correctly
, having considered the different designs of chimneys and the requirements for their construction.
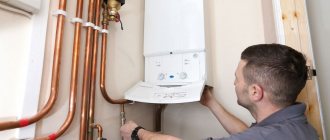
The chimney for the boiler is designed to remove fuel combustion products into the atmosphere. Actually, any heating boiler, if it is not electric, can only work if there is a properly made chimney.
What chimney designs are there?
What is the difference from a coaxial chimney
In order to understand the distinctive characteristics of horizontal chimneys from coaxial ones, you should disassemble their structure and principle of operation.
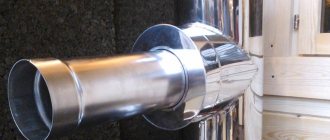
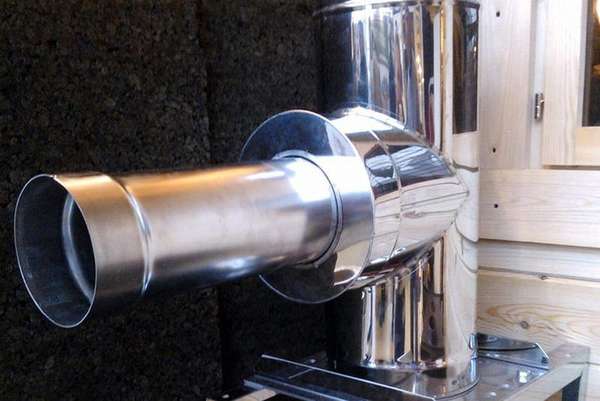
The first device combines 2 pipes of different diameters: the inner one removes smoke and combustion products, and fresh air is supplied in the cavity between it and the outer wall of the outer pipe.
A prerequisite for the functioning of coaxial chimneys is the presence of a turbine in the heating equipment, which will push out smoke and suck in oxygen. This system is the easiest to install, because does not require natural traction.
External side chimney
For such chimneys, forced draft is not needed: the exhaust gases are discharged due to natural atmospheric draft. With such a chimney device, the pipe from the boiler goes through the wall to the street, and then the chimney along the wall rises to the roof:
2. External side chimney
The height of the chimney must be at least 5 m from the bottom of the boiler to the top of the chimney (see the following figure).
In the diagram, D1 and D2 are the diameters of the chimney itself and the outlet on the boiler. So these diameters should be equal and according to the standard 130 mm.
The chimney is attached to the wall using additional parts (clamps and support frame).
What is it and why is it needed?
Horizontal chimneys are sections of the chimney parallel to the floor, passing in one form or another between the stove and the exit to the roof. It is performed in three types:
- In the form of a branch from the main one. The maximum length of the "recumbent" part -1m.,
- Completely, with a minimum height of the vertical pipe sections. It is brought out into the street through a hole in the wall of the house,
- Snake (brick version only).
The area of the working surface of a horizontal chimney is several times larger than that of a conventional one.
When is installation necessary?
- The boiler or stove should be connected to an outlet located far away. There are situations when a vertical pipe cannot be installed indoors for some reason. In these cases, it is taken out of the room, and connected to the stove using the aforementioned pipeline,
- The stove (boiler) has a low heat transfer rate, it is less than that required for the heated area, and cannot cope with providing heat for the entire room. Here, the horizontal section of the pipe plays the role of a kind of battery,
- If the heat source is not connected to heating media. This is especially true for a stone (brick) stove, which gives off heat to the interior due to the cooling of the masonry. In this case, the use of multi-turn chimneys (snakes) is most justified.
Requirements for the chimney device
For the above, let's look at the diagrams of how chimneys are arranged.
Vertical execution. If the boiler is floor-standing and the floors are combustible, there must be a non-combustible substrate under the boiler: an asbestos sheet plus a metal sheet.
Chimney passage through a wooden wall
(and in general a wall made of combustible material) must have a fire seal for at least 0.5 meters around the chimney.
The next requirement is - length of the horizontal section of the chimney
: from the axis of the boiler to the axis of the chimney, which is outside, there should be no more than 2 meters, otherwise the draft will be poor.
On the outdoor section of the pipe, the pipe is two-layer and thermal insulation is laid between the layers to prevent condensation in the pipe. But in any case, there should be a pocket at the bottom of the vertical section of the pipe for cleaning and drainage of condensate.
In fig. 3 a chimney that runs vertically through the ceilings: in this case, through the ceiling and roof. The requirements are the same here. A requirement is also added: from the bottom of the boiler to the top of the pipe, a distance of at least 5 m.
Chimney diameter for gas boiler
set by the manufacturer must be equal to the diameter of the chimney leaving the room. It happens that boilers with a smaller chimney diameter (about 80 mm), then the inner diameter of the rest of the chimney must be at least 130 mm. All these requirements must be taken into account, because if you do not do it right, you will have problems with putting gas equipment into operation.
In the following diagram (Fig. 4, A), an option is considered when the chimney is embedded in the channel of the outer wall. Here the following requirements must be observed: below the pipe entry into the wall channel, there must be a cleaning hatch. It happens that in cold weather sparrows, pigeons, etc., sit on the top of the chimney, they choke on carbon monoxide and fall into the chimney. Naturally, all this garbage will collect until the entire chimney is clogged.