Do-it-yourself whitewashing of the oven
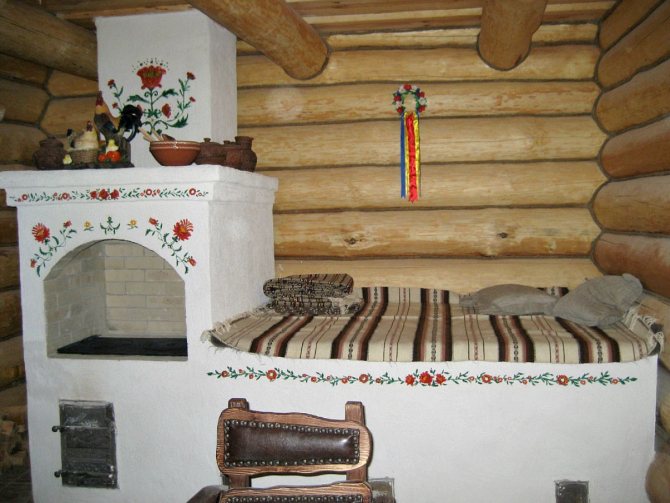
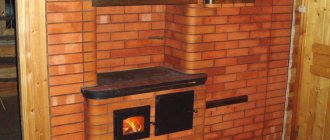
Today, much is dictated by fashion and customs, a "house in the village" appears more and more in the trend, and few people think about building boyar mansions according to fashionable projects, what meaning did our ancestors put into one or another detail of the interior, in particular, to whitewash the stove with their own hands. The Russian stove, which from ancient times was only white, today is painted in any color of the rainbow, up to the avant-garde paintings. Almost no future owner of a house with a Russian stove thinks that its white color symbolized the purity of the owners' thoughts and peace and tranquility in the house. Only a few take into account this historical moment and carefully study the chronicles and historical documents in an attempt to understand how to whitewash the stove so that it fully complies with traditions and does not strike the eye like a knight in full armor in a modern disco.
Furnace decorative finish
In order to give a newly built stove a pleasant appearance, there are many ways, it does not make much sense to describe each of them, therefore we become the most popular and widespread. (See also: Simple DIY oven)
Facing the stove with tiles. Perhaps the most versatile way to decorate stoves, due to the widespread use of ceramic tiles, this method is gaining more and more popularity among people who do not strive for the historical correspondence of the stove and who love simplicity. But this finish has several drawbacks, one of which is that, under the influence of temperature, the tile heats up unevenly, which causes small deformations and the tile "loosens" its fastening. After several heating cycles, such decor may begin to fall off and will have to be reinstalled in place.
The use of tiles for decorating the stove increases its beauty and reliability of the coating several times. These specially made ceramic tiles require specific skills for their installation, and their price itself is quite significantly different from ordinary tiles in the direction of increase.
The simplest and most affordable way to give the structure a "commercial" look is to whitewash the furnace with chalk, which allows you to get an attractive and inexpensive coating without resorting to significant costs. The downside of this decor is the need for periodic updates.
(See also: DIY oven painting)
Another way that the owner of the stove will not particularly bother is painting it with ordinary floor paint. The method, it would seem, is simple and reliable, but after 2-3 months, the entire gloss of the coating begins to fade and climb, and at least once a year it will have to be completely renewed.
Lime whitewash
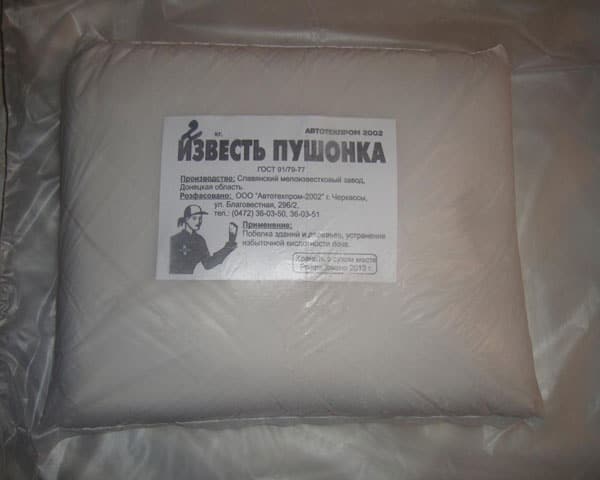
Despite the fact that the use of chalk is the easiest and most affordable way to prepare a composition for whitening indoor surfaces, lime is in great demand. This is due to the fact that the walls and ceilings treated with lime whitewash are not susceptible to the formation of mold and mildew. The most popular composition for whitewashing walls is fluff. White powder, quenched and ready for use after adding water and fixing agents.
Read also: Baking soda and hydrogen peroxide application
Modern manufacturers sell lime:
- Slaked, supplied to the place of sale in the form of powder or paste (dough).
- Quicklime, sold in the form of granules or large lumps.
After pouring lime with water, close the container with a lid.
For whitewashing, only slaked lime is used, for the preparation of which you will need:
- water and lime itself, taken in a 1: 1 ratio;
- clean metal dishes without chips and corrosion;
- cover for the container;
- wooden spatula for mixing the solution.
After the quicklime is poured with cold water, it begins to boil, heating up to 130 ° C. The reaction is very violent, the liquid bubbles and splashes scatter in different directions. At this point, it is better to cover the container with a lid to avoid getting the mixture on bare skin.
It is impossible to use plastic dishes, since the solution heats up very much during the quenching process, and the composition can be mixed only after the reaction is completed. Now the container needs to be closed with a lid and put in a cool dark place for 20-25 days.
At the end of the specified time, the composition is thoroughly mixed.
A thick white film should remain on the wooden spatula. The mixture required for whitewashing is diluted with cold clean water, achieving a homogeneous opaque composition. The approximate amount of a ready-made solution prepared from 1 kg of quicklime is 10 liters.
During quenching, all lumps and granules must completely dissolve in water, but before use, the contents of the container must be thoroughly mixed, and strain through a special mesh before use.

The tool for performing bleaching can be selected taking into account the wishes of the layman or the characteristics of the surface to be treated:
When working with a spray gun, the resulting mixture will have to be filtered through cheesecloth to remove even the smallest remaining lumps.
Oven whitewashing options
Let's consider the simplest way to give the stove a neat look, which was used by our grandfathers and great-grandfathers. But even in this case, there may be several options for whitewashing.
Whitewashing the kiln with lime is one of the common ways to decorate the kiln. The lime mixture is quenched with milk or a solution of sodium chloride in water. Salt solution is made in a proportion of 100 parts of lime to 4 parts of salt per liter of water. Lime is poured with the resulting composition and a thick, viscous mass is prepared.
(See also: How to decorate a stove with your own hands)
The advantage of using lime as a finishing material is its high availability and reliable contact with brick or clay. Has a lime mixture and bactericidal properties.
The disadvantage of using lime can be that even in the "slaked" state, it remains quite active and caustic, which can lead to burns, especially in people with sensitive skin.
There is an option that we inherited from our ancestors - whitewashing the stove with a stove bench with chalk with the preparation of a mixture in skim milk. After milking, milk is placed in a warm place for several hours, as a result, the cream rises and is removed with a spoon, the return remaining in the jar is used for mixing with chalk. You can also use ordinary water for mixing with chalk, but in this case it is necessary to add a little water-based glue to the resulting mixture - busylate, paste, etc.
(See also: DIY Russian stove repair)
The advantage of using a chalk mixture as a decorative finishing of the stove is its high availability and environmental friendliness. When working with it, it can only cause inconvenience in a person with respiratory diseases, for the rest the mixture is safe.
The disadvantage of using chalk is that it is well washed off and this can lead to the need to periodically renew the color, and in an important environment it is better to refuse chalk altogether.
A recipe that appeared relatively recently and the main component in it is tooth powder.
How to dilute lime for whitewashing - step-by-step instructions
- Prepare a clean container. It is advisable to use a plastic bucket. A metal container is also suitable, the main thing is that there is no rust on it.
- Place the fluff in the bucket.
- Add cold water (1/2 bucket).
- Stir the contents of the container thoroughly with a wooden stick.
- Add a liter of water and stir again.
- Leave the resulting solution for 24 hours.
- Prepare a saline solution using an additional container by diluting two kilograms of salt with one liter of water.
- Mix it with a lime mixture that has been infused for two days.
- Leave the resulting mass for another day.
In this tutorial, we used a little trick (making the saline solution) to get a more durable finish that doesn't stain hands and clothes.
To obtain a clean, lump-free consistency, it is recommended to strain the material that has stood for 24 hours through a sieve. Now you know how to dilute lime and you can prepare the material for whitewashing without assistance.
One of the most important works of a gardener is to protect trees from pests, sunlight, for which they are whitewashed. In our material, we will tell you how to dilute lime to whitewash trees, and also consider the main nuances of this work.
Whitewashing the oven. How and what to whiten the oven
To prepare the mixture, you need the tooth powder itself, 2-3 eggs and milk of 1.5-3 percent fat.
(See also: DIY Russian stove masonry)
The advantages of the mixture do not differ much from that of chalk, but due to the fact that the powder has a finer grinding, the mixture prepared on its basis practically does not need additional cleaning and sieving procedures before whitening the oven.
The disadvantages are, in principle, the same as those of the chalk mixture, but the difficulty of acquiring tooth powder in sufficient quantities is added to them.
Of all the proposed methods of decorative whitewashing, the most reliable and affordable is lime mortar. Therefore, in what follows we will consider just it.
How to dilute lime
There are two ways to dilute slaked lime to whitewash surfaces.
Method Ν1: we take 400 g of powder, add 6 liters of water, 5 g of salt and a teaspoon of drying oil. All this is thoroughly mixed and filtered through a sieve. If you want a bluish tint, add 25 g of ultramarine.
Method # 2: For 3 kg of dough, 10 liters of water and 100 g of sodium chloride are used. Further, the process becomes a little more complicated: the dough is diluted in only half of the water to obtain milk of lime, the salt is separately stirred in 1 liter of hot water and added to the milk. All this is thoroughly mixed and then increased to a volume of 10 liters by adding water.
How to whiten? You can manually use a special brush or roller, or you can use a spray gun, but in any case, you must first prepare the walls for whitewashing.
The process takes place in two stages: the application of the first layer, and after it dries, the second. It is preferable to carry out works in the evening hours or in cloudy weather. This is done so that the liquid does not evaporate so quickly and the layer is more durable.
You can quickly, simply and cheaply finish the ceiling by whitening it. For the result to be satisfactory, you need to take into account all the features of the process, starting with the preparation of the solution. The quality of the layer depends on its composition, color intensity and consistency.
Content of the article: Whitewashing is a budget and simple finishing option, which, in addition to all its advantages, has a significant drawback - fragility. The whitewash quickly crumbles, fades, loses its aesthetic appearance. In order for the finishing layer to look attractive and last as long as possible, you need to be able not only to correctly apply the whitewash composition, but also to prepare it.
Whitewashing the oven with lime mortar
The first thing to start with the procedure for treating the oven with a lime mortar is to prepare the oven surface itself.We will not consider the procedure for puttingtying and priming a new oven for this, there are separate topics, but we will proceed directly to preparation for whitewashing.
The oven is inspected for soot spots. If they are, then they must first be completely cleaned or washed, otherwise, after whitewashing, blackness will appear in these places. The wash is used if the soot has not yet had time to well eat into the clay. If the oven has been in operation for several years, then the best way to clean it from soot is to use a metal brush. It is only necessary to try not to cause excessively deep damage to the plaster.
Options for whitewashing the Russian oven
To prepare a solution, you need 2 liters of milk and 1 kg of chalk. That is, the proportion of the composition is 2: 1. Crush the chalk into dust, use a mortar. Sift through a fine sieve: the material should be free of stones and coarse fractions. Pour in milk and immediately start whitewashing.
Advice: at a high wall temperature, the composition may turn yellow. To avoid this, add 50 ml of blue to the prepared solution. This is about a quarter of a glass.
Protein-milk structure. To whiten the oven in this way, you will need 100 ml of milk, two chicken egg whites and 2 boxes of tooth powder. Mix the components, you should get a mass similar in consistency to sour cream. Do not use large amounts of the product: the protein curls up quickly.
Lime-salt structure. Everything is simple here: you need 1 kg of lime and 40 g of salt (two tablespoons with a slide). Prepare the solution as for a regular whitewash, dissolve the salt. After finishing work, light up the stove. When heated, the salt melts, covers the surface with a transparent and even layer.
The modern way is spakryl... If there is a hardware store nearby, buy a jar of plaster. Dilute with water in a 1: 2 ratio and start whitewashing. Experienced craftsmen claim that such wall surface treatment is durable, does not stain clothes and does not fade.
The stove is so indispensable in a private house for its practicality of use, autonomy from gas and electricity, but it still has its drawbacks. We will not list all of them, but according to the thematic feature of our article, one of them is the exit of exhaust gases through fittings, slots, etc., which, as a result, leads to the settling of soot on its walls. At the same time, you can get dirty on the stove, the stove also loses its attractive appearance, knocking out of the interior of the house. The solution to this problem is to whitewash the oven.
In fact, whitewashing a stove is not such a difficult procedure, it is similar to whitewashing a ceiling. The difference is that it is usually even more convenient to whitewash the stove, but with the peculiarity of applying a thicker layer of whitewashing to certain parts of the stove.
The first step is to remove the part of the surface layer where most of the soot has settled. If we do not remove the soot and start whitening, then it will begin to show through, it will not work to whiten this place to the original whiteness. The top layer is best removed with a metal washcloth or metal brush, but the brush needs to be done more carefully, as it is harder and can lead to deep scratches on the stove.
Next, you need to wet the oven with water. It will be difficult to apply whitewash on a dry oven surface, as the whitewash will roll into balls and poorly absorb. The stove can be soaked in water in parts, in accordance with the whitewashing speed and the places planned for whitewashing. When doing this, try to rinse off any remaining soot if possible.
How to dilute lime fluff
In no case should you rush - this is the basic rule that you should be guided by. The material dissolves gradually in water. Many people make the mistake of not learning in what proportions to dilute lime for whitewashing. First, the powdery composition is placed in a container, and then water is added to it. The optimal proportion is 1/2.The contents are thoroughly mixed using a wooden stick. As a result of mixing, a chemical reaction occurs - the lime heats up.
Next, no more than 1 liter of water is poured again, after which the mixing process is performed. Water is added until the solution gets the desired consistency, i.e. it loses its transparency, but remains liquidish. Ideally, the resulting mixture should resemble store sour cream in consistency. Let the solution stand for several days, and then start whitewashing.
How and how to whitewash the oven to please the eye
You can apply lime or spacryl which we mentioned earlier. Spakryl is diluted with 1 part of the spacril and 2 parts of water. Stir the whitewash until smooth, so that there are no solid inclusions in the liquid.
Apply whitewash to the damp oven surface with a brush or foam sponge. If, after drying, the oven does not break through (dark spots appear), re-whitewash these areas.
We are waiting for the drying of the whitewash of the oven. Now the stove has a completely different look.
Few can afford to overlay the stove with decorative tiles or artificial stone even at home, not to mention a summer cottage. Because of this, whitewashing of the oven is still popular. Its composition must be selected with great care, so that during the operation of the stove it does not get dirty and does not worry that when heated, cracks and chips will go through it.
Whitewashing solutions recipes
You can quickly whitewash the stove in a traditional way or in a modern way. The main thing is that the applied paint should lie evenly, it was impossible to accidentally get dirty on it. Lime solution, chalk and white powder for teeth are considered traditional means for whitening the oven. The modern method includes a mass in the form of a paste - spacril. You can find it in many repair shops.
Experienced stoves praise the product and note that it does not fade, it serves for a long time and does not stain things. Spacril for whitewashing the stove is very easy to prepare: it is diluted with water (2: 1). On the packaging of the product it is written how to knead the mass without lumps correctly.
Before you start whitening, it is advisable to heat the stove in the house a little - two hours will be enough. So l
The coloring agent will fit better.
Mortar
To whitewash the stove, precautions must be taken to avoid contact of the solution with exposed parts of the body and eyes. It is better to wear long rubber gloves on your hands. You need to work slowly and without making sudden movements.
Lime burns are a rather unpleasant phenomenon. But despite the danger, lime is considered a good whitewash and has been used in everyday life for many decades. Lime stains and disinfects the stove from fungi, harmful microorganisms and insects. The following solution recipes are used:
- Lime powder is mixed with water and edible salt (35-40 g). Salt gives strength and prevents surface cracking. After staining, it is recommended to light the oven to dry.
- Lime, chalk powder and carpentry glue are mixed with water and then bleached. 100 g of glue is enough.
To increase the durability of the coating, some masters recommend adding Oksol drying oil (2 tsp) to the lime solution.
Chalk based whitewash
A good effect is obtained when painting with an inexpensive natural material - chalk, which creates a rich color on the surface. The disadvantage of this method is considered to be white marks on hands and clothes with each touch. There are several recipes for chalk solutions. Most Popular:
- Dilute chalk with water (2: 1), stir and apply immediately.
- Take dry chalk powder, water or skim milk. Stir the mixture until smooth, add natural grated heated soap and 100 g of wood glue.
- The composition of chalk with milk is considered old. Proportion of ingredients: two parts milk and one part chalk.
It is cheap and quick to whitewash the stove with a chalk solution, but this method is often streaky and requires several coats.
The chalk turns gray when the liquid is added. When the hearth dries up, it will turn snow white. Up to 50 ml of blue can be added to the chalk mixture, which will prevent yellowing.
Tooth powder solution
This tool makes the surface white for a long time, does not stain things, you can heat the hearth on the same day. To whiten a Russian stove with this tool, you will need 4 packs of tooth powder, 1 tbsp. milk and 4 chicken proteins. The components are thoroughly mixed and left to infuse for 20 minutes, so that the consistency resembles oil paint. Then the necessary work is carried out. If the mixture is not enough, make a new portion.
This method is used for a heated surface - so the ingredients, in addition to coloring, will give strength. The method promotes fast drying, even and smooth surface.
How to whiten?
In stores you can find modern compositions for whitewashing the oven, they are made by different manufacturers, but they go under the same name - shpakril. Before use, such a purchased composition must be diluted with water in a ratio of 1 to 2.
After processing the stove with it, its walls will have a well-groomed appearance for a long time and will not fade. Among the popular manufacturers, it is worth highlighting those whose products are available at an affordable price and with a high quality composition.
| Brand | Volume, kg | Description | Price, in rubles |
| Master | 1 | The surface of the oven must be prepared for this product so that it is dry and free of dust. They can seal small cracks and whitewash walls, ceilings and stoves. |
30
115
The better to whitewash the stove in the house, everyone decides for himself; from the above means, you can choose the right one.
How to prepare the whitewash yourself?
There are three common methods for preparing a solution for whitewashing the oven, each of which has been used for more than a dozen years.
Mortar
Whitewashing the kiln with lime has been known for a long time, if you dilute 1 liter of the composition from it, then it is enough for 2 m 2. The preparation of such a composition is as follows: take 40 grams of salt and dissolve it in water, then add 1 kg of lime to it.
Salt acts as a fixative; after applying such a whitewash, the oven must be heated so that a smooth transparent layer forms on its surface. It is better to dilute such a remedy with low-fat milk instead of water.
Chalk based whitewash
The chalk should be prepared: finely crush and sift, you need to take about 1 kg of this component, then pour 2 liters of milk and 50 ml of blue into it.
Some neglect such a scrupulous preparation and get a solution with different inclusions at the exit, after being applied to the oven, under the constant influence of high temperatures, it begins to change color from white to yellow.
It is the blue that prevents such a transformation in the color of the oven. The prepared milk-chalk mixture must be used immediately so that it does not freeze.
Tooth powder solution
This unusual tool will give the stove a pure white tint and keep it for a long time. To prepare the composition, you need to take 2 boxes of tooth powder, half a glass of milk, 2 eggs. Any dairy product can be used boiled or unboiled.
Only proteins are taken from the eggs, which are mixed with milk and powder, after holding for 10 minutes, the mixture can be used. In its consistency, it should resemble paint. After staining, the oven can be used on the same day, only it should be noted that the smell of tooth powder will disturb you during the day.
How to dilute lime to whitewash trees?
In stores, only quicklime is sold, which is presented in the form of small stones, sand, but they all have a strong alkaline reaction. As soon as contact with water occurs, heat begins to be released, as a result of which the following three types of solution can be obtained:
- Fluffy.
- Lime milk.
- Lime dough.
The final result depends on the amount of lime in relation to the water. But according to technologies, first you need to get fluff from the solution, and only after that - prepare a mixture for whitewashing.
When working with quicklime, be very careful, because when in contact with water, the temperature of the mixture can rise to 150 degrees Celsius, the solution begins to boil. Careless maintenance can damage your skin or burn your eyes.
The cooking recipe will be as follows:
- Take a deep bucket.
- Pour 2 kg of lime there.
- Gently pour in 2-2.5 liters of water.
- Wait for the reaction to pass.
- Stir the mixture gently.
If you just dissolve the resulting fluff in water, then in a couple of weeks the whitewash will be washed off the trunk. Therefore, it is better to use the following solution for whitewashing:
- 2 kg of fluff.
- 10 liters of water.
- 50 g flour paste.
Mix everything and apply to the tree trunk with a brush. If you don't have a paste on hand, use 1 kg of clay instead. The solution should turn out to be creamy, because if the mixture is liquid, it will quickly drain from the trunk, and a too thick composition simply will not be applied to
Note. You should have a creamy mass (milk of lime). A thinner solution will roll off the bark, a thicker one will not stick.
How to whitewash the stove with your own hands?
First, you need to carry out a visual inspection of the stove, if there are deep cracks and chips on it, then they must first be covered in the old fashioned way with clay or a specially purchased putty. It is impossible to whitewash the stove beautifully without preparatory work, you need to carefully eliminate all defects so that the efforts are not wasted.
Tools for the job
Before whitewashing the oven, clean its surfaces with a broom or a brush; for old exhibits, you can use a metal brush, but most importantly, do not damage the plastered surface with it. Then you need to determine the method of applying whitewash, for this you can use:
- Brush - it is chosen by those who have painted any surfaces more than once, and I am sure that they will do everything smoothly and without streaks. Before painting, it is advisable to soak the brush in water so that when whitewashing, no hairs remain on the surface of the oven.
- A sponge is an alternative technique, it does not give a clearly even coloration, it is used only for small ovens, since it will take a long time to obtain the desired thickness of painting.
- Roller - suitable for both beginners and professionals, it captures a larger area with one stroke than with a regular brush. Application of the selected composition with a roller is very simple, the main thing is to move along the surface in the direction of the window in order to create uniform stripes.
- Spray Gun - This is used for large ovens. It is easier to cope with it together, one person will maintain the required pressure in the device, and the second will monitor the uniformity of the application of the composition filled into it. Before using it, you need to check the spray gun, and then constantly hold the spray gun at a right angle to the oven wall, while maintaining an optimal distance of 30 cm from it.
How to properly prepare the oven for whitewashing
There are various ways to whitewash the surface of the stove, which are done by hand. In practice, chalk, lime, spacril, and tooth powder are used for the stove. Which method the owner wants to choose depends only on personal preference. Each of the coloring options is suitable if you mix the components correctly, observing the proportions.
Do not use a water-based solution of purchased paint, since as the hearth heats up, fumes that are harmful to human health will form.
Before whitening the stove, you must wear protective clothing, rubber work gloves, perform preparatory work in the form of cleaning and plastering the surface, and grout the brick. It is important to prepare the place of work:
- cover the floor and furniture with plastic wrap;
- clean the surface of the hearth from debris and dust;
- grout the masonry with clay, cement or asbestos, wetting the surface with water.
Why it is necessary to whitewash the oven
According to the traditions in Russia, the oven in the villages was whitewashed from the evil eye and misfortune. It is a great sin if the stove is dirty or has any drawings on it. That is why people painted white. In addition, it was possible to carry out the plan only on certain days and on the growing moon.


Nowadays, of course, they no longer pay attention to such features and can paint the stove in any color or draw attractive images. However, they still continue to adhere to traditional rules and use whitewash for the oven.
The advantages of this method are as follows:
- quality factor of the material;
- ease of application;
- attractiveness of the coating;
- low material cost.
The only drawback is constant renewal. As a rule, it is carried out 1-2 times a year as needed.
Where is lime whitewashing used?
The antiseptic properties of the material made it the most demanded for use in kindergartens, medical institutions, and its durability - in public buildings with high traffic. The moisture resistance of lime allows you to use the mixture for wall decoration in swimming pools, saunas, showers. The low cost makes lime a profitable solution for spaces such as garages, closets, basements, and so on.
Whitewashing remains relevant not only for public places. It is actively used to carry out inexpensive cosmetic repairs in office premises, commercial facilities, city apartments, private houses and dachas. It is used wherever an inexpensive and high-quality wall decoration is needed.
How can you whiten the oven
Knowing how to whitewash the stove, you can avoid further troubles, such as premature shedding of the material or its unsuitability for such work.
Lime
Lime is formed as a result of annealing of mountain limestone in mines. By adding water to the resulting solution, a white color is obtained, which is used for construction purposes. Especially often this method of whitewashing is used in the bath.


The advantages of this method are as follows:
- inexpensive cost of materials;
- the solution has antimicrobial and moisture resistant properties;
- can be applied to the old layer.
Important! Lime is alkaline, therefore precautions should be taken when using it.
Spacril
Spakryl is a paste for interior work. The disadvantages include only the high cost of the material. Moreover, it has a lot of advantages:
- moisture resistant material;
- sold ready-made, all that remains is to add water;
- characterized by increased whiteness;
- the surface will not get dirty;
- small cracks are smeared.
Chalk is a natural material that can be easily applied to the surface and easily washed off. With the help of the product, a nice bright white color is obtained. The only drawback of chalk is its ability to leave marks, that is, every time you touch the stove, a white spot remains on your clothes.
Dental solution
Tooth powder is an expensive option than whitening the stove in the house. At the same time, this method has a large number of adherents, since it has the following advantages:
- does not get dirty and does not leave marks on clothes;
- retains an attractive appearance for a long time;
- the surface of the stove does not crack for a long time;
- you can heat on the first day after the procedure.
other methods
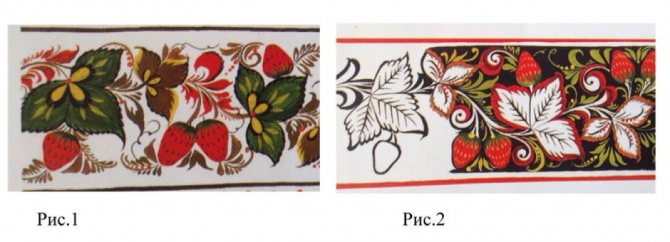
Alternatively, instead of the classic white color, you can use art painting. If you have the ability, then you should draw the selected drawing yourself, otherwise stencils will come to the rescue. You can make them yourself or purchase them from the store.The template is glued to the surface and a contour is drawn, which is then painted with the necessary colors.
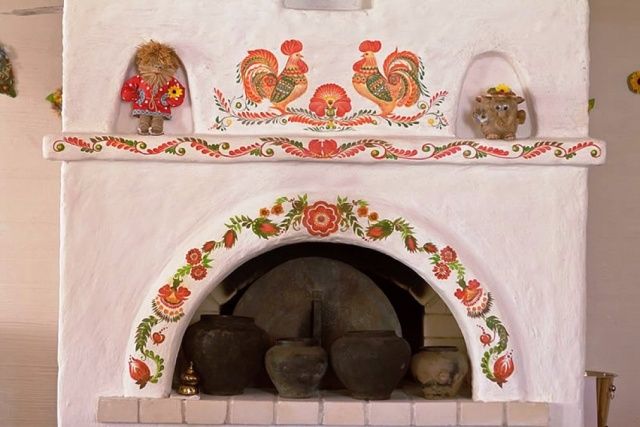

As a basis, the same whitewash is taken with the addition of paints, for example, gouache, acrylic or water-dispersion. They tend not to crack at high temperatures and do not emit harmful substances. The image itself is applied with paint brushes. For large patterns, paint cans or a spray gun are used. After drawing a picture, it is not recommended to heat the stove for 2 days.
Buying lime - which one to take and how much ↑
Before going to the store, you need to find out which lime to buy for whitewashing - slaked or quicklime, how much is required and what other components are needed. This will save you from going back to the building market if suddenly the solution is not enough or its properties do not meet your requirements.
How to cook slaked lime with your own hands ↑
As you already understood, slaked and quicklime are completely different substances, which are united only by the consonant name and the presence of calcium in the composition. Slaked lime is used for household repair work. It is sold by weight at any hardware store or agricultural department.


However, situations are not uncommon when the farm has a fairly large supply of quicklime and it is desirable to use it, and not buy slaked lime. In this case, you can extinguish it yourself, especially since this chemical process does not require the skills of conducting such experiments in the laboratory.
So, how to prepare lime for whitewashing from lumpy quicklime "boiling water". First you need to worry about personal protection. Since you will be dealing with a fairly aggressive alkali, take care of your eyes (goggles), respiratory protection (respirator), exposed skin (closed clothing and gloves). This should be done in the air.
Video: How to prepare a whitewash solution
You will need a deep container such as a bucket and a mixing tool - traditionally a stick. The list of ingredients is short too:
- lumpy quicklime;
- water.


The water must be cold, this is the only condition. Even a first grader will remember the proportion - 1: 1.
- For 1 kg of calcium oxide, take 1 liter of cold water.
- Combine all this in a container and mix. Almost instantly, you will be able to observe the beginning of a powerful chemical reaction with the release of large amounts of heat. When extinguished, the mixture sometimes heats up to 150 degrees, it is not for nothing that the substance is popularly called a boiling water - the solution literally boils.
- When the reaction stops, heat and gas will cease to be released, lime can be considered "fluff", that is, slaked. However, it is not yet suitable for whitewashing.
- The solution should mature within 2-3 weeks under a lid in a dark cool place.
Solution proportions and consumption per square ↑
To start whitewashing with lime with your own hands, you need to prepare at least the following set of materials:
- fluff powder or lime paste;
- water.

In addition, all kinds of auxiliary substances are often added to the whitewash, which give it certain properties. The stock solution is prepared in a 1: 3 ratio. For every kilogram of fluff, they take 3 liters of water. As a result, 4 liters of solution can be prepared from 1 kg of the substance.
Lime consumption per 1 m 2 during whitewashing directly depends on the type of surface on which it is applied:
- The largest consumption - about 1 liter of ready-made solution per square, will go away when whitewashing untreated brickwork.
- A smooth, prepared surface assumes approximately 0.5 liters per square meter of area.


Another criterion that affects the expense is painting tools. Most often they use a regular flat brush or a round one - a brush. These tools are uneconomical, the mass is applied in a thick layer, drips and drops can form. The spray gun can significantly reduce material consumption and operating time.Often, instead of a spray gun, a back-blow vacuum cleaner and even hand-held tree sprayers are fitted.
Read also: Do you need lightning protection for a private house
How to calculate the amount of fluff and water
Before you dilute slaked lime for whitewashing, you need to perform some calculations. An approximate calculation of the consumption is as follows.
First you need to calculate the area of the walls and ceiling that you plan to whitewash. For example: room 3 by 5 m, ceiling height 2.5 m. It was decided to process the ceiling and part of the walls from the middle of the height to the ceiling with lime whitewash.
Wall area: (3 * 2.5 + 5 * 2.5 + 3 * 2.5 + 5 * 2.5) / 2 = 20 m 2.
Ceiling area: 3 * 5 = 15 m 2.
Total area: 35 m 2.


Based on the average consumption of 1 liter of solution per 2 m2 of surface, it is easy to calculate the required amount for whitewashing - 17.5 liters of lime solution. You can round up to 18, or better - up to 20, because the average consumption is a rather flexible concept.
That is, 20 liters of solution is required, and this is 5 kg of hydrated lime in powder. It is worth noting that the ready-made lime dough, which is sold in hardware stores, is diluted in the same proportion, which means that the calculation is correct for him.


Supplements to improve resistance and combat deficiencies ↑
Since lime has been used in construction for a very long time, there are many "folk recipes" and methods that improve the properties of this substance. Still, modern water-based paints appeared not so long ago, and craftsmen were forced to do chemistry right at their dacha or at home.
The first problem that is solved by adding a secret ingredient to the lime whitewash solution is shallowing. A dried surface tends to stain everything and everyone who touches it. What to add to lime so that it does not smear? This ingredient is found in every home - table salt. It has a good bonding effect. Add 100 g of salt per liter of solution.


Another problem, especially when using whitewash for outdoor use, is the rapid rinsing off of the composition with water. It has long been known what to add to lime so that it does not wash off - a fatty component is introduced into it - drying oil. The drying oil repels water and allows the whitewash to last longer. Proportion 1:10, 100 ml per liter of solution.
Practicing the addition of laundry soap, grated on a coarse grater, PVA glue, wallpaper glue, acrylic primer. All this is done in order to ensure maximum adhesion of the whitewash to the wall, to exclude its swelling and bubbling.


White is not the only possible color ↑
To prevent the lime coating from becoming yellowish, an ordinary blue is added to it - methylene blue. You will need 10-20 g per liter. The whitewashed ceiling will become snow-white. But sometimes it becomes necessary to obtain a lime solution of other colors. This mass cannot be called whitewashing, and not every dye is suitable. Use only those pigments that are resistant to alkaline conditions - mineral, but in no case organic.
Pigments used for lime paints:
- ocher (yellow tint);
- umber (greenish brown);
- red lead (orange);
- mummy (red-brown);
- chromium oxide (green);
- titanium dioxide (white);
- lithopone (white);
- ultramarine (blue).
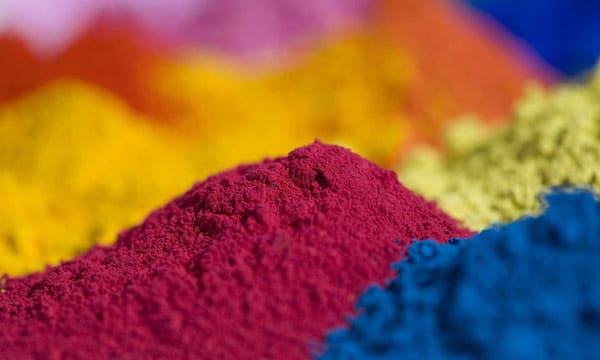

To prepare good quality lime paints, it is not recommended to add pigment in its pure form - powder. It is preliminarily diluted with water to obtain a paste. Then the pigment paste is allowed to infuse for about 24 hours. And only after that, the dye can be added to the solution. This is because the pigment grains are often difficult to dissolve and can drag behind the brush, forming unsightly streaks of color.
