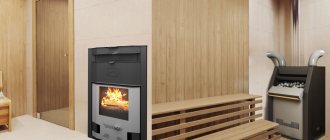
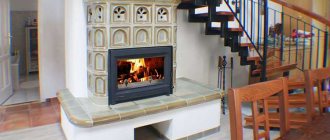
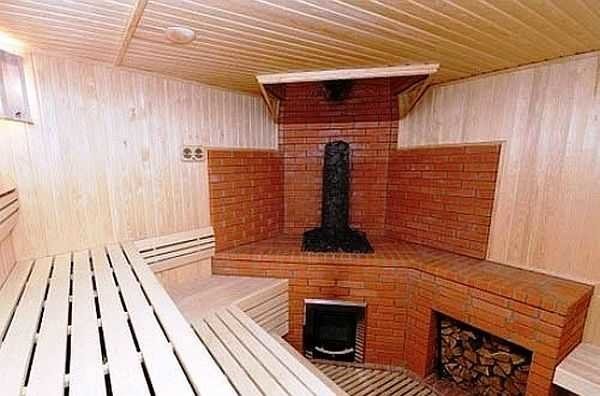
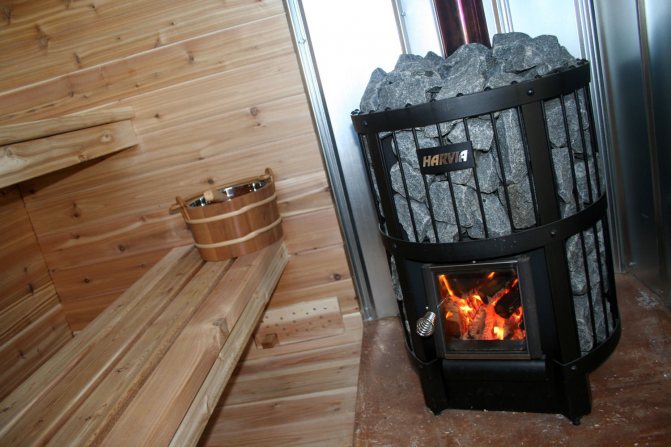
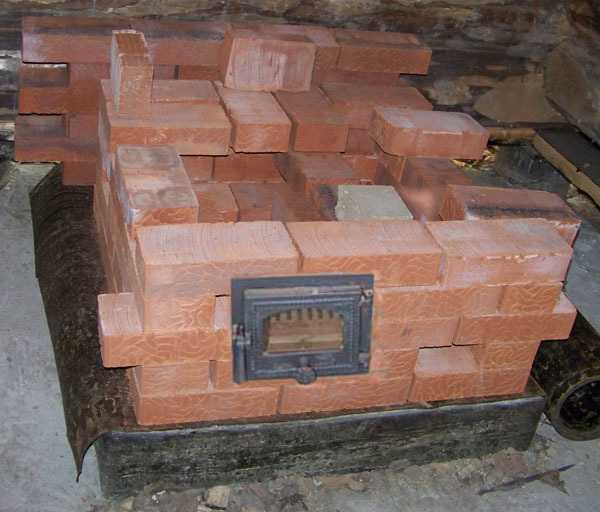
Despite the variety of wood-burning metal and cast iron sauna heaters offered on the market, the traditional brick stove design remains relevant and in demand. This is not surprising, because it warms up the steam room well, retains heat for a long time and provides it with dry steam. Also, a brick stove, in addition to a steam room, can also heat 2-3 adjacent rooms (washing, dressing room). In this article, we will tell you how to properly fold a brick sauna stove with your own hands, share our experience in terms of preparatory work and foundation construction.
Types of sauna stoves
First of all, you need to choose a suitable ready-made furnace project. Experienced furnace masters are able to develop their own schemes in relation to the conditions of masonry and operation. This means that you need to use their experience and take a ready-made scheme, and for this you need to understand what brick ovens exist for a bath.
It is very difficult to clearly classify heaters by type, there are too many of them, but conditionally all developments can be divided into groups according to the following criteria:
- method of transferring heat to the room;
- the location of the heater;
- way of heating water.
The efficiency of heat transfer largely depends on the design and operating principle of the heater. According to this criterion, the existing types of furnaces can be divided into:
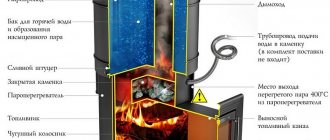
- ducted: the name indicates that the stove has one or many channels (gas ducts) for flue gases. The latter, passing through these channels, give off heat to the brick walls. The flues can run in the furnace body both vertically and horizontally;
- bell-type furnaces by I. V. Kuznetsov: here the principle of heat transfer is different, combustion products give off heat, accumulating in space under a specially made bell. Moreover, they can leave there only after cooling, so the oven comes out very heat-intensive.
Advice. Bell-type furnaces are very complex in execution, a home craftsman without experience is unlikely to be able to build one. Therefore, it is better for a beginner to start mastering the laying of channel-type brick ovens.
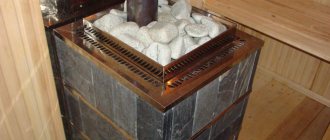
The filling of stones (stove) can be located both inside the stove and be open. This criterion does not particularly affect the quality of work. But the method of heating the water can affect the duration of heating the steam room. There are such technical solutions here:
- a register made of steel pipes or a stainless steel tank built into the body of the furnace, or rather, into the flue;
- hob: water is heated on it in large containers.
It should be borne in mind that a good brick stove with a hob will warm up the steam room faster, but the inconvenience with hot water in pots cannot be compared with a flow-through heat exchanger inside a gas duct connected to a storage tank.
Sauna stove projects
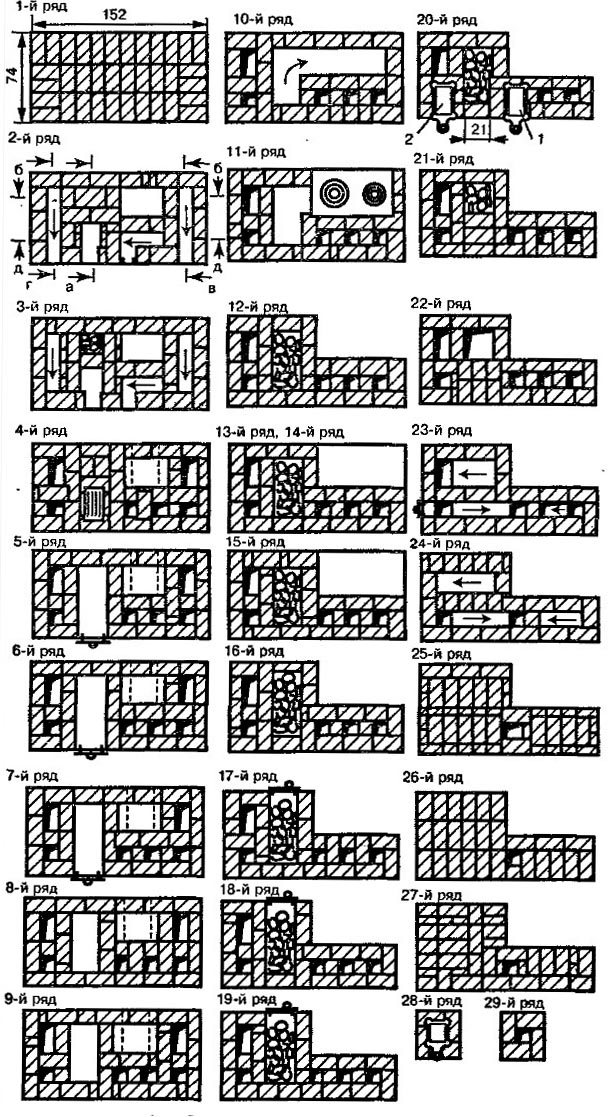
As already mentioned, there are a great many different projects of brick ovens. We will offer several typical schemes, you can use them or find something suitable in the technical literature. So, the first is a diagram of a stove for a brick bath with an open stove and a built-in tank for heating water:
Note. In this diagram and in the future, the following conventions are used:
For the construction of this furnace, you will need 415 pcs. bricks and components such as:
- firebox door 210 x 250 mm and blower door - 140 x 140 mm;
- cleaning doors 140 x 70 mm - 2 pcs .;
- stainless steel tank 200 x 300 x 490 mm;
- cast iron plate 410 x 410 mm;
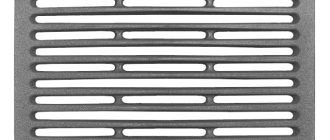
- grate grate 175 x 255 mm;
- gate valve 120 x 230 mm and 2 gate valves 130 x 130 mm.
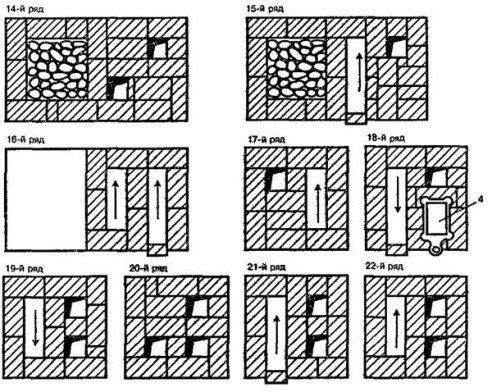
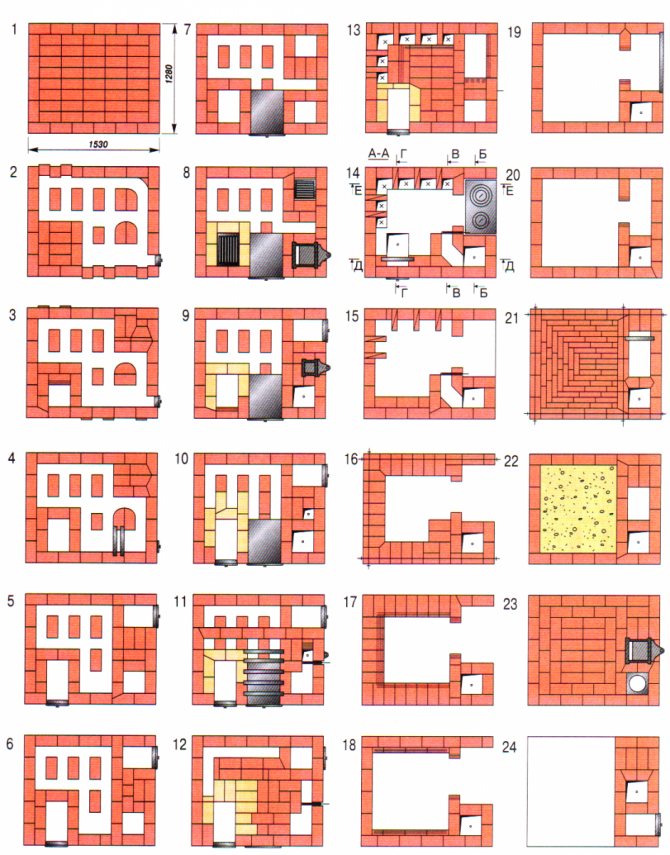
The following diagram shows the order of the sauna stove:


Materials and tools
The acquisition of quality material is the first step towards the construction of a durable brick structure for a bath. Brick deserves paramount attention: for arranging the stove of the stove and chimney, a red refractory type is used that can withstand heating up to 850 ° C, the laying of the furnace is carried out with fireclay bricks, which retain their properties at temperatures above 1500 ° C. To lay the foundation, coarse sand and clay will be required; roofing material is used as a waterproofing material between the base and the sauna stove.
Additional materials for arranging a sauna stove:
- furnace casting;
- steel corner and tape;
- container for heating liquid;
- asbestos cord;
- galvanized wire.
The listed materials will make it possible to build the simplest model of a brick sauna stove; more complex structures will require additional parts. In order not to interrupt the process to find the required tools, take care of their availability in advance. In addition to an electric drill and a grinder, you will need a container for the solution, a level, a tape measure, a plumb line and a wooden mallet.
Heater stove with heating plate
This sauna heater is equipped with a 2-burner stove instead of a built-in tank, and the heater is located in the body of the stove, directly above the firebox. Although the design provides for the possibility of installing an internal hot water boiler, this is reflected in the corresponding layouts of the stoves for baths:
The construction of the heater will require 650 bricks, as well as stove accessories:
- firebox door 210 x 250 mm and blower door - 140 x 140 mm;
- cleaning doors 140 x 70 mm - 4 pcs .;
- cast iron plate 410 x 710 mm;
- grate grate 175 x 255 mm;
- steel circle Ø20 mm - 3 m;
- stainless steel water tank 220 x 380 x 630 mm - if necessary.
In this version, the order of the masonry for the stoves is as follows:
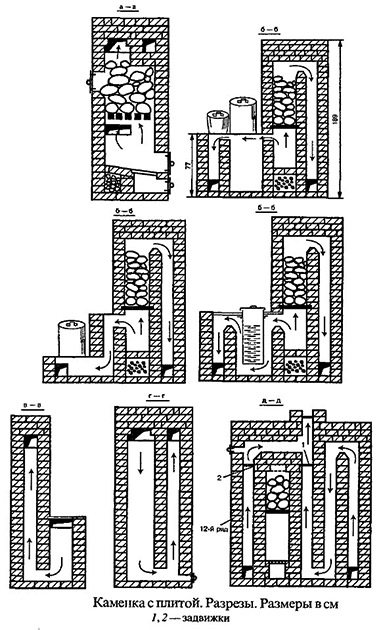
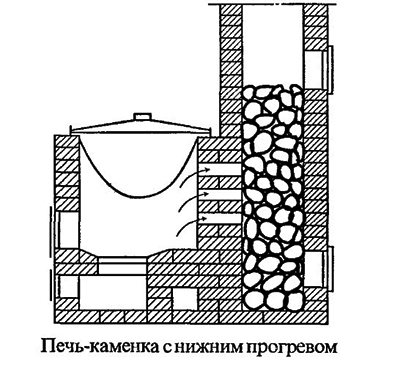
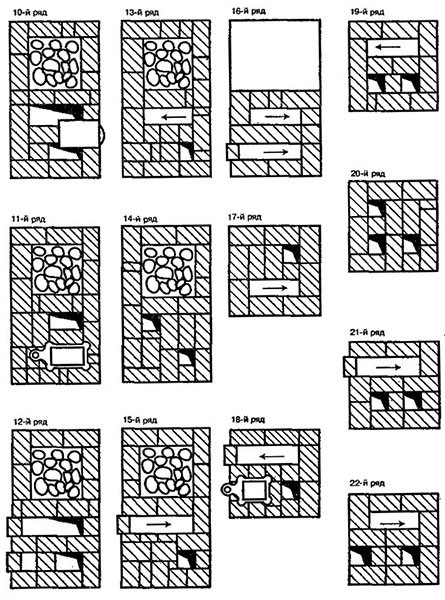
Sauna stove with bottom heating
This is a small brick stove, which, due to its design, requires a good foundation. In fact, it will take longer to build his device than to complete the masonry itself. Here is a sectional diagram of the heater:
In addition to 260 pcs. bricks for construction are still needed:
- firebox door 210 x 250 mm and blower door - 140 x 140 mm;
- cleaning doors 140 x 140 mm - 2 pcs .;
- chamber doors for stones 210 x 250 mm - 2 pcs .;
- cast iron plate 410 x 410 mm;
- grate grate 175 x 255 mm;
- gate valves 130 x 240 mm and 130 x 130 mm.


Preparation for the construction of the furnace
Before you start building a brick oven in the bath, you need to prepare the necessary tools and materials. The set of tools required for work is shown in the figure:
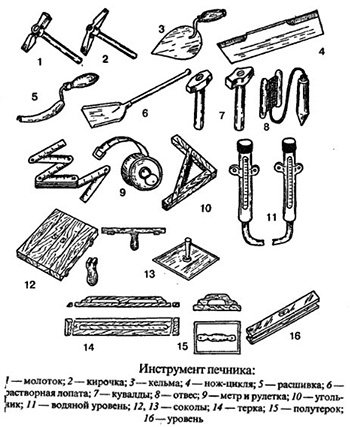
As can be seen from the figure, the set should contain tools for splitting and shrinking bricks (pick, hammer), for working with mortar (trowel, grater) and various measuring devices (tape measure, level).
For reference. Modern stove-makers, instead of chopping stones with a pickaxe, often use cutting machines - lathes, grinders.
In addition to the tool, some devices will help to build a furnace:
- a sieve to sift the sand;
- a small container, bricks are soaked in it;
- various scaffolding or goats.

Which brick to use for a sauna stove?
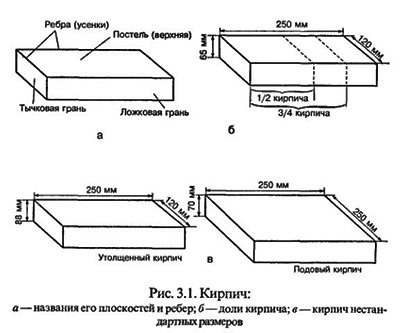
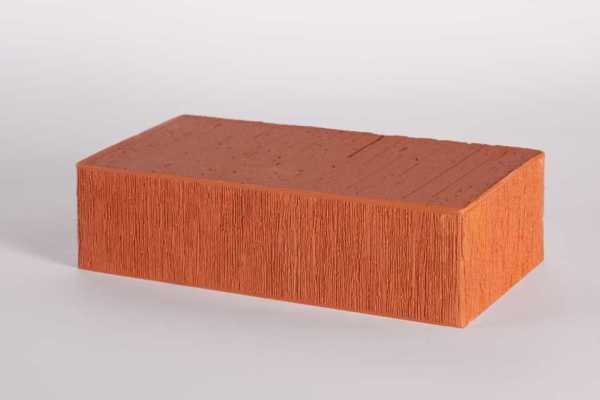
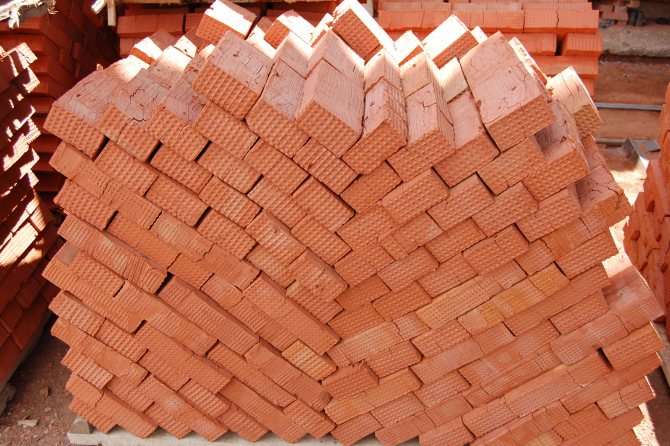
It must be understood that the stove in the bath will operate in more extreme modes than a conventional stove for heating a house. This means that masonry bricks should be selected of good quality, without damage, chips and cracks, best of all - with smooth spoon edges (see the figure below). For the construction of furnaces, 2 types of bricks are used: red ceramic full-bodied and refractory (chamotte). The dimensions of a standard brick are 250 x 120 x 65 mm, the approximate weight is 3.5 kg.
1 m3 of standard ceramic bricks contains approximately 480 stones with a total weight of 1700 kg. However, some brick kiln projects may involve the use of non-standard stones, as shown in the figure below:
Advice. When buying a brick, take it with some margin for rejection. The size of the stock depends on the quality of the material, and also on the skill of the master to accurately and correctly prick or cut it. An inexperienced stove-maker needs more supply.
Furnace masonry materials
When choosing a material, the main thing is to choose a high-quality and well-fired brick. The brick should be with even edges, without cracks and chips. When dropped, it should fall apart into several large pieces. If you get a lot of little things, the game is not suitable.
Brick for laying a sauna stove should be with even edges, without chips and cracks
For masonry, it is necessary to use ceramic refractory bricks, which are also called oven bricks. Ideally, all of it should be of a standard size - 125x250x65 mm. But the reality is that the dimensions differ not only from different manufacturers, but there may also be a significant difference between batches of the same manufacturer. Therefore, you have to carefully select them in size. Many stove-makers first lay out each row without mortar, expose the bricks one by one, leaving gaps in the seams. Many mistakes can be avoided this way.
You can first lay out a row of bricks without mortar, choose a suitable size
There is also a special oven brick: only three sides of it are fired. One spoon is left without firing. And the uneven unburned side is laid out (from the firebox). But this is quite a rarity. Most people use regular red ceramic.
Fireclay bricks Ш5 of white, light pink or slightly yellowish color are used for laying the fuel zone. It can withstand high temperatures. Its dimensions are somewhat different. But this does not play a special role - in most furnaces, the firebox made of chamotte is not connected with the furnace body, and there is no need to adjust the rows to one level. But if, suddenly, you need to align, you can file it down, having achieved the required compliance.
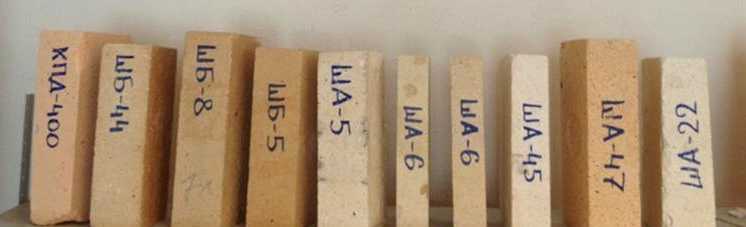
Fireclay bricks can be different. For laying the fuel zone of the sauna stove, Sh-5 is used
Important! It is not recommended to use fireclay bricks for laying the entire furnace. And it's not just the price (it is decently more expensive than red). The fact is that chamotte cools down quickly. Its task is not to accumulate heat, but to withstand high temperatures.
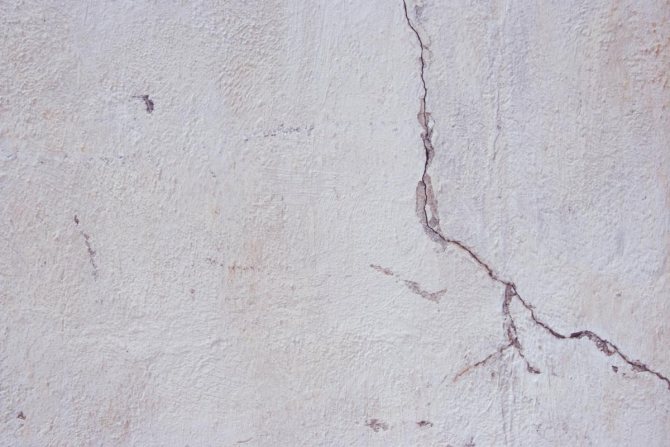
The preparation of mortar for fireclay bricks is carried out from fireclay refractory clay - white. It is sold in specialized building materials stores. You can use ready-made compositions for laying fireclay. But you cannot put the whole furnace on this solution: at a temperature of 600-800 ° C, this composition is sintered into a monolith. There are simply no such temperatures in outdoor masonry, so over time the solution simply spreads out and spills out, and the masonry collapses.
For the rest of the furnace design, a solution of clay and quartz sand is used. The ratio of the mortar mixture is 1: 5 (1 part clay, 5 parts sand). The sand can be used from quarry or river origin. The river is slightly worse - its grains of sand are rolled, round, and such a solution has the worst characteristics. For the stove to stand for a long time, it is better to buy quarry sand. It must be sieved through a sieve with meshes of 2-2.5 mm in order to exclude the ingress of large particles in the solution.
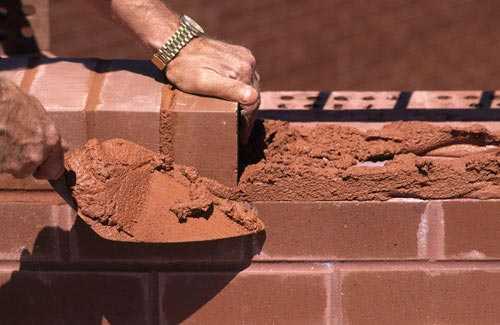
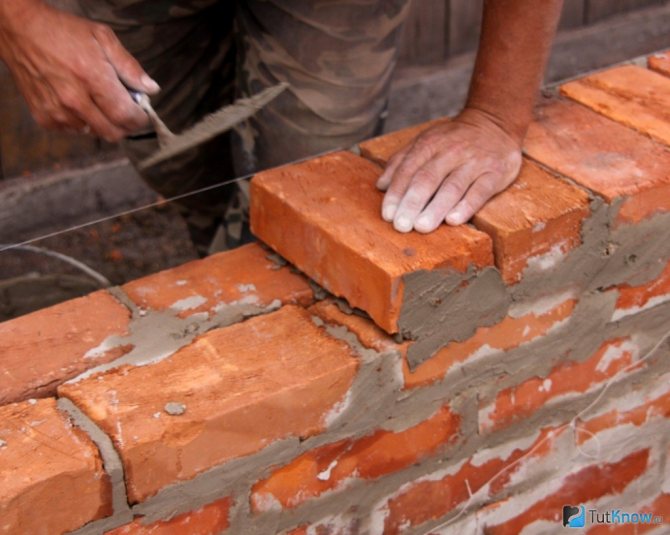
The brickwork of the furnace is performed on clay-sand mortar
Clay is suitable mined from quarries, with a depth of at least 2 meters. It is necessary to be attentive to her choice. You can check the quality of the clay yourself. Soak a small amount in water for one day (200 g). Roll a bun with your hands and leave to dry under a canopy. Check for cracking after two days. To do this, it is necessary to "drop" from a height of 170 cm onto a slab or stone tile. If the bun has crumbled into several large pieces, it means that the clay is suitable for laying the stove.
Having chosen a suitable clay, you need to prepare it: soak it in water to a pasty state and rub it through a sieve. First with larger cells, then through a fine mesh.
You will also need a wire with a diameter of 2-3 mm. It will be used for fixing the furnace and blower doors.
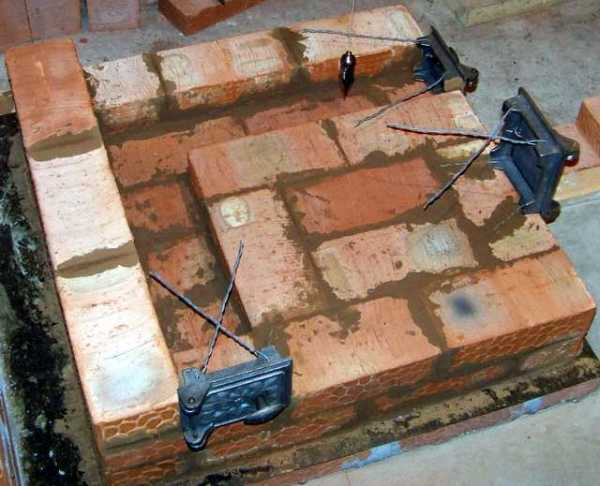
This is how the furnace casting is fixed with the help of wires between the rows of masonry
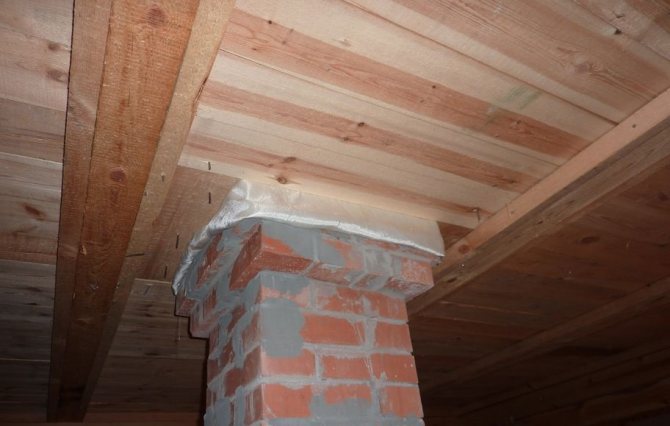
To install the furnace casting, you will also need an asbestos cord - they are wrapped around those parts of the casting that are in direct contact with the brick, thus reducing the casting temperature and preventing cracking of the masonry. You also need to be careful when passing the chimney through ceilings and roof structures: be sure to lay sheet asbestos with heat-insulating material (you can use clay solution). For more information on how to lead a pipe through the roof, read the article "How to bring a bath pipe into the wall and through the roof"
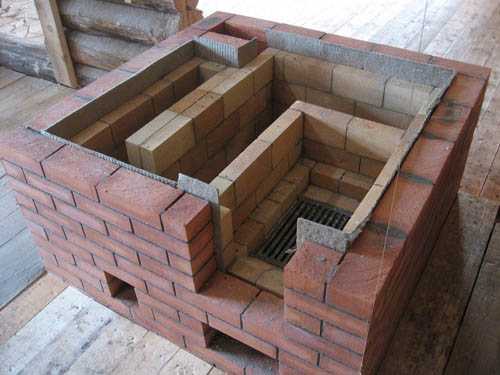
The fireclay core and the furnace body are laid out separately. To increase the temperature in chamotte, sometimes basalt cardboard is laid between them.
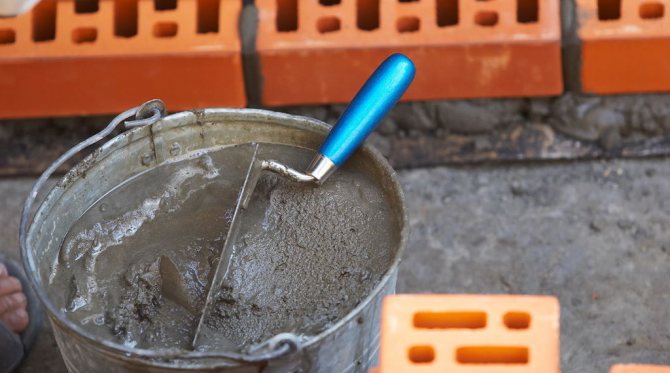

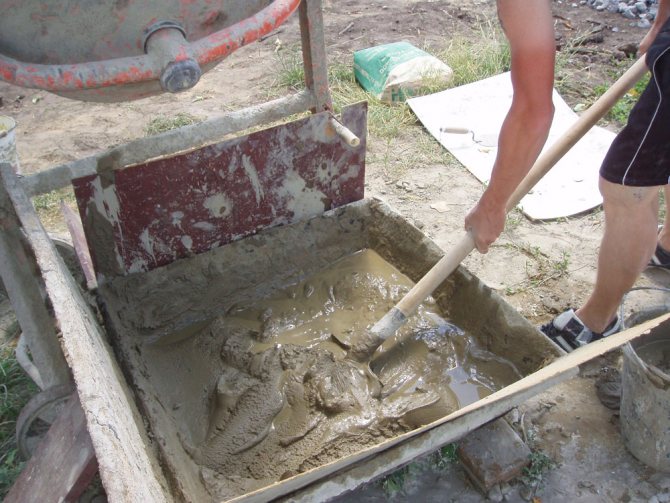
Masonry mortar
Kiln brick laying before the pipe is carried out exclusively on clay mortar, without cement. To prepare it, you need to take the same amount of sifted sand and clay cleared of impurities (that is, the ratio is 1: 1), mix and add water. A good consistency is when the solution slides off the shovel easily, but there is no excess water in it.
Advice. It is better for a novice craftsman to purchase a ready-made building mixture for laying stoves.
Clay can also be taken from the nearest ravine and prepared with your own hands. It will need to be soaked in a trough for 2-3 days, and then mix thoroughly and manually push the mixture through a sieve, separating stones and other foreign fractions. The amount of water for soaking is taken in a 1: 1 ratio to clay. As for the masonry of the firebox made of fireclay bricks, an equally refractory mortar is needed here. For its preparation, instead of sand, chamotte crayons are added to the clay in the same proportion.
Thermal insulation of a brick bath
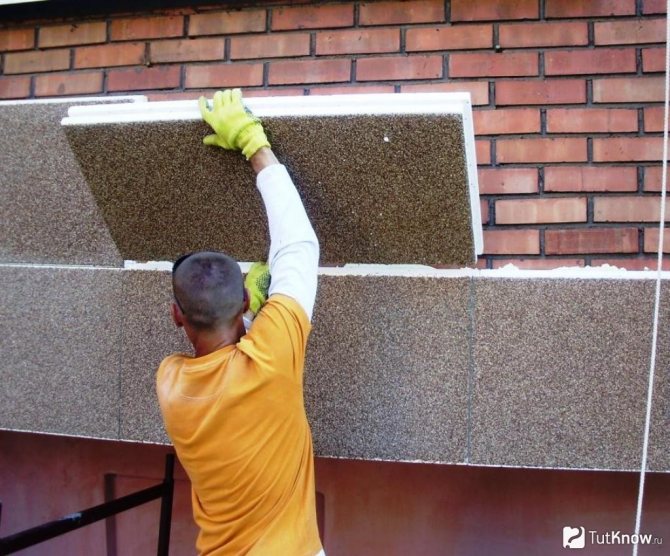
The brick walls of the bath are subject to mandatory insulation. If the walls are laid in the form of a "well", the space is filled with half-meter layers of a mixture prepared from "fluff" lime, sawdust and light slag in a ratio of 2: 2: 1. Each of the layers is filled with a solution of lime.
Tiled heaters, which are used for other types of masonry, are more profitable to use. They are attached to the wall from the inside of the room with synthetic binders and clamps.
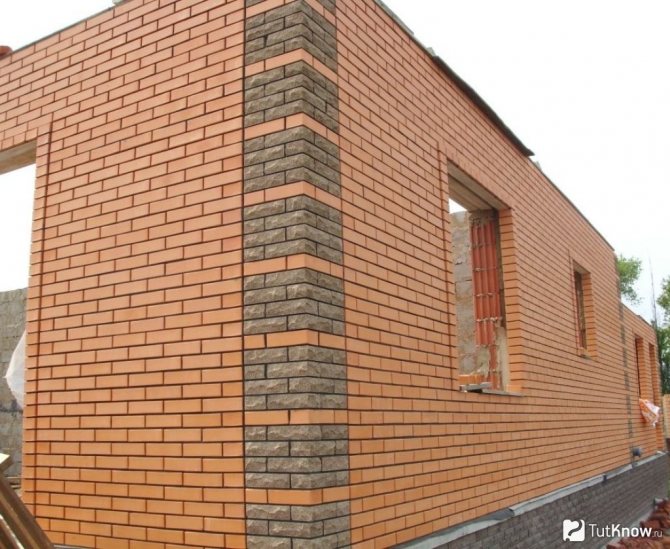
Outside, the brick walls of the bath can be insulated with polystyrene sheets, then plastered and sheathed with decorative panels.
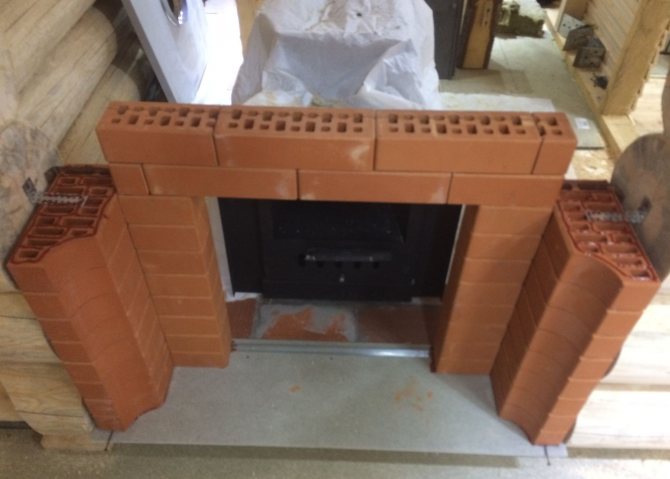
Sauna stove construction
Any, even the simplest oven for a bath requires a solid foundation. As a rule, the foundation serves as the base, although in some cases its device is not required, the stove is placed directly on the floor, laying a sheet of asbestos and metal. This is allowed when the total weight of the structure with the pipe does not exceed 750 kg, or the foundation of the building itself is a monolithic slab. In other cases, you need a separate base located at least 50 (or better than 150 mm) from the foundation of the building.
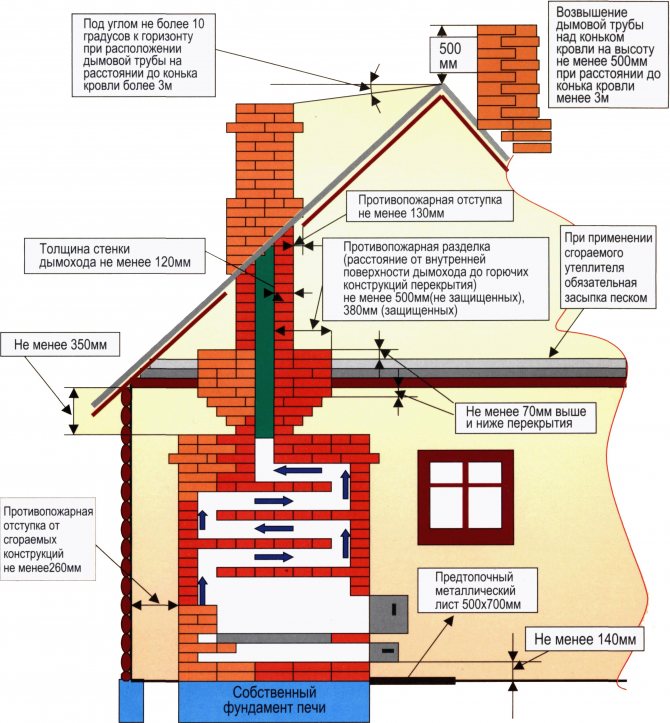
Advice. Even before installing the foundation, keep in mind that all wood-burning stoves must be placed from building structures at a certain distance in order to avoid a fire, as shown in the figure:
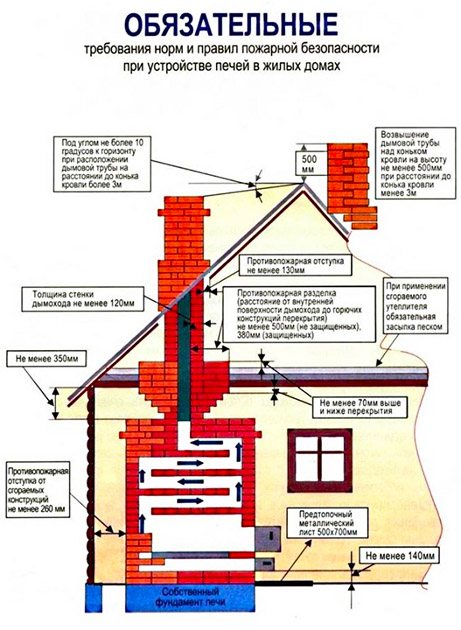
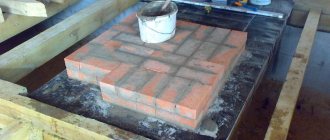
The easiest way is to pour the same slab of concrete to the size of the furnace, evenly distributing its entire load on the ground. To do this, a pit is dug with a depth of no more than 30 cm, its bottom is compacted, and then crushed stone is poured to a height of 100 mm. Further, a foundation up to 7 cm thick is poured from a cement-sand mortar, and after it has solidified, a formwork and a reinforcing cage are installed. Then concrete is placed in the resulting shape to the remaining height. Complete hardening of concrete - 3 weeks.
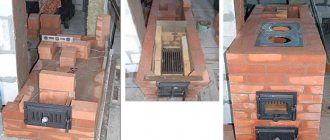
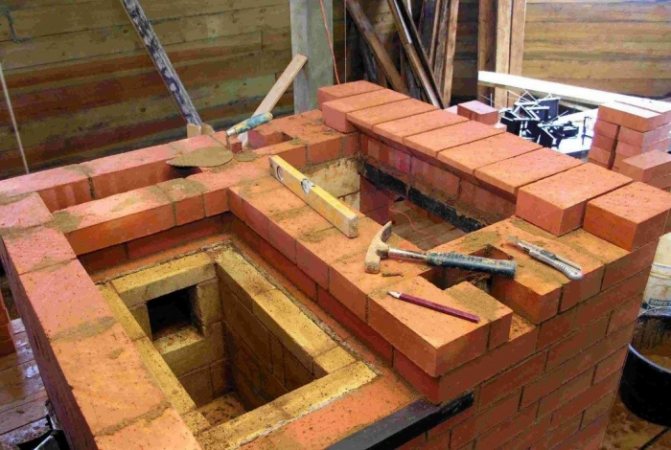
Further, in order to lay out a brick oven, you must adhere to the following rules:
- soak each brick in a container with water before laying;
- apply the solution not to the stone, but to the previous row;
- lay the brick with the smooth side to the smoke channel;
- first lay out each row without mortar for adjusting the stones;
- the remains of the solution are removed, and washed off from the inner surface and wiped dry every 3-4 rows;
- horizontal and vertical checks are performed on each row.
Important! If small-sized stoves have a firebox made of refractory bricks, do not tie up fireclay and ordinary masonry! A gap is left between them, filled with a solution with ground mineral wool.
After the end of the laying, it is allowed to dry for a couple of days, after which a trial kindling is done with a small amount of firewood. When the dampness is gone completely, the stove can be heated fully.
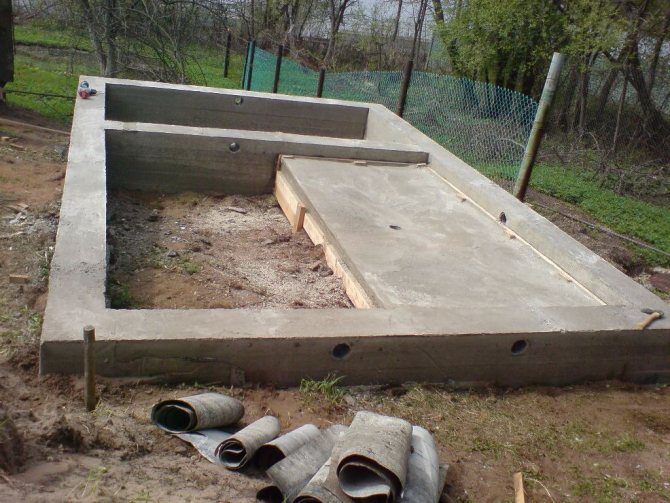
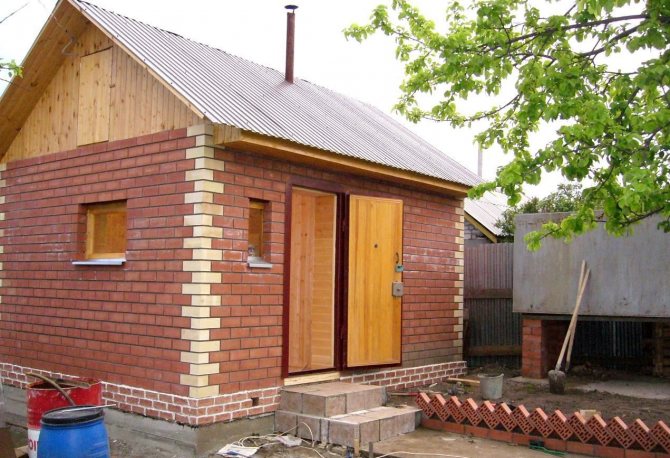
Construction of the foundation for a brick bath
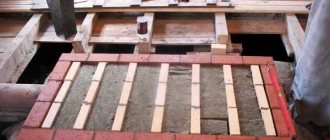
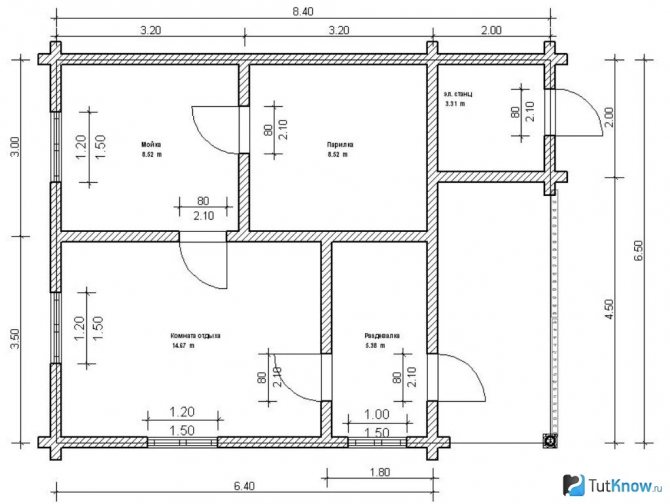
For our bath we will carry out a reinforced strip foundation. Before installing it, the building site must be cleaned and the vegetation layer of the soil removed. The breakdown of the axes and the construction of the perimeter of the future foundation on the terrain is carried out using a cord, pegs and a construction tape. All dimensions are taken from the design documentation. A trench for the foundation is dug 10-15 cm below the level of soil freezing in your region.
The bottom of the trench dug for the foundation must be covered with sand and gravel by 10-15 cm. Then it is compacted and a reinforcing cage with a diameter of 12 mm rods is installed in the formwork.
For the passage of ventilation ducts into the future bath, the foundation must be equipped with appropriate holes. They are cut in opposite formwork panels and connected with a sleeve from a pipe or a wooden box. Naturally, all this happens before the concrete is poured into the formwork.
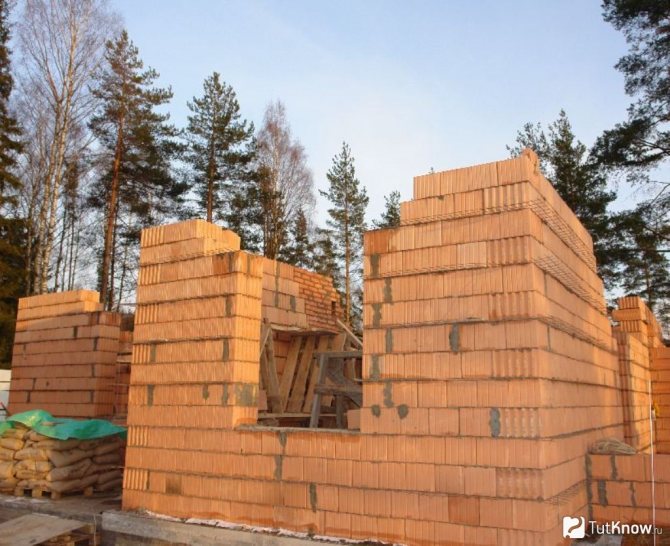
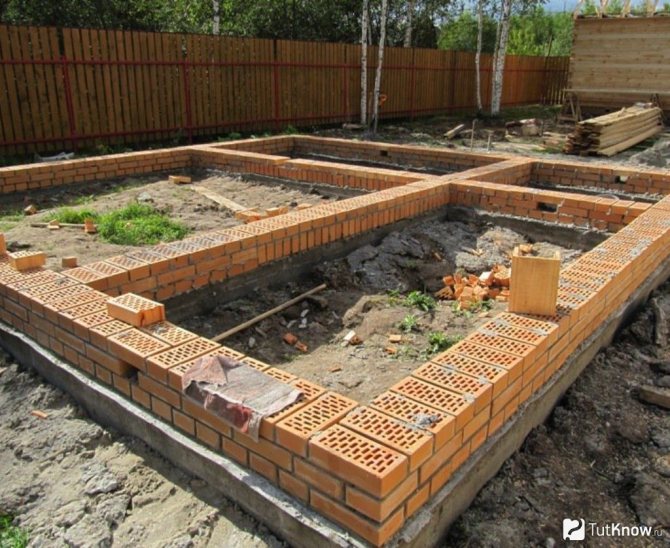
The concrete is poured up to the design level. After it has solidified, the foundation must be covered with waterproofing and laid on top of 3-4 rows of brickwork for the basement of the bath. In its last row, we leave a hole for the passage of communications. We lay the drainage pipe under the foundation and take it out at least 5 m beyond its borders.
Solid brick can be used as a foundation for partitions of internal premises.