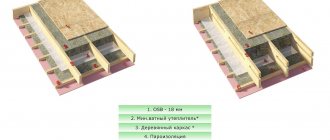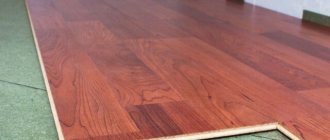

Warm floor on plywood how to make and what to look for
The device of a warm floor in residential premises has long ceased to be a novelty and is regularly used during repair work. This popularity is due to the ability to independently mount a warm floor on plywood, its versatility (it can be laid on both concrete and wooden surfaces, and even on plywood) and comfort that improves living conditions.
Features of laying underfloor heating
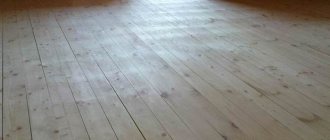
In contrast to the standard installation of underfloor heating, the underfloor heating is laid on plywood without fixing it to the base of the floor, that is, to the plywood. At the same time, plywood sheets are connected using metal brackets, and not attached with dowels. This approach prevents the appearance of cracks and allows you to regulate the expansion of wood with changes in humidity and temperature conditions.
Installation of plywood under a warm floor
There are several ways to mount plywood:
- on a concrete screed - plywood with a thickness of 12 mm is used;
- on a wooden floor - plywood of any thickness is suitable, attached with self-tapping screws;
- on wooden logs - a 20 mm thick plywood sheet is used, or two layers of plywood, 9 mm thick.
How to install a warm floor under linoleum or carpet?
When installing an electric warm floor under plywood, and then linoleum or carpet, it is also necessary to take into account all the subtleties. It is recommended to use all the accessories from the same manufacturer, this will help prevent problems in the future when using a warm floor.

Thermal film (warm film floor)
Under the flooring, a film warm floor is used on plywood. Its assembly is somewhat like a "sandwich":
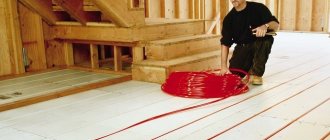
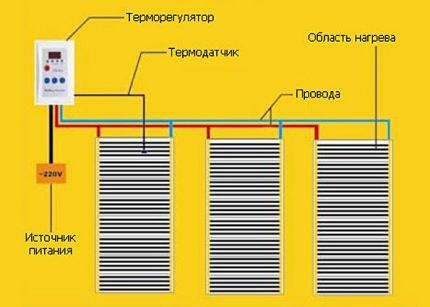
Underfloor heating installation scheme
- It is laid on the main floor
- Then a layer of thermal film is laid.
- A plastic wrap is placed on the thermofilm.
- From above, using plywood or chipboard, they build a hard floor, and at the same time ensure the leveling of the floor.
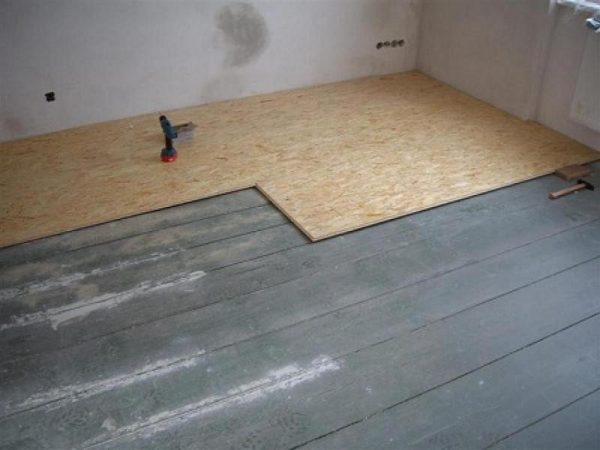
Important! It is not recommended to use fiberboard or OSB sheets, since they do not provide a flat floor surface, and fiberboard tends to bend under gravity pressure. ... Plywood sheets are attached to the main floor using self-tapping screws or dowels
It is necessary to "flood" their caps so that the floor surface is free of unevenness. All joints between the sheets are putty and after 48 hours linoleum or carpet can be laid.
- Plywood sheets are attached to the main floor using self-tapping screws or dowels. It is necessary to "flood" their caps so that the floor surface is free of unevenness. All joints between the sheets are putty and after 48 hours linoleum or carpet can be laid.
Laying underfloor heating under tiles
Often in the kitchen, the floors are cold due to the use of tiles, but a warm floor laid on plywood helps to cope with this disadvantage. It is necessary to lay a warm floor under the tiles in compliance with all instructions, this will help to avoid adverse consequences in the future. Before laying the tiles, plywood must be properly processed - cleaned of minor defects, dust and sanded. Warm floor allows you not to worry about the health of the household and creates a cozy atmosphere in the house.

The scheme of laying a warm floor under the tiles


Preparatory work

Preparing the wood floor
Before laying plywood on a wooden floor in a house, the flooring and the surface must be prepared. DIY activities are as follows:
- the base for the installation of plywood must be cleaned of debris, dirt and treated with antiseptic compounds; when laying without logs, priming will need to be performed;
- checking the condition of the floor, removing and replacing damaged elements;
- if there is time, it is recommended to arrange the sheets vertically and dry them for 2-3 weeks, while the temperature should be room temperature or slightly higher;
- after drying, the sheets are treated with antiseptic compounds;
- further it is necessary to ventilate the material;
- if there is a need to increase the strength, it is worth treating the plywood with acrylic varnish, the coating is made in several layers;
- when laying with your own hands, you need to bring the sheets into the room in two days and spread them horizontally, this is done so that the material adapts to the temperature and humidity conditions of the room.
Concrete floor device
Well do it yourself detailed overview construction instructions
It is possible to immediately solve the problems associated with the installation of the warm floor system on a concrete base, and you can choose the appropriate type of linoleum when the subfloor already exists. If instead of it there is only an old rotted wooden base or just soil, you need to start building the concrete floor itself.
The process consists of several stages:
- dismantling the old floor, if any;
- alignment of the base;
- pillow devices;
- arrangement of an insulating layer;
- preparation and pouring of concrete solution.
Leveling the soil is carried out using a shovel. Then they begin to create a pillow. For this, crushed stone or small pieces of brick, broken slate are poured to a height of about 50 mm. All this is slightly rammed.
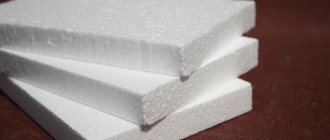
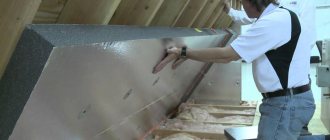
The perimeter of the room is covered with a sheet of foam plastic having a thickness of 20-50 mm. It will serve as both formwork and at the same time balance the thermal expansion of the concrete base. Clean sand is poured onto this layer - 10 centimeters.
This is followed by the laying of the second type of insulation. Most suitable for this, preferably the Penoplex brand, which is produced in the form of rigid plates with a thickness of at least 50 mm.

Expanded polystyrene or penoplex is resistant to temperature extremes, environmentally friendly, tolerates compression loads well, moisture resistant, durable
On the sheets, the manufacturer has provided a lock connection, so when they are laid there are no gaps left. During installation, you need to monitor the horizontal position using a level. Waterproofing is not needed here, because the material is extremely resistant to moisture.
The next step is to prepare the solution. The optimum ratio of components is 1 part cement, twice as much sand and three times as dropout. As a result, the solution should not be fluid, but also not overly thick.
In order not to overload the floor, light fillers and leveling agents are introduced into the concrete solution. Before pouring the solution, beacons are placed near the walls, a cord is pulled between them. Guided by these marks, place intermediate markers.

A cement base of a traditional composition with a height of 10 mm weighs about 20 kg, so it can be used only when a warm floor is arranged on the first floor of a house or when there is a very strong floor under it.
The surface is moistened and the solution is spread on it between the beacons and leveled with the rule. As the setting progresses, the surface is leveled. At the end, a building level is applied to check the horizontalness. After the marks are removed, the resulting voids are poured with a solution and everything is left to dry completely.
Pros and cons of using plywood for flooring
Plywood covering has a whole list of technical advantages in comparison with other types of building materials:
- the material has the minimum moisture content - up to 15%;
- when excessive mechanical stress occurs, plywood extinguishes most of it, preventing damage to the concrete floor;
- in the manufacture, natural veneer is used without the addition of harmful impurities that are present in chipboard and OSB. It is worth noting that more and more people are laying OSB on the floor, since this material has proven itself well;
- the material plays the role of thermal insulation from rough floors;
- unlike pouring a cement screed, laying wood slabs on logs is a less time-consuming process;
- plywood has high resistance to bending, so it can withstand very heavy loads;
- There are several grades and grades of plywood that makes it suitable for use as rough and finish flooring.
Among the disadvantages of laying material on logs, the following points can be distinguished:
- poor resistance to large temperature changes;
- the material is afraid of moisture, so it is advisable to use it in dry rooms.
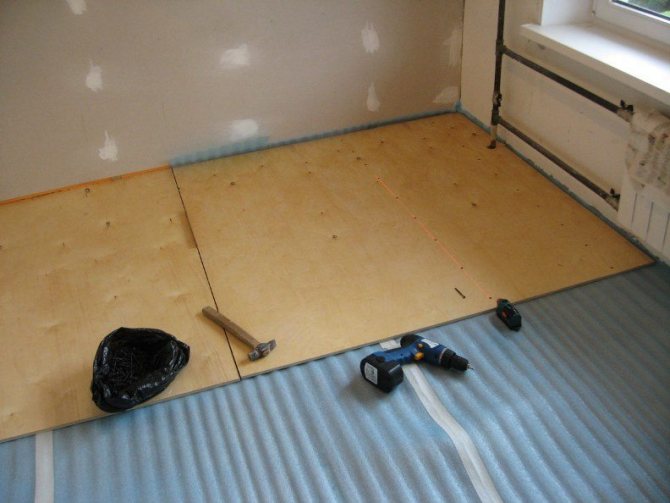
Preparing the base for plywood flooring
Warm floor under linoleum reviews
Fastening plywood to beams with a thickness of 30 mm. With this value of the base thickness, the required rigidity is provided at which the mounted tiles cannot crack or vibrate.
To eliminate the stress of a solid sheet of plywood, it is divided into several parts. Then they are fixed on a plank floor or a log system in a checkerboard pattern. If it is necessary to lay the substrate on the logs, the gaps between them should be within 30-40 cm.
When laying plywood flooring, there is no need to limit the number of self-tapping screws, since their more frequent pitch minimizes the plywood sagging and reduces its vibration. Self-tapping screws must be screwed so that their heads are recessed into the plywood. This should be done to prepare the base for floor and wall tiles.
During the installation of a plywood base, it is necessary to regularly check its horizontalness by means of a building level.
Situations often arise when you have to use thinner plywood. What to do in this case? You can use thin material, but in several layers. In this case, it is necessary to lay out the squares so that the seams of the lower layer do not coincide with the upper ones. To obtain the required hardness of the plywood base, the sheets are fastened to each other and fixed with self-tapping screws.
Laying plywood on a wooden floor - which one to choose and how to lay it
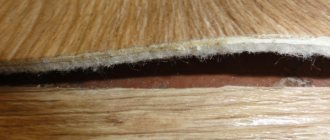
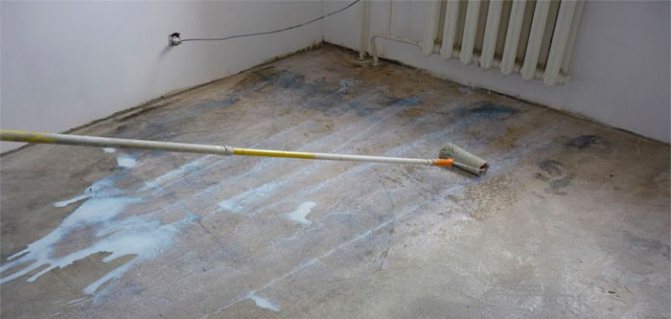
You can check the humidity using an elementary method. Lay a piece of plastic wrap on the concrete overnight, press it tightly around the perimeter with any objects. If the concrete is wet, then the evaporation of water from the surface will continue all night, it itself keeps heat for a long time. The plastic film will cool down quickly, high humidity under it and low temperature will create conditions for condensation, the so-called dew point will appear. In the morning, look at the film, there is condensation - take active measures to dry the concrete, there is no condensation - you can start laying plywood.

Methods for measuring the moisture content of concrete
Step 1. Inspect the condition of the concrete screed surface. Small cracks do not need to be repaired. Additionally and more carefully it is worth checking the uniformity of the dry screed. To do this, tap it, places with a dull sound indicate the presence of voids, here the builders allowed a marriage.
The decision will have to be made independently: if the sound is very deaf and the air pocket is large, then repair work will have to be done. At this point, a thin top layer of the screed is removed, the recess is repaired. Time, of course, will be lost, but it is better and cheaper than redoing the entire floor later. If there is heavy furniture in this place, then the finishing laminate will be deformed.

How to repair screed potholes
Step 2.With an even spatula, scrape off the protruding sharp parts of the cement-sand mortar a little, the dust should be thoroughly swept up or it is better to vacuum it.
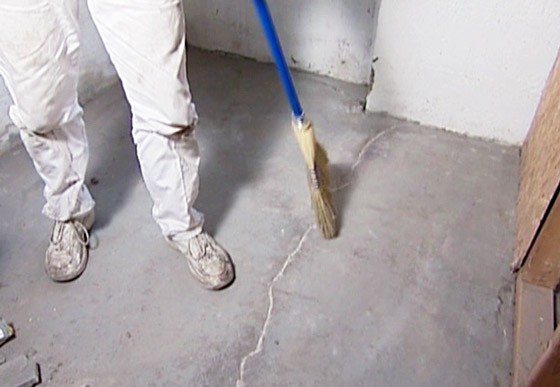
The screed needs to be swept and vacuumed.
Step 3. Apply a primer. If it is expensive and of high quality, then it is enough to soak the surface once. There are doubts about the quality - it is much safer to do a double primer. Conclusion - don't buy cheap materials. As a result, you will lose more time, and you will not achieve monetary savings. We'll have to do all the work twice.
Concrete priming
Step 4. Prepare construction adhesive. When all the preliminary work is done correctly, then any glue will perfectly cope with its tasks. Moreover, the loads on plywood sheets are only vertical, and even then insignificant. No effort, no displacement. Before using the glue, read the manufacturer's instructions and follow its recommendations.

Plywood adhesives

Fastening plywood with dowels
Step 5. Apply glue to the floor area and use a comb to remove excess. The glue should be thick, similar in consistency to a putty solution. Let the prepared area slightly exceed the dimensions of the plywood sheet. Place the plywood carefully on the prepared place and fix it with dowels. You will have to work with an assistant, one will definitely not be able to put it down.

Adhesive application under plywood
First fix the corners and then the rest of the surface. To set the gap between the plates, use cardboard spacers; their thickness is 2-3 mm. The holes will have to be drilled immediately in plywood and concrete; you need to use drills with victorious solders. To make plywood easier to drill, do not be lazy to periodically grind the solders.

Fixation of plywood sheets
Before fixing the next sheet, do not forget to align the bottom edge with the previous one with a straight ruler. This will help you avoid additional cutting of the plywood, reduce waste and speed up the installation process. If the tie is strong, then you can use the simplest and cheapest hardware. They should go into concrete by about 3-4 centimeters. If the concrete is of poor quality, then you need to use special dowels with spacers.

We screw in self-tapping screws
Lay the next row of sheets a little with a shift in a checkerboard pattern, do not allow the four corners to be at one point. It is not necessary to seal the holes from the dowel caps under the laminate, putty the gaps and scrape small irregularities in the base, such work is done only under the linoleum.
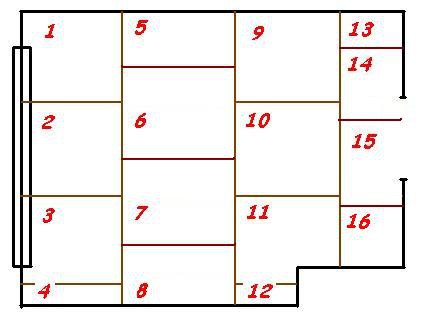
Scheme of the sequence of laying plywood on the floor

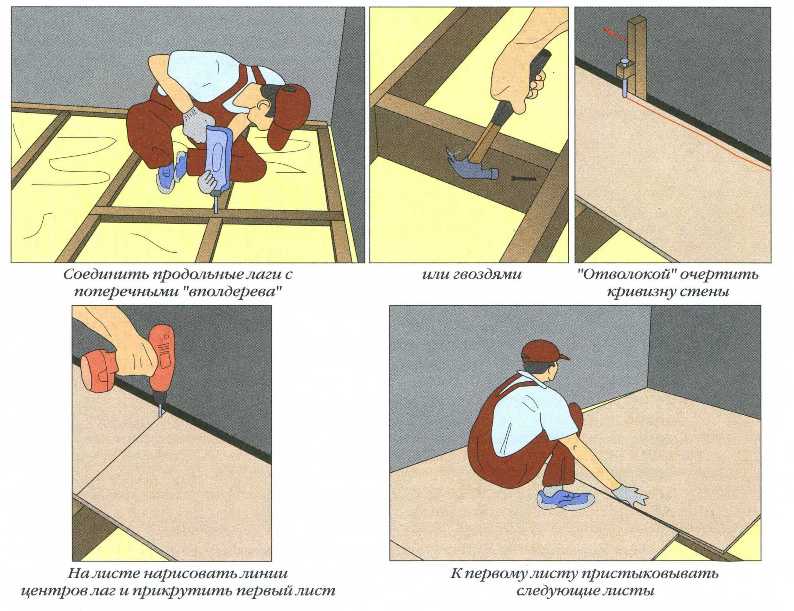
DIY plywood laying
Step 6. Sew up the cracks near the wall, do not forget to leave an expansion gap.
This completes the preparation of the plywood base, you can start laying the laminate floor.

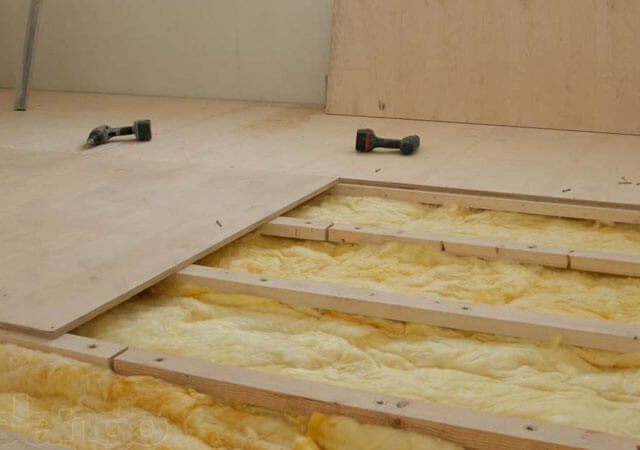
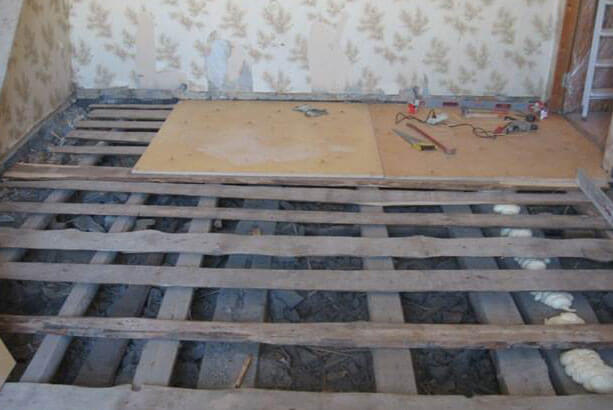
Plywood on logs

Layout of plywood on logs with insulation and laying of communications
Step 1. Check the horizontal position of the log, the spread in height should not exceed 2-3 mm. Such fluctuations in height after laminate flooring are completely invisible.

Check the horizontal lag
If the lags are not in the same plane, then the problem can be solved by two methods.
Method one
- Use a level and a rope to find problem logs. All others need to be aligned at the lowest.
- Note the amount of discrepancy horizontally. Draw straight lines along the entire length of the log.
- Using a portable electric plane, carefully adjust the height of each log under one horizontal plane. It is not necessary to achieve great accuracy, a few millimeters do not play any role. This method of lag leveling is quite time consuming, but the most effective and reliable.

Align the lags
Method two
- In the same way, find problem structures, align the extreme ones and pull a rope between them.
- Taking into account the gap between the rope and the log, select wooden slats or wedges. You can fix them to the lags with small carnations, it is advisable to additionally use wood glue.
- Check the position of the lag using a flat rod or a long level.
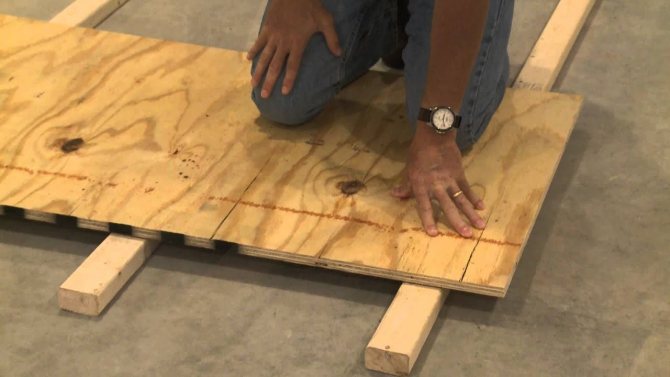
Step 2. Taking into account the distance between the logs, cut the plywood sheets. The work must be done accurately, the joints of two adjacent sheets should be fixed on one lag, and its width rarely exceeds 10 centimeters, only five remain per sheet. The width of the indentation from the edge of the sheet should be subtracted from this value, otherwise it will crack.

Cutting pattern example
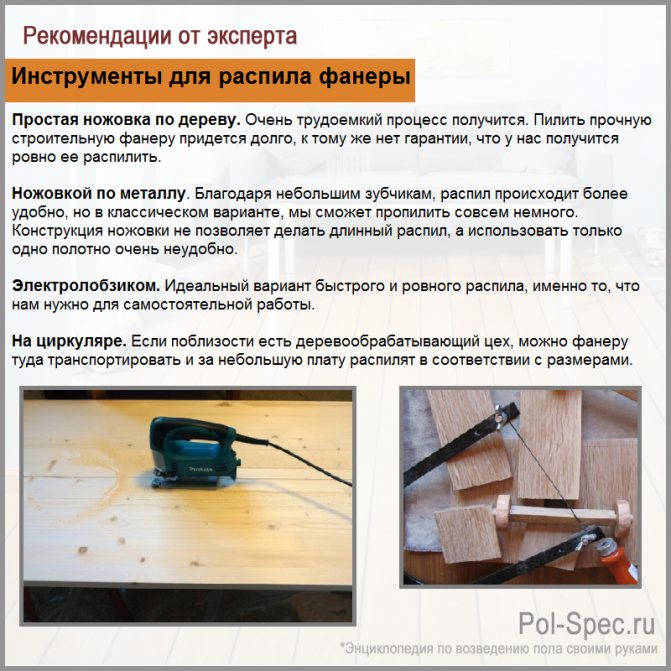
Plywood sawing tools
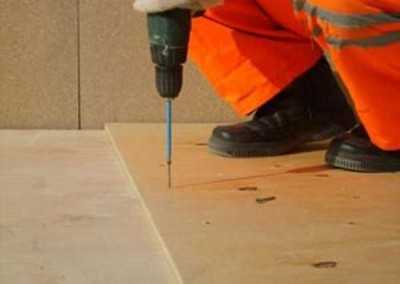
Step 3. Fix the sheets with nails or self-tapping screws, the first option is much easier and faster. If you are afraid to hammer nails past the lag, then you can make a simple device. Drive a nail into one end of the log in the middle, tie a rope to it. The other end of the rope will always be at your fingertips, with its help you can easily see the line on which you should drive the studs.

Laying the log floor

Lags for plywood
There are times when unscrupulous or unprofessional builders have left too much gap between the extreme logs and the walls. This significantly complicates the process of stacking plywood sheets. Before starting work, you need to securely fix the slats against the walls, plywood sheets will be nailed to them. The position of the rails is set along the lags.
If possible, it is recommended to lay boards across the lag, and to nail plywood to them. This floor will be more durable and easier to work with.

Fastening plywood, used insulation
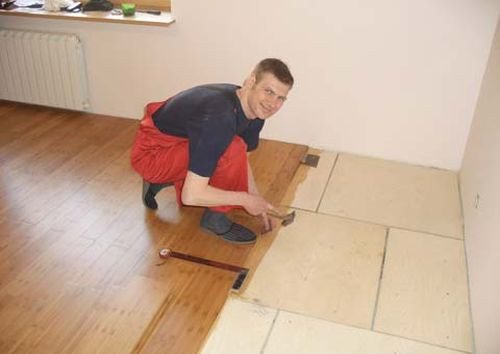
Laying plywood on a wooden floor

Plywood sheets on an old wooden floor
The log floor is a frame made of wooden beams laid on the base and sheathed on top with sheet building materials. The thickness of the plywood for the joist floor will affect the quality of the finished floor, as well as how long it will last. A thicker slab will bend less while walking (more: "What thickness of plywood is suitable for the floor").
When choosing sheet plywood, among other things, you will need to determine the size of the sheets. Present on the market at the moment, sheets are of the following standard sizes:
- 1525 x 1525 mm. It is considered the most common sheet size that is purchased to cover logs. Some experts argue that square sheets are easier to cut and produce a minimum of waste, but this statement can be considered dubious. The price of one sheet can range from 5.5 to 10 dollars and depends on the thickness of the quality of the coating of the material.
- 1210 x 2440 mm. Rectangular plates with a thickness of 5 mm or more are used to eliminate unevenness of various surfaces. One sheet of softwood material with a thickness of 12 to 14 mm will cost $ 5-7.
- 1500 x 3000 mm. Large sheets can be made from softwood and hardwood. Most often used by businesses when creating a dry screed or to eliminate uneven subfloors. The cost for such sheets varies from 6.5 to 12.5 dollars.
findings
If you are going to put sheet plywood on logs, then try to buy only high-quality material that is best suited in terms of its properties for the desired coating. When sheathing a wooden frame, try not to neglect a number of very important nuances and rules, namely: the intervals between the logs, the degree of humidity in the room and the amount of load on the future floor - for this, select the correct thickness of the slabs, their grade and type.
"How to lay plywood on the floor - laying rules"). Care should be taken to maintain a damping distance during installation: a gap of 2 - 3 cm from the wall, 0.5 - 1 cm between the sheets. If the fitting was successful, the sheets are numbered so that the final fastening of the plywood to the wooden floor goes smoothly, without frantic searches for the desired sheet.
Warm floor under the tiles types and features of installation
Do-it-yourself warm floor under the laminate on a concrete floor
Any of the types of warm floors that exist today can be laid under the tiles, but each of them has its own characteristics. For example, in the bathroom, water heating is considered more acceptable: it will not deteriorate if neighbors flood you, or water flows abundantly from you. And for electric heating, you have to take care of a good degree of waterproofing and be sure to connect the power supply through an RCD. If water penetrates under the tile in large quantities, the automatic device (RCD) will simply turn off the power - and you will not be hurt, and the floor will be intact. Many in the reviews wrote that the bathroom floor under the tiles begins to crack, although it warms up. Here, rather, the fact is that due to the fact that ordinary tile glue was used, the tiles peeled off. Although, the cases are different ...

The easiest way is to lay a cable mat under the tiles.
In all other rooms, preference is given to one of the varieties of electric floor heating. In the simplest installation option, the tiles are placed directly on the heating elements - these are cable mats or a rod infrared floor. These varieties have a “cake” with a minimum number of layers.
In the case of rod mats, you need to weigh everything thoroughly: although infrared heating seems attractive, reviews indicate the low reliability of this type of warm floor. For many, after the first season, the floor began to warm up in pieces, and then stopped showing signs of life altogether. Moreover, everyone who tried to identify the reasons says that they have burned out the joints of the rods with the conductive wires. Apparently, the technology is still incomplete (rod heaters appeared several years ago). Provided that they cost a lot (at least as much as infrared films), it is impossible to recommend them for installation, and even more so under the tiles, because for the repair you will have to completely knock everything down ...

Resistive or self-regulating cables also do well under tiles, but they take longer to install.
But another type of mats - cable, shows itself just fine. Heating cables and mats made of them have been produced and operated for decades in Europe and America, technologies have been developed and tested for a long time. Therefore, if you want high reliability, install a cable underfloor heating under the tiles. It is equally reliable in the case of using a cable and in the case of a finished mat, and it costs several times cheaper than infrared floors. The method of laying mats under the tiles is similar to laying a carbon mat: spread it on a flat surface, wind cold cables on the thermostat and you can put tiles on the glue. But with one condition: the thickness of the glue and tiles must be at least 2 cm.
Using a resistive or self-regulating cable underfloor heating, you will need to make a screed under the tiles, and then put the tile on it with glue. These options require a significant margin of time: you will have to wait at least 28 days for the screed to dry.
- another carbon underfloor heating under the tiles (the first is a rod mat). It also emits heat in the infrared range, but does not fit under the screed. The film is too smooth and therefore the solution does not adhere well to it, although there are special films with through perforation. Not many enterprises produce them, but it is possible to find them.
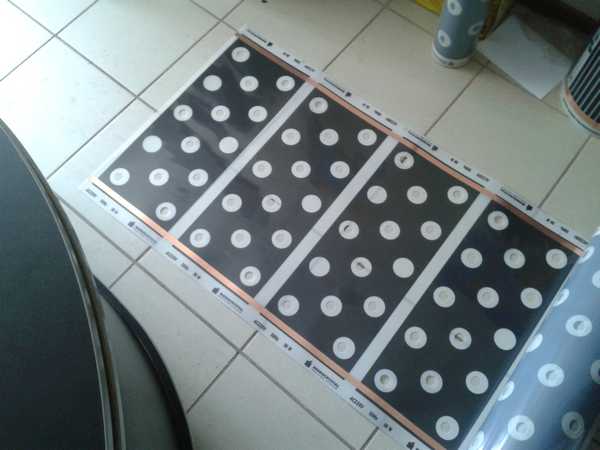
Continuous perforated infrared films can be installed in screeds and under tiles
The usual film warm floor under the tile is laid without a screed in a "dry" way: sheet material is laid on the film: plywood, chipboard, gypsum fiber board, etc. And already on this base, tiles are laid on glue. This is done because the polymer, into the layer of which the carbon paste is sealed, is destroyed in the screed.But it turns out that the film warm floor under the tiles is not the best way out: there are too many layers on which a lot of heat will be lost. In addition, the price per square of film is high: an average of $ 70-80. Therefore, standard options and a "dry" screed are rarely used, but over the perforated option, one might think: the heating efficiency is quite high.
What kind of insulation is there and what kind of plywood to use?
So, depending on which floor you need to insulate, the technology will be special. In general, only two options need to be considered:
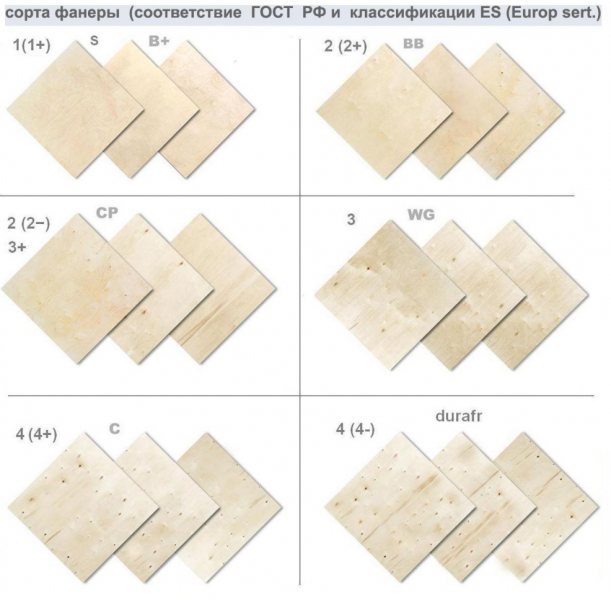
Plywood grades in accordance with GOST.
- wood floor insulation;
- insulation of the concrete floor;
Immediately it must be said that not all types of plywood are suitable for such work.
Today there are several brands of plywood:
- FC;
- FOF;
- FSF.
All of them differ from each other in only one parameter - the level of moisture resistance. But this level is determined by the following indicators:
- the type of glue used;
- the type of coating that is applied to the top layer of each sheet.
FSF plywood has the highest level of moisture resistance. However, it is mainly used in very humid rooms, for example, in bathrooms, in unheated warehouses, and so on. It is not recommended to use it at home, since its individual layers are glued together with rather toxic adhesives.
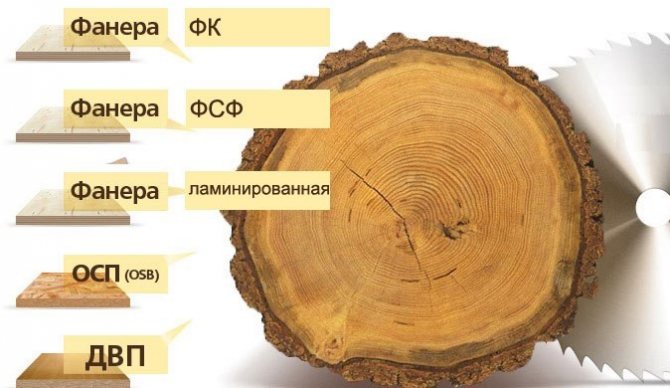
Plywood can be of the brands FK, FOF, FSF, OSB and fiberboard.
The FC brand is the golden mean. In its manufacture, a non-toxic glue is used. The composition of this glue is based on carbamide resins, which are completely harmless to human health.
I must say that there is another sign that affects the ability to use plywood in one place or another, this is the material of manufacture. On this basis, plywood is distinguished:
- from conifers;
- from hardwood.
The first type can only be used in roofing works, since conifers emit various resins. But for interior decoration, a material made of hardwood is used.
So, from all of the above, we can conclude that the optimal plywood for warming a wooden or concrete floor will be one that is made of birch and has the FC marking.
Related article: Do-it-yourself Swedish wall
Underfloor heating on plywood for tiles or laminate installation tips
If it is cold in the house, and heating bills "please" with a stable increase in numbers, then the optimal solution that will heat a room of any size and help reduce the monthly payment for utilities will be the installation of underfloor heating on plywood.

Their popularity is due to the fact that it is this method that can be mounted independently, without involving construction crews for this. In addition, underfloor heating under plywood is laid under porcelain stoneware and tiles, which is important for a bathroom, kitchen or hallway.
Benefits of using
If you plan to use wood or parquet for cladding, which will be fastened with self-tapping screws and glue, then plywood must be placed between the engineering system and the topcoat without fail.
It is also advisable to arrange a warm floor on plywood under the laminate, in this case the layer additionally acts as noise and heat insulation.
Among the undoubted advantages, it should be noted:
- Long service life and environmental friendliness.
- Affordable cost of consumables and installation work.
Is it possible to install underfloor heating on plywood? This question often worries newcomers who want to make repair work on their own. The answer of experts is unequivocal - yes. The only thing to consider when choosing a raw material is its grade. By and large, all varieties on the market are suitable for underfloor heating, but it is best to give preference to grade 1 and 2 plywood.

Useful Tips
The methods of laying underfloor heating on plywood under tiles and laminate flooring differ, depending on the choice of raw materials. For example, the installation of a heating system in rooms with high humidity on plywood does not tolerate the use of dowels. The rough material can expand, so it must be secured with mounting brackets. This will ensure that the plywood will not swell and damage the heating system.
There are several recommended options for installing plywood as a rough covering:
- If plywood will be laid out on a sand-cement screed, use sheets no thinner than 12mm.
- Lags are laid in the case when it is planned to lay utility networks and communication lines along the perimeter of the floor. This is done in two ways - a single layer flooring not thinner than 2 cm or a double coating of thin sheets.
- When installing a warm floor under plywood on a wooden floor, the thickness of the sheets can be any. The main thing is that it does not bend under the weight of the upper layers.
The following guidelines apply to glue. It is better to use special adhesive bases marked "for TP", for example, Litokol K80. Types of alcohol or two-component content are suitable.
To avoid stress and deformation of the sheets, it is advisable to cut them into 4 identical parts before laying them. Do not stack them back to back for the same reasons. The distance should be 4 mm between the joints and about 8 mm between the wall and the floors.
Before starting the installation of the topcoat, the subfloor base must be carefully prepared - cleaned and leveled. Errors in height greater than 0.5 cm will lead to premature chips and cracks in the cladding material. In addition, differences in height will create unnecessary stress on the plywood, and it will lose its original properties more quickly.
Despite the seeming simplicity, laying a warm floor on plywood is an occupation that requires knowledge of the "behavior" of consumables. To avoid possible errors leading to premature failure of the structure, the best solution would be to contact specialists with practical experience in carrying out work of such a plan.
pol-hot.ru
Certain technological nuances
If beams are used as insulation, they should be laid so that the edges of the sheets used are located strictly in the center of the room. This action is aimed at ensuring that none of the edges are located above the air.
Boards that are laid on the base of the flooring should fit very tightly to each other. But even in this case, small gaps are allowed, the dimension of which should not exceed from 1 to 2 cm.
The ability to choose the right insulation for plywood is only half the battle. Here, it will still be necessary to make considerable efforts to properly equip the floor and give it a sufficient protective effect against the negative effects of cold weather.
And if all this can be done, then it will be possible to unequivocally assert that the quality of the repair work has fully justified itself, and practice can only confirm the corresponding result!
Competent installation of electrical devices for STP
Thorough preparation of all necessary materials for construction is an important point. When assembling a floor heating structure, it is necessary to purchase a high-quality film element. The product is laid at a distance of 50 cm from the walls.
It should be remembered that heavy objects such as large furniture and household appliances should not be placed over the film. IR heater does not regulate the temperature
If large objects on top do not allow heat to pass through, then it gradually returns back to the source. As a result, the conductor may burn out or partially deform. The determination of the exact amount of film is carried out based on the technology and features of the stacking.
For the continuous operation of the heaters, clips are required, which fasten the contacts (2 units per separate strip). But first you need to lay a heat-insulating material with a high reflection coefficient, as well as install thermostats, prepare copper wires.
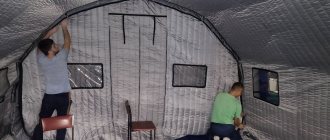
Installation of thermal insulation
Laying the thermal insulation layer does not take much time, but it is a very important step. The event is mandatory, as the heat will go up and down without a protective barrier. As a result, a large amount of energy is wasted.

The implementation of work, as a rule, is carried out through a roll insulator. The product is rolled out on a wooden base, while its reflective surface should look up
Each strip is attached to the base with a stapler and double-sided tape. In this case, the strips are joined without any gaps. The joints are carefully glued with tape.
Rules for the formation of a film floor
The process of rolling the infrared film is carried out over the insulator at a distance of 50 cm from the wall. In this case, the placement of the copper strip should be clearly at the bottom. If necessary, cut the material into equal strips, based on the marking of the film sections.

The feature of infrared film cutting is accuracy. The product is formed into strips of the required dimensions along section lines. This way you avoid damage to the heating elements.
Carbon based heaters must not be damaged. If you find scratches or tears on the product, then such places should be treated with bitumen-based mastic. This option is also excellent for insulating copper electrodes. The joints of materials are securely fastened with special clamps.
The parallel connection diagram has the following sequence:
- the placement of the first contact on the surface of the electrode is carried out inside a special film. A second contact is gently applied from above;
- a strong and secure connection is achieved by firmly pressing the clamping electrode with pliers.
After detailed laying of all strips of infrared film, the formation of a common web is carried out by gluing with tape.

The bare ends of the electrical wires are insulated with pliers. The contacts of the thermal film must also be insulated, since they are made of silver along the edge and are capable of conducting current
High-quality gluing of the fabric around the perimeter prevents slipping.
How to install the thermostat correctly?
Installation in each room allows you to use the floor heating system as efficiently as possible. Separate thermal sensors are glued to the IR film strips using mastic. In addition, each device must be securely fixed to the carbon thermal element.
The sensor wires are routed to the nearest wall. To avoid unevenness, a groove for the cable is cut out in the heat insulator.
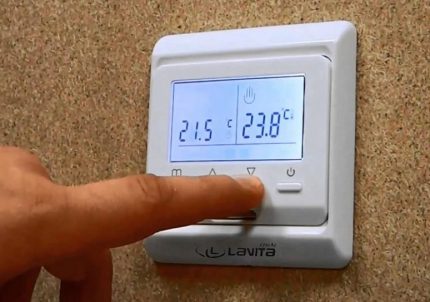
The regulator is fixed on the wall in compliance with the rules for connecting electrical wires based on instructions from the manufacturer
In order to increase the efficiency of electrical protection, all devices with a power of more than 2 kW are connected to a separate circuit breaker. After setting the floor temperature to 30 ° C, wait for the film to warm up.
In this way, the state and functioning of the system can be examined. If serious deficiencies are found, they are eliminated.
The last stage includes the installation of insulation - a polyethylene-type film that reliably closes the underfloor heating system. The product is carefully rolled out on top of the heating elements and fixed with small screws to the base made of wood. Perform this procedure carefully so as not to snag the electrodes.
Liquid heat transfer systems
enjoys a well-deserved popularity based on many factors. Among others, durability, which in turn, affects the formation of a low total cost of heating in general. Considering the performance of the system and the availability of materials, the possibility of using it in unheated loggias, this option has become widespread.
Purchased
If the planned additional heating system is installed by specialists representing the interests of the manufacturing company, then the customer's interest is obvious in terms of timing and cost.
What the pipes will be connected with, or what kind of coolants are involved in a particular case, is absolutely not important. ... The interests of normal manufacturers do not include work to restore the lost performance of the heating system.
A lifetime warranty, with periodic maintenance and mandatory clarification of operating rules - this is what the customer should count on.
The interests of normal manufacturers do not include work to restore the lost performance of the heating system. A lifetime warranty, with periodic maintenance and mandatory clarification of operating rules - this is what the customer should count on.
Homemade
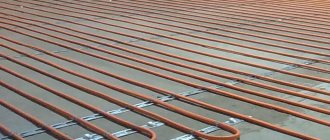
When self-designing a water-heated floor, it should be remembered that the two installation options "snail" and "snake" have different technical features. For example, under the same conditions, the first option is characterized by a smaller footage of pipes than the second.
"Snail" provides uniform heating; pipes laid with a "snake" lose their temperature somewhat, as they move away from the main circuit. The design of the "snail" has less resistance, which explains the temperature difference. By the way, this feature also explains the different changes in pressure in the general heating circuit.
Based on the fact that periodic maintenance of a warm floor laid under a tile is impossible, initially you should focus on durable materials. In the case of installing a home-made system, the best choice would be metal-plastic and stainless steel corrugated pipes
Polyethylene and copper pipes are used less often, since unwanted complications are possible due to contact with the cement mixture.
Given the correct calculation, for a system with its own boiler, you can avoid major troubles during operation. And by mounting the water circuit "by eye", in the conditions of an apartment building, it is quite possible to provide yourself with a number of troubles.
Of course, the bypass (a jumper between the supply and return) will serve as a kind of safety guard against problems with neighbors at the entrance, but in any case, raising the floors and redoing the circuit again is a below average pleasure.