- We insulate the floor
- We insulate the walls
- We insulate the roof and attic
In order for chickens to produce fresh eggs year-round, the chicken coop must be warm. The hen house is insulated in three stages. At the beginning, the floor is redone, then the walls are installed inside and out. Last but not least, the attic and the roof are improved. How to insulate a chicken coop for winter, we will consider in this article.
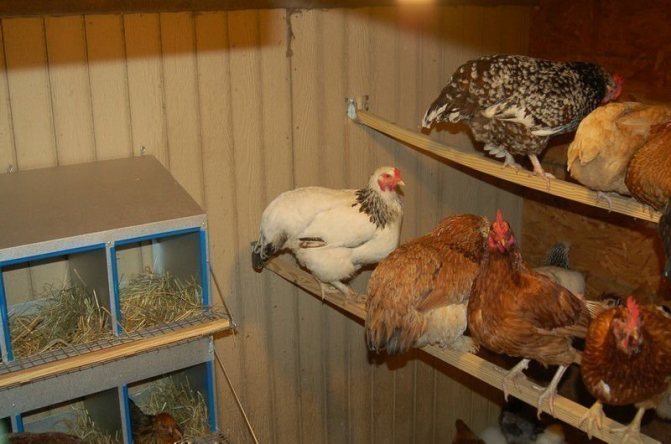
Chickens in an insulated chicken coop
Before starting work, we decide on the materials. Let's try to figure out how to insulate the chicken coop so that the chickens are comfortable in the winter. The material can be used not only of one type, but 2 or 3 at once.
The choice of insulation cloth is influenced by the level of thermal characteristics and the building material used for the construction of the chicken coop.
Penoplex, polystyrene or mineral wool is suitable for wooden chicken coops. They are the most common. These materials have good thermal properties. Foiled penofol belongs to inexpensive insulation materials. It is quick and easy to install with your own hands.
It is important
When planning to insulate a chicken coop for the winter, keep in mind that its thermal insulation must maintain a temperature of at least 0 degrees.
Read more about the thermal regime in the poultry house in the article “What should be the temperature in the hen house in winter and summer”.
Frost-resistant types of chickens can tolerate temperatures from -7 to +7 degrees. But only if there are no drafts in the room. As well as high humidity and mustiness. It must be equipped with a ventilation system.
Some summer residents settle birds for the winter in polycarbonate greenhouses. In such a room, chickens feel great. Get enough sunlight. They can dig in the soil and not suffer from the cold.
Find out more in the article "Winter chicken coop in a polycarbonate greenhouse".
Next, we will tell you in detail how to insulate a barn for chickens.


https://youtu.be/3VU0V8usmJc
We insulate the floor
Materials for floor insulation are divided into two types:
- deep underlying layer (performed in 2-3 layers);
- shallow underlayment (done in one layer).
It is better to use materials that allow for a deep bedding on the floor. Thanks to this design, a biochemical process takes place inside the organic layer of the underlying material.
Natural materials are used as the underlying layers, which are easy to find, and their cost is not high. Warming occurs:
- sawdust;
- straw;
- moss;
- peat;
- hay;
- shavings and others.
Such materials are called old-fashioned or traditional methods. They have not lost their relevance today, because they are environmentally friendly material. The most common of these is moss. It has the highest thermal performance. Moss also absorbs droppings. This prevents unpleasant odors from spreading.
When using sawdust, there may be problems with poor bedding. After all, it is light and it will take a lot of time for chickens to press it. Straw, compared to other materials, retains heat much longer.
The depth of the litter on the floor from natural raw materials is made at least 20 cm. After a couple of weeks, when the litter is laid, add 5-10 cm. We do this 2-3 times.
Thanks to natural bedding, birds will not have problems with wet feet. Such material will dry them out and prevent the birds from getting sick.


Chickens prefer natural bedding
You should not insulate the chicken coop with modern materials if the floor is wooden. Bird droppings are hardly absorbed into these insulation materials, passing it to the wooden surface. As a result, when it comes time to clean the floor after winter, difficulties will arise. Using traditional materials, the bedding in the coop is easy to clean up and serve as fertilizer for the vegetable garden.
Floor insulation
Ground coating
If there is an earthen floor in the house, then you can insulate it as follows:
- Remove about 10-20 cm of soil to form a depression. And compact the ground thoroughly.
- Take a thick film (200 microns) and spread it so that the edges are 10 cm above the floor level. Attach them to the walls.
- Pour expanded clay into the formed depression. Or lay out foam plates, from 15 cm thick (middle zone of Russia) to 30 cm (northern regions). You can use 5 cm thick expanded polystyrene.
- Cover the insulation with a mesh of reinforcement 0.5-1 cm thick.And fill it with concrete. The floor will dry for about a month. But you can walk on it in a week and a half.
You can additionally put an electric infrared film under the reinforcement mesh. But a floor insulated in this way is an expensive pleasure. Therefore, many farmers limit themselves to conventional thermal insulation.


Concrete pavement
If the floor is covered with a "screed", you can equip the flooring with planks. Having poured a layer of expanded clay between it and the concrete with a thickness of 50-100 mm.
Another option is to lay out the floor with foam boards. Also 50-100 mm thick. And then re-pour the concrete layer.
You can make deep bedding for your birds. This is a simple and budget option. How to choose and cover it correctly, read below.
Choosing a material for bedding
Nowadays, fermentation mats are actively used, which do not require frequent changes. For example "Bioherm" or "Net Plast".
These new generation floor coverings contain a range of chicken-friendly bacteria and microorganisms. They enter into a chemical reaction with bird waste. And due to this, they generate heat.
Read more about the coating in the article "Bacterial litter for a chicken coop".
Chickens also feel comfortable when the floor in the house is covered with peat (moss), straw, sawdust, and hay. The optimal layer height is 25-30 cm.


Ceiling insulation
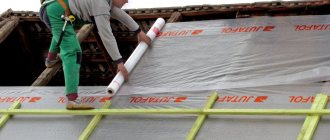
A well-insulated chicken coop also implies insulation of the ceiling. Particular attention is paid to the attic floor. For insulation, a vapor barrier is used, which can be replaced with ordinary dense polyethylene. Without such a layer, the insulation will get very wet. The material is laid on the ceiling with an overlap with the obligatory approach to the walls.
When choosing insulation for the ceiling, decide for yourself whether you are going to store anything in the attic. If not, then ordinary hay is enough, the optimal layer thickness is 25 cm. If you need to go to the attic often, it is better to put the crate over the insulation.
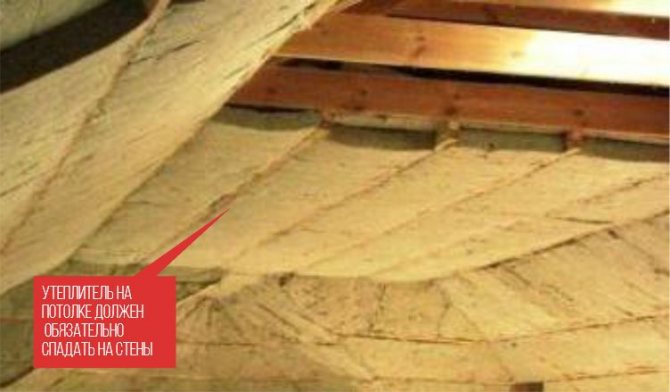

Insulation should fall from the ceiling to the walls
Foam plates can be laid without using a crate, and boards or chipboard sheets can be laid on top of it, so that it is convenient to walk.
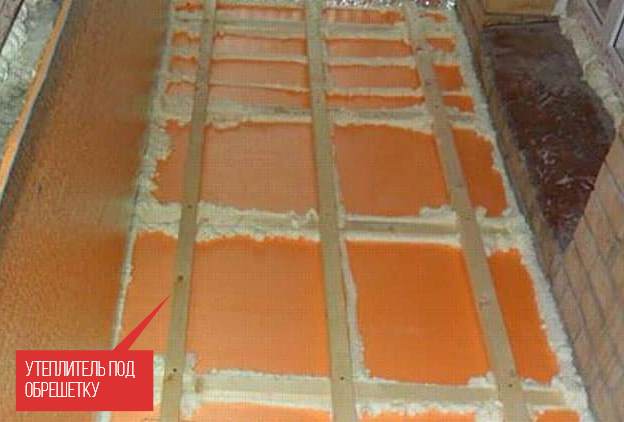

Insulation under the crate
Wall insulation
A little about construction
If you are making a barn for chickens for the winter from wood, then it is better to opt for pine boards. They represent the perfect combination of price, quality and excellent technical characteristics.
In cold regions, it is advisable to use log cabins for these purposes. And for central Russia, you can take standard boards 2.5 cm thick.
Read more about building a poultry house in the article "Building a winter chicken coop with our own hands."
General rules
The walls of the house can be insulated from the outside and from the inside. Regardless of the material from which they are made. For example, brick or wood.


The choice depends on the size of the house.If you equip thermal insulation from the inside of the room, then, by increasing the thickness of the walls, the area of the room will significantly decrease.
Therefore, large chicken coops can be insulated from the inside. And the little ones are outside.
That is, if the area of the poultry house is 3-4 sq. m, and 10 chickens live in it, then you need to fix the thermal insulation on the walls from the side of the street.
To properly insulate a chicken coop with your own hands, you will need simple tools: a construction stapler and tape, a drill, a tape measure, dowels, a knife or scissors for cutting insulation.


Procedure
First cover any gaps in the house with moss or tow. Then make a wooden frame. Attach it to the walls with dowels or self-tapping screws. It is important that an air gap of at least 5-6 cm remains between the wall and the sealant.
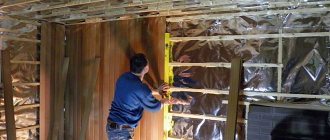
Then, on the frame, with the rough side to the wall, attach the vapor barrier film. It is most convenient to fix it with tape or a construction stapler.
On top of the film, sheets of the selected material are superimposed for thermal insulation. Please note that "loose" heaters must be fixed with dowels with large "caps". Since the usual "fall through" in the insulation.
Final stages
Boards, battens, plywood or panels are placed on top of the thermal insulation. You can also close it with a reinforcing mesh. And cover with a layer of plaster. This is necessary to increase the effectiveness of the insulation. And to protect it from pecking by chickens.
To understand the best way to insulate a chicken coop, you need to understand the properties of different materials. And choose the one that suits you perfectly. Depending on the climate and financial capabilities.


We insulate the walls
You can insulate the chicken coop for the winter from the inside with foil foam, if the walls are made not of boards, but of reliable material. Basalt wool and slab insulation are options for wall seals. Insulation with polystyrene or polystyrene foam occurs in the form of plates. It is better to carry out wall insulation with your own hands with plates. After all, the installation does not take much time and effort. And when installing mineral wool, it will take a lot of time and special skills.
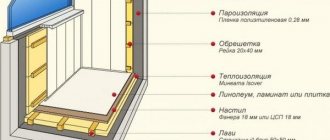
Let's take a closer look at how to insulate a house for chickens from the inside. To begin with, we make a crate for the walls, which is made of 50x50 cm bars. The first bar is nailed. We align it depending on the vertical and horizontal position. For this we use the building level. The nailing distance of the following bars depends on the type of insulation material. For example, if you take mineral wool with a width of 60 cm, then the distance between the bars is 59 cm. Such a ratio can ensure a high-quality fit of the insulation.
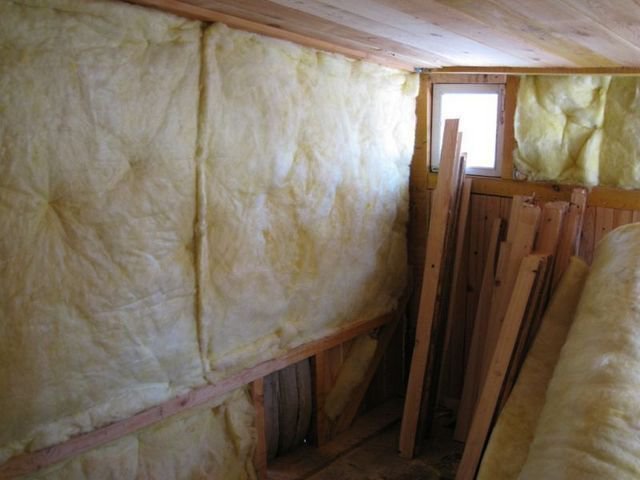

Mineral wool - modern insulation
For wooden walls, fastening takes place with nails or self-tapping screws. If the wall is made of foam blocks or expanded clay blocks, then the crate is attached using dowel nails.
If the insulation occurs with a mineral product, then a vapor barrier film will be required. During installation, the main points are taken into account:
- We decide on the outside and inside.
- We fix this material with staples, which are fixed with a special construction stapler.
- The sheets are superimposed on each other at a distance of 1-2 cm.
- Seams are carefully glued with a special solution.
If you install it correctly, then unnecessary moisture will not form inside the chicken coop.
As soon as the film is mounted in place, the insulation can be laid. Installation takes place by dense overlap of material on top of each other.
The total thickness of the insulation layer should be more than 5 cm. If gaps are formed between the insulation and the timber during installation, then we fill it with construction foam. But it is better to avoid them, because in these places heat will subsequently come out.
When insulating with polystyrene or penofol, you should stock up on a fastener called "dowel mushrooms". This is a fastener made of plastic. It has a wide bonnet and a hollow leg. It is used in conjunction with nails. First, a "mushroom" is installed in the slab, and then a nail is driven into its center. 5 such "dowels" are used for one plate.
The vapor barrier layer is installed both under the insulation and on top. Thus, the insulation material is not exposed to moisture. This allows the material to retain its thermal function. It is simple to insulate the walls with your own hands, the main thing is to adhere to a certain sequence and rules.
If the chicken coop was not built from wooden building material, then it is allowed to use modern insulation materials.


Modern materials for warming a chicken coop
Choosing an insulating material
Mineral and basalt wool
It is a dense insulation consisting of randomly interwoven fibers. It tolerates temperature extremes well. It keeps warm well, does not burn. Absorbs excess moisture from the air. And its installation does not require special knowledge and skills.
The frame for this insulation is made of vertical beams, the distance between which should be 2 cm less than the width of the insulation. It is also important to unfold the roll of material in advance so that it does not bend in different directions.
The material has one drawback - it slips over time. Therefore, it is advisable to fasten the layer not entirely, from floor to ceiling. And divide it into 3-4 pieces. And fix each of them separately. This will reduce the overall weight of the insulation. And he will not slide down.
A chicken coop insulated with such materials will withstand any cold weather.
Penoplex
This is a modern dense fine-mesh insulation made of expanded polystyrene. Sold in slabs 1.2x0.6 m.


Pros: odorless. Does not produce harmful fumes. Has excellent thermal insulation properties. "Cope" with any temperature. Effective even in severe frosts. Does not absorb moisture. Retains useful properties for about 50 years. And a special edge with a "snap" allows you to connect the slabs without gaps.
Cons: Requires mandatory plastering. Toxic in case of fire. Does not protect the chicken coop from mice and rats.
Styrofoam
Insulation is made of foamed polystyrene "grains" pressed into plates. The main component of such material is air. Due to this, it has excellent insulating properties, moisture resistance, light weight.
Styrofoam is very easy to work with and inexpensive.
The main disadvantages of insulation include its fragility. Inability to pass air. And the release of toxic substances in case of fire.
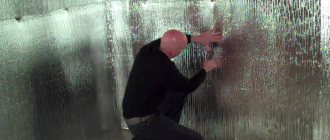
Penofol
To put it simply, this is a heater consisting of a layer of polyethylene foam, covered with foil on both sides.
The thickness of the material can be from 0.2 to 4 cm. This allows it to be used separately. And in combination with other heaters.
It keeps warm well. It is non-toxic and easy to use.
The main disadvantage is that it is desirable to fix penofol with a special glue. Or choose insulation with a self-adhesive surface.
The use of fasteners in the form of dowels, piercing the insulation, significantly reduces its thermal insulation properties.


Natural options
Needles and sawdust
To use sawdust, pine needles or dry leaves as insulation, you will need a non-standard frame design.
Step back from the wall of the hen house, covered with a vapor barrier film, 5-7 cm. Make a double frame of boards or plywood, which you fill with insulation. In fact, you need to make two more thin walls. The distance between them should be about 10 cm.
Then mix your chosen natural material with lime (25 to 1). Thoroughly tamp the resulting insulation into the gap between the boards.
As a result, the following alternation of layers will turn out: the wall of the chicken coop, the vapor barrier film, the wall of the frame, insulation and again the wall of the frame.
The advantages of such insulation are in the environmental friendliness of materials.And the small cost of thermal insulation of the chicken coop.
Shingles
Thin small wooden plates (shingles) are evenly attached to the wall of the chicken coop in two layers.


If you are insulating a chicken coop with this material, it is important to fix the wooden plates with an overlap. So that there are no “bare” spaces left. The insulation must completely cover the wall.
When finished, mix wet clay with sawdust. Determine the proportions yourself. It is important that the mixture is thick enough and does not run down the wall.
Let the plaster swell for 4 hours. Then apply it on top of the shingles in a thick layer of 3-4 cm. After drying, seal the resulting gaps with a mixture of sand and clay (2 to 1).
After drying, cover the plaster with hydrated lime. And cover the insulation with panels or plywood. Otherwise, the chickens will quickly peck it.
Features of the
Such material is environmentally friendly, provides excellent insulation of the poultry house. Does not greatly reduce the area of the chicken coop. In addition, it saves your wallet from serious expenses.
The disadvantage of using shingles is that such insulation is not only laborious, but also takes a long time.


Useful Tips
It is necessary to insulate the barn for chickens before the first frost, because otherwise the bird, due to the cold, may at least stop laying eggs, and in the worst case, hypothermia will lead to illness and death of chickens.
Many people use moss peat to insulate their coop.
It is necessary to insulate the shed for chickens before the first frost
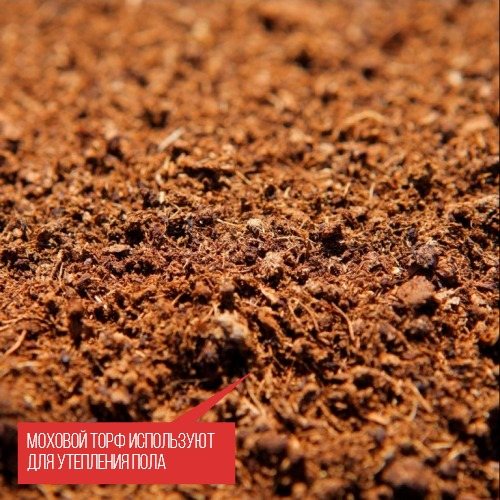

Moss peat
Not only is it an environmentally friendly material, it also absorbs moisture and chicken droppings, preventing odors from spreading. Moss peat is excellent as floor insulation in a winter chicken coop. Birds, moving on such a moss floor, will not wet their paws, which means that the risk of diseases in winter will significantly decrease. Such peat can be reused as fertilizer for plants on the site.
In addition to moss peat, you can use a mixture of wood shavings and sawdust in a ratio of 3 to 1. It is best to use conifers because they keep the heat inside the barn best and are also a good prophylactic against a number of bird diseases.
A well-made and insulated chicken coop will not take a lot of effort and financial investment. You can insulate a shed for chickens on your own, without resorting to outside help. Despite the fact that the materials are quite cheap, it will take a lot of effort and time. However, the more thoroughly the work is done, the higher the quality will be.
We insulate windows and doors
The window in the hen house should be small. And it is better to place it on the south or east wall.
To protect chickens from the winter cold, the window is made on a double frame. In winter, the inside is covered with a thick transparent film. And the place where it adjoins the wall is trimmed with felt or other insulation material.
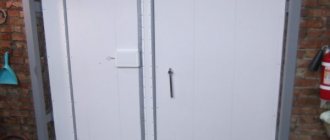
It is important to cover the house door with insulating material to prevent heat loss. It is upholstered on both sides with any insulation: felt, foam rubber or even a piece of old carpet.
To prevent the material from getting wet, from the outside of the door, the insulation is covered with a layer of dense film or leatherette.
To make it easier to work, remove the door from its hinges.


We insulate the walls
If the owners dream of getting eggs all winter, they need to insulate the walls. Most chicken coops are built of wood, the thickness of the walls is usually determined by the characteristics of the climate of the region. Log and board walls need insulation. The building is thermally insulated from the outside and inside, using different types of materials.
The most effective way to keep warm in a chicken coop is to build a lathing of beams and lay insulating material inside.In modern conditions, these are usually synthetic fillers - mineral wool, foam. You can use natural - straw, sawdust.
Hay and sawdust
Before laying in the walls, natural materials are thoroughly dried, mixed with slaked lime in a ratio of 1 part calcium hydroxide to 25 parts of an insulator.
A layer of vapor barrier is laid on the walls inside the chicken coop, the seams are fastened. Then the boards are laid tightly on top. Between the boards and the vapor barrier, the main material is poured - hay, sawdust, straw, dry foliage, pine needles. Tamp it tightly.
Minvata
To fasten the mineral wool, a crate is installed with a distance between the bars less than the width of the material by 1-2 centimeters. A vapor barrier is placed on the wall, sheets of mineral wool are laid tightly end-to-end, and they are fixed to the wall. Another layer of vapor barrier is covered with mineral wool from above, it will retain moisture coming from the chicken coop.
Styrofoam
An excellent lightweight material with a fine mesh structure that retains heat due to air bubbles inside the polymer. It is produced in sheets of a convenient size. Fastened to the wall of the chicken coop with plastic "mushrooms" with wide caps that do not destroy the plastic material. Use 2 mushrooms for each leaf.
On both sides of the foam, a vapor barrier is laid; the sheets do not need to be connected to each other.
Polyurethane foam
Lightweight polyurethane-based insulation material. Possesses low vapor permeability and high waterproofing properties. It is produced in the form of slabs, construction foam, which hardens quickly.
Any option can be used to insulate the chicken coop - the plates are attached to the walls, the gap between the wall and the board crate is filled with foam.
Reference: any kind of finishing material is placed on top of the insulation and lathing - non-corrugated slate, drywall, lining. The trim helps protect the insulation from chickens who like to peck at anything.
Ceiling
Warm air always rises to the top. Therefore, it is very important to insulate the ceiling. Otherwise, all your efforts will be in vain. For these purposes, mineral wool is ideal.
Take a layer of insulation. Place the vapor barrier film on it, with the smooth side facing the cotton wool. And attach the structure to the ceiling from the inside of the chicken coop with a construction stapler. So that the rough side of the vapor barrier is in contact with the boards.
Cover the insulation with plywood or clapboard. For greater effect, treat the ceiling in the same way from the outside, from the side of the attic.


We insulate the ceiling and roof
Most of the chicken coops, built for year-round breeding of poultry, are built with the construction of an attic where food, materials for the manufacture of an insulating frame, bedding, etc. chicken coop. That is why this part of the structure also needs to be carefully tackled.
As a rule, the roof can be insulated using the same material that was chosen for the walls. The technique for performing this task depends only on how the roof is arranged. If it is a beam structure, then you are in luck - this is a real ready-made foam crate!


Insulation of the roof of the attic of a chicken coop using foam
In this case, do everything according to the first among the above methods of strengthening the walls, only in a horizontal position, adding the finishing of the insulating structure only if desired.
When the lathing is represented by unedged boards, it is better to lay out roofing material or a layer of parchment paper as a finishing element on top of the vapor barrier.


Parchment paper can be placed on top of the vapor barrier
Step-by-step description of the roof and attic insulation process
First of all, it is necessary to diagnose the condition of the ceiling and roof. Examine wood beams or planks for decay.If you find rotten areas, you will have to replace the damaged wooden elements with new ones. Prepare fresh boards for installation by treating them with an antiseptic.


Rotten ceiling beam
Once the boards are in place, attach, for example, mineral wool, which is one of the most popular ceiling insulation materials. In order to avoid its rapid wear, and the penetration of moisture into the building, cover it with a vapor barrier film. Using a construction stapler, secure the cotton wool and film to the underside of the frame boards.


Fixing mineral wool on the ceiling
If necessary, insulate the boards with another layer of mineral wool on top by repeating the steps described in the first two steps.


Insulation of the roof of a chicken coop with a beam frame
Step 4
Such a popular facing material as lining can act as a practical coating. It is fixed with metal clamps and impregnated with special fluids from parasites and rodents, after which, for reliability, it is painted.
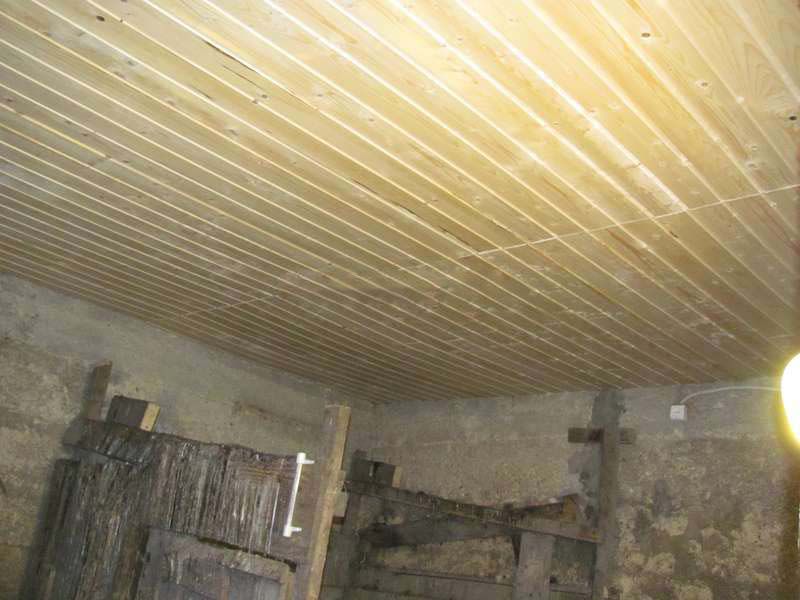

Clapboard ceiling
Now you know all the popular, effective and simple ways to insulate your chicken coop yourself. However, for the most restless poultry farmers, who may not even think this is enough, we have prepared something else!
Roof
The roof of the chicken coop, like any other structure, is insulated from the inside. For these purposes, the same insulation materials are suitable as for the treatment of walls. Except for expanded clay, shingles, a mixture of sawdust and lime.
First, a vapor barrier film is laid, with the rough side to the roof. Then a heater is placed between the beams (5-10 cm).
To prevent the insulating material from sliding out and collapsing, drive small carnations into the rafters. And fasten a thin rope to them. So that it supports mineral wool or foam.
The insulation must be closed from the inside with a diffusion membrane. It must be overlapped, with a minimum offset of 10 cm. And carefully glued with tape.
Then cover the structure with sheets of plywood. And of course, consider protecting your roof from running water. You can cover it with roofing felt and slate.


Do-it-yourself barn insulation technology
How to insulate a barn? The technological process is not complicated. It does not require highly skilled workers and the use of expensive equipment. General construction skills are quite enough to carry out the work; the owner of the barn can do them with his own hands. He will be required to be accurate and strictly follow the technological recommendations and safety rules.
Materials and fixtures
To insulate the barn with mineral wool or foam, you will need:
- insulation;
- wooden lath or metal profile for guides;
- waterproofing film;
- vapor barrier membrane;
- Double-sided tape;
- polyurethane foam;
- assembly knife;
- screwdriver;
- jigsaw or circular saw;
- self-tapping screws;
- measuring tool: tape measure, ruler, square, level.


To insulate the barn, you may need a waterproofing film
It is also necessary to equip a workplace for cutting material indoors or under a canopy. It should be spacious and level and well lit.
Wall insulation
The method of wall insulation depends on the selected material. If you decide to work with bulk insulation, such as sawdust or expanded clay, you will need to erect a second wall at a distance of 10-15 cm from the main wall of the shed, connected to the main wooden vertical logs. The boards of the second wall are allowed horizontally, nailing them starting from the bottom. Every half a meter of height, you need to make a stop, fill in the insulation flush with the top board and tamp it.
Was everything done correctly?
How well you carried out the work will become clear only in winter. When it's too late to redo something.
Therefore, it is necessary to initially ensure that all the rules for fastening the insulation are observed. And use only quality materials.
Violation of the tightness of the structure, improper fastening of the vapor barrier, errors in fastening the insulation and gaps can lead to the fact that the room will not keep warm. And the walls will get wet and even freeze through.
Use only quality materials from reputable manufacturers. Carefully study the technical characteristics of different types of insulation.
Also, avoid using damaged thermal insulation materials. For example, having gaps.
Be careful with Styrofoam. Do not use very dense, highly compressed boards for insulation. They are easier to install. But they keep it warm worse.


Heating devices
Insulation of a chicken coop implies not only the presence of insulated walls, floor and ceiling, but also heaters. What devices are suitable for the poultry house:
- diesel ovens or conventional wood- or coal-fired stoves;
- electric heating radiators;
- incandescent lamps.
Diesel stoves are the most economical and fire safe heating option. In addition, they do not emit smoke. Depending on the size of the chicken coop, several such ovens may be needed, each unit heats only a specific section of the room.
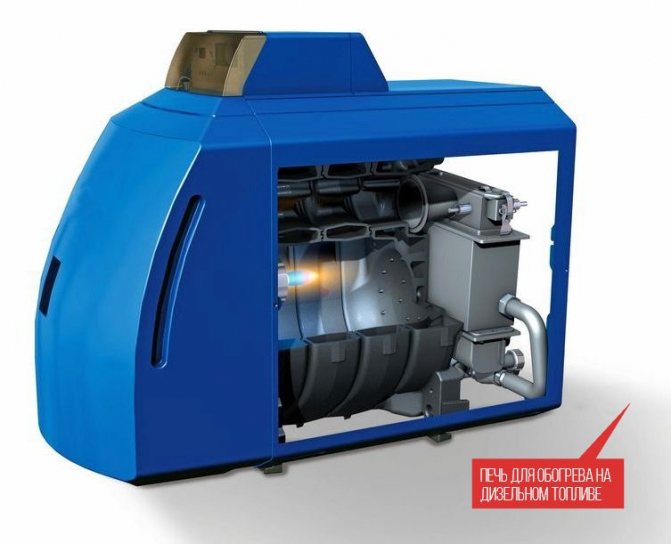

Modern type of heating equipment
Buleryan stoves, operating on any type of solid fuel, are quite economical to use and evenly heat up the space.
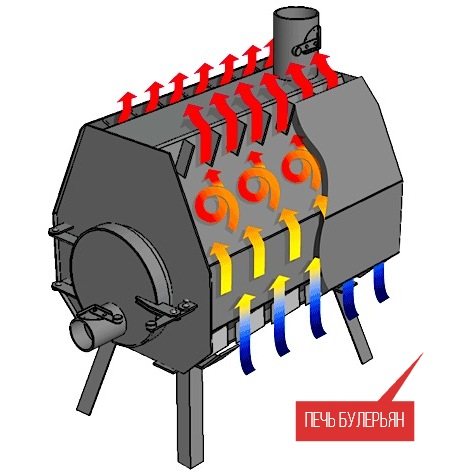

Solid fuel stoves are a convenient heating medium
Solid fuel stoves are gaining in popularity.
But before insulating the chicken coop with electrical appliances, make sure that no chicken can get to the wires and hot surfaces of the heaters themselves. Failure to comply with safety precautions threatens the death of birds.
The most economical in terms of energy consumption are infrared heating devices. In some models, you can independently adjust the room temperature. It is enough to set the maximum temperature, and the device will automatically turn off as soon as the air in the room becomes warm enough.
Prices for thermal insulation materials
The cost of one package of insulation depends on the volume, quality of the material and the manufacturer.
Mineral wool costs on average from 400 to 1000 rubles.
The price of basalt wool also starts at 400 rubles. And it comes to 1200r.
Polyfoam will cost 2,000 rubles. Or a maximum of 2500.
The price tag for penofol starts at 300 rubles. And it goes up to 1700.
Penoplex is very cheap - from 100 to 400 rubles.
Waterproofing will cost an average of 200-600 rubles. per packing.


