
Home / Design
Back to
Published: 06.02.
0
15
- 1 What does a bathroom faucet consist of?
- 2 How much does it cost to install a mixer?
- 3 Criteria for choosing a bathroom faucet
- 4 Installation of an expensive crane
- 5 Dismantling the old mixer
- 6 Methods for installing a faucet in a bathroom
- 7 Installation Tricks
- 8 Installing a wall-mounted bath mixer
- 9 Installation and connection diagram
- 10 Nuances of installation
- 11 Required tools
- 12 Preparatory work
- 13 Installation details
- 14 Some helpful tips
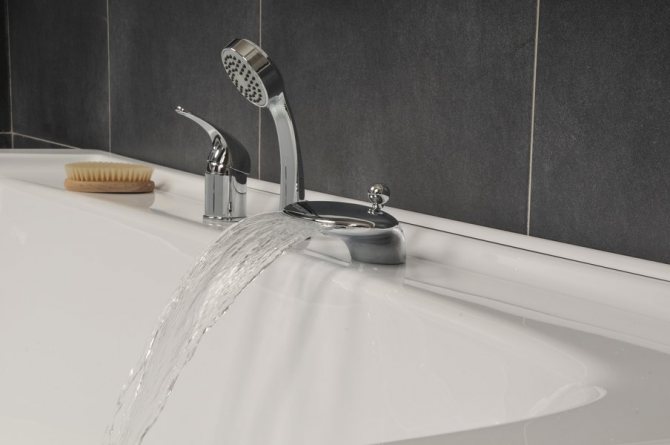
What does a bathroom faucet consist of?
Before dismantling and installing the mixer in the bathroom, you need to figure out how it looks and what parts it consists of. In addition, knowing how it is staffed can help avoid unscrupulous sellers. Packaged sanitary ware consists of the following items:
- Housing. Its standard scheme is as follows: two nozzles for supplying hot and cold water, two sockets and a spout;
- Shower hose. This is the part of the system that connects the mixer body to the shower head. Since this part is the most frequently out of order, it is not recommended to save on it.
Before installing the faucet in the bathroom, let's figure out what types of shower hoses there are, because their choice is huge: from plastic products with metal wrapping, to advanced models with anti-twist protection and a silicone layer on a metal braid.
- Shower head (also called shower head). Shower heads from the simplest ones with two or three standard modes, to half a dozen functions for creating a soft aerated, massage or jet stream, "economy" mode and many other pleasant shower options.
- Eccentric. This type of shower adapter is elongated, rounded, with one edge attached to the mixer and the other to the pipe. The length and size of the eccentrics is individual for each model.
- A gander called a spout or curl. The most common gander models are J, C and L-shaped.
- Decorative shades.
- Rubber or silicone gaskets.
The nuances of installing a mixer in the bathroom with your own hands video
However, checking the equipment is not always enough, since to be completely sure that there is no defect in the purchased product, it is necessary to make sure that the threads of the eccentrics and fastening nuts are intact. Assembly instructions are included with the plumbing. Assembling and disassembling it is quite simple, you can make sure of this by watching the assembly video lesson.
Installing a new device
If you carry out piping to the mixer with your own hands, consider such factors.
Piping

The center-to-center distance should be 15 cm.
- The gap between the central axes of the inlet corners of hot and cold water should be 15 cm.
- The pipe for cold water should be on the right, for hot - on the left.
- The optimal installation height of the tap above the bath (its side) is 15/20 cm, from the floor level - about 90 cm.
- The entrance corners on the pipes must be sunk into the wall, so that after laying the wall cladding, their ends are flush with the coating. So you will be able to mask the tap connection areas with decorative cups.
Note! It is advisable to make plumbing using modern plastic pipes. They do not rust, and they can be joined by welding, which guarantees 100% tightness of the pipe joints.
Mixer installation

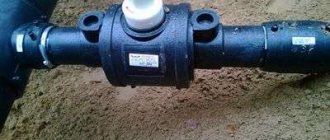
The photo shows the installation of eccentrics.
Next, how is the installation of a tap in the bathroom with your own hands.
- First you need to screw on the eccentrics... If the positioning of the entrance corners was not carried out accurately enough, it will be difficult to maintain the desired center distance of 15 cm. The eccentrics will help to correct this error.
- Wrap the fum tape on the threads of the elements and screw them into the inlet corners of the pipes for hot and cold water.
- Rotating the eccentrics with a key, achieve an ideal center distance between the entrances of 15 cm... Next, check the horizontal installation with a bubble level.

Installation of the device case.
- Then screw on the body of the mixer and also check its horizontal... In this case, the fixing nuts should be easily screwed by hand to the stop, to their full thread. When the nuts turn tight, you should fine-tune the eccentrics by turning them slightly.
- Next, screw the decorative cups, masking the areas of the mixer connection to the eccentrics.
- Before assembling the faucet in the bathroom, insert the gaskets and finally fix the appliance body in place.
- Tighten the fixing nuts with a gas wrench... Place a cloth under his lips. Otherwise, you will damage the chrome plating of the nuts, it will not look aesthetically pleasing.
Note! Do not overtighten the fasteners. The connection is sealed with rubber or silicone gaskets. With a strong clamp, they will crumple and the connection will flow. For insurance, turn on the water and make sure there is no leak. If it is, slightly tighten the nuts to eliminate it.
- Now you can put the gander of the mixer... First, tighten the nut with your hands. Then tighten it with an adjustable wrench (also through a protective fabric material).
- Screw the hose of the shower head onto the body of the appliance... Remember to insert the spacer before doing this.

Screwing the watering can to the hose.
- Screw the watering can to the hose, after placing a rubber or silicone gasket on the connection.
- Select a location for the shower holder and mark the points for attaching it.
- Drill holes in the wall, insert plastic dowels into them... Then fix the holder bracket with self-tapping screws.
- Turn on the water and test the appliance in different modes of operation.
How much does it cost to install a mixer?
Firstly, there are different mixers: for concealed installation, open installation, with levers, valves, thermostatic, non-contact. When installing a mixer in the bathroom, it is necessary to take into account all the nuances of the equipment and the original piping in the bathroom.
Old and new houses differ from each other: different water supply systems, different pipes, different conditions of the sewerage system. Our specialists serve dozens of houses in different districts of Moscow and are well familiar with the peculiarities of Khrushchev, new buildings, Stalin-era buildings.
The cost of installing a mixer in the bathroom depends on the type of bath, the type of mixer, the availability of supplied communications, the need for additional equipment. Call our specialists and briefly describe the task, then we can name the approximate cost of the service.

To determine the cost of installing a faucet in a bathroom, a plumber needs to know:
- mixer type;
- type of mounting (hidden on the wall, on board, hidden on the rack);
- your plans (current renovation, complete renovation, renovation in a new building);
- mixer brand.
The master will be able to give the most accurate and objective assessment of the cost after determining the scope of work.
Step-by-step instructions for installing a new mixer
If you do not know how to properly change the faucet in the bathroom with your own hands, follow the following algorithm:
- If you had to change old eccentrics to new ones, you need to prepare a threaded connection before installing the latter.For this, a plumbing tow is used, a segment of which about ten millimeters wide is screwed onto the thread from its beginning to the end and vice versa, after which the edges are moistened, fixed, processed with Unipak grease or any plumbing sealant. In the absence of the above materials, you can get by with a fum tape.
- Prepared eccentrics are screwed into the threaded holes of the fittings, free from possible contamination, first by hand, then using an adjustable wrench. The end result, ideally, should provide the required center distance between the mating parts of these adapters and the horizontal position.
- On the installed eccentrics, decorative cups are put on, covering the junction.
- Installing a new mixer. To do this, you first need to insert new half-inch gaskets, then tighten the nuts by hand until they stop. You can additionally slightly (no more than a quarter of a turn) tighten with an adjustable wrench.
IMPORTANT! Moderation should be observed when tightening the nuts, since even slight pinching can damage the O-rings or fragile parts of the mixer (especially if they are made of silumin alloy, which is typical for cheap Chinese products).

This completes the process of replacing the bathroom faucet yourself. The only thing left to do is to complete the final assembly by installing the spout and connecting the shower hose to the appropriate connection points. Then you need to check the quality of your work, for which you need to resume the supply of cold / hot water and test the mixer for leaks on and off.
If you find any in the area of the fastening nuts, you can very carefully try to tighten them a little more with an adjustable wrench. If this measure does not lead to a positive result, it is not recommended to overdo it, it is better to repeat the procedure for dismantling and installing the mixer, while changing the O-rings.
Useful video
The whole process that is described above is in the video.
Criteria for choosing a bathroom faucet
How to install the faucet on the wall, what are the most common methods? Firstly, this is the replacement of the old one, and secondly, the installation during the repair.
In order to replace the old plumbing with a new one, first of all, you need to choose the right one. It is not difficult to do this, since the current range of products offered by plumbing stores makes it possible, taking into account financial capabilities, to choose a mixer, both domestic and foreign. Below are the characteristics to look out for when buying:
- The weight. Even if you are not an expert, and are not able to distinguish stainless steel from brass, the quality of a product can be determined by its mass. Too lightweight product indicates its small thickness and fragility of the device.
- Metal. If the consultant in the store offers a choice of silumin and brass mixer models, give preference to the second one. Silumin is not very durable, its composition is an alloy of silicon with aluminum, products made from it have a minimum weight and can be deformed during installation.
Many novice craftsmen make a standard mistake when choosing products from it due to the low price. The highest viscosity of the alloy is possessed by brass models, which do not allow the clamping nut to burst with light deformations and installation. In addition, brass fixtures are less susceptible to corrosion.
- Dimensions. This characteristic concerns not so much the size of the mixer as its correspondence to the place of installation to the bathroom wall.In the case of an incorrect selection of a model (excessively long or short, massive or, conversely, a miniature crane and other inconsistencies) or does not correspond to the installation site, it can not only look ridiculous, but also quickly fail.
Installation work
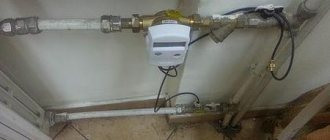
Wall mounted shower mixer

A simple example of a wall mounted appliance.
Wall-mounted faucets are most often used to service the bath and shower.
This is due to a number of advantages and features of this type of plumbing installation, among which the following can be noted:
- Simplicity of installation, maintenance and replacement of the device. The product is fixed and connected with only two union nuts, which greatly facilitates its installation and dismantling;
- When connected to the water supply, there are no flexible hoses, which have always been the weak link of any system;
- There are no hard-to-reach areas or hidden communications, which are often seen in the designs of faucets built into the side of the bowl.
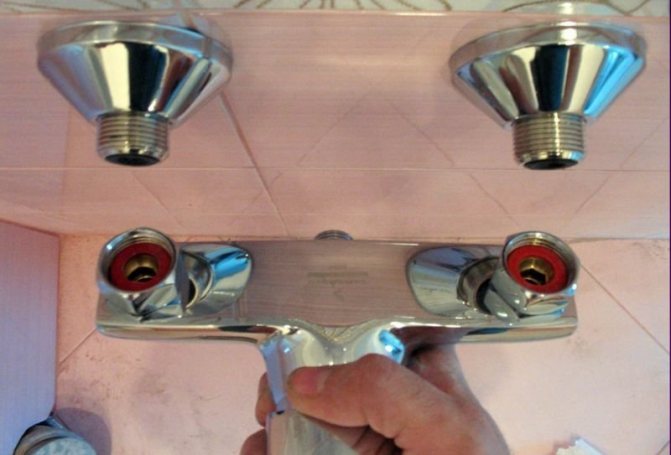
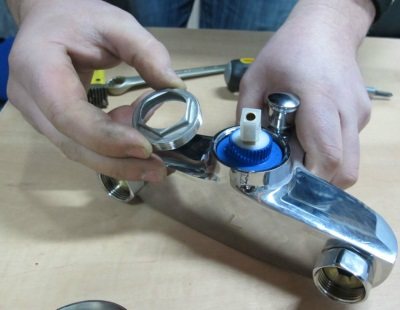
Let's take a look at what a wall-mounted bathroom faucet consists of.

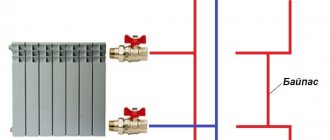
Schematic diagram of a bathroom faucet.
In the diagram, we see a conventional two-valve body, into which valve-axle boxes (3) are screwed for hot and cold flows with flywheels (4) to control shut-off valves. The streams of water meet in the middle, where there is a diverter switch (8), which directs the total mixed flow either to the gander (7) or to the hose of the shower head (16).
On the back side of the body there are two inlet openings, which are located opposite the sockets for mounting crane boxes. On the branch pipes there are union nuts with gaskets (1), due to which the product is connected to the water pipes.
Important! The distance between the inlet holes on the body of the device is not adjustable, therefore, the end pipes of the pipes must be positioned in advance at the correct distance, which depends on the mixer model, but most often equal to 150 mm.
So, let's look at how to assemble a DIY wall-mounted bathroom faucet:
- We check that the water sockets are at the correct distance (see the drawing of the bathroom faucet that we purchased), and also located on the same level;

We check the pipes by level and distance;
- We take the body of the product, twist the crane-axle boxes with lambs, the divertor and install the gander. All connections must be fitted with rubber or paronite gaskets. For correct assembly, the manufacturer's instructions are used;

We assemble the mixer according to the instructions.
- We take eccentric adapters 1 \ 2 - 3 \ 4 ˝ and wind tow on the thread from the pipe side clockwise. Then we apply a sealing paste and twist the parts into the pipes, tighten with a wrench and set them according to the distance;

We wind sanitary flax onto the thread of a smaller diameter.
- We screw the so-called eccentrics onto the thread. reflectors - decorative overlays that hide the connection point;

We wind up the reflectors.
- We apply the mixer, put on the union nuts and tighten them first to the stop with our hands, then with an adjustable wrench. We tighten without fanaticism so as not to crush the rubber seal;

The photo shows how to fix the faucet on the bathroom wall.
- We connect the shower head, fix the shower arm with dowels;

We fix the mounting bracket for the watering can.
- We turn on the water and check the operation of the device.

We check the operation of the product.
Important! Connections equipped with union nuts and rubber seals should not be wrapped with tow or FUM tape.
Onboard mixer

If you first understand how the bathroom faucet is disassembled, it will be easier to work.
Now let's talk about installing an onboard model, that is, one that is attached to the side of a bathroom or sink.There are many models presented here, which have very different quality and price, but the principle of installation is approximately the same.
First, it is advisable to assemble the body: install taps and valves (switch knob for single-lever models), and also screw on the gander. Then from the bottom it is necessary to connect the hoses of the flexible connection of the mixer and insert a rubber gasket.

We put the rubber ring in place from below and fasten the hose fittings.
Now we pass the hoses into the mounting hole and insert the mixer base into it. On the other side of the sink, screw on the fastening nut or bracket, tighten the fastener so that the device is firmly on board.
We fix the product with a fastening bracket and nut.
We connect the opposite ends of flexible hoses to water pipes. We do not confuse hot and cold water, on imported and most modern Russian taps, cold water is on the right, hot - on the left.
We connect the hoses to the water supply.
Important! Tighten the flexible hose connections carefully without overtightening. Otherwise, the gaskets can be pinched and damaged.
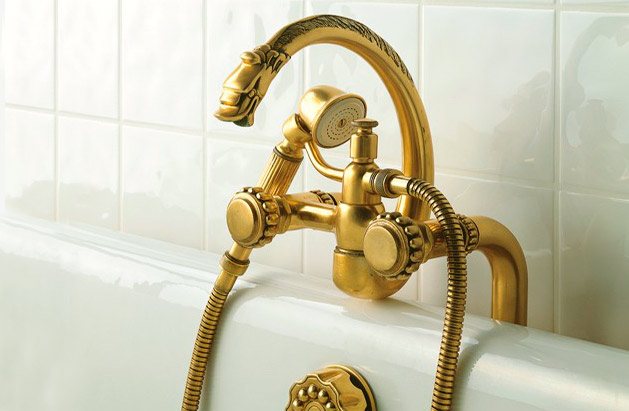
Installation of an expensive crane
To install the faucet in the bathroom correctly, you need to understand the design of products from different manufacturers and know the intricacies of installing taps of a particular brand. Especially if you have chosen a good European option - many of them are now equipped with a water saving system.
An incorrect installation will reduce all the advantages of an expensive purchase to zero. With improper installation, you can pinch rubber gaskets, poorly insulate pipe joints and assemble the crane incorrectly. Professional installation of a faucet in the bathroom will extend its life.
Tap installation and decoration
The next step is screwing on the tap. This is done using the supplied nuts. Check the presence of a winding-seal, on which the valve will be screwed. Now almost everything is ready. Turn on the water and slowly start opening the tap. Do not immediately apply a high pressure of water. In the case of insufficiently accurate installation, the tap in the bathroom can be disrupted. If everything is done correctly, then at the maximum head there will be no leakage anywhere.
Now you can start attaching the decorative overlays. These are special metal parts that are attached to the wall at the junction of the mixer with pipes. Turn on the tap again and turn on the water. If there are no leaks or whistles, proceed to seal the holes and cracks in the wall using ordinary mortar.
Try to stain the surface of the mixer as little as possible. After finishing, wait until it dries, sand everything and cover with a thin layer of putty. And when it dries, you can safely prime the wall and glue pieces of wallpaper or tiles that were removed or damaged during the installation of the mixer.
The mixer installation is now complete! Assembling the mixer is not very difficult. The only condition is the availability of the necessary tools and materials, as well as step-by-step execution of actions. And, of course, masculine strength. After all, dismantling and installing mixers is not at all a woman's job.
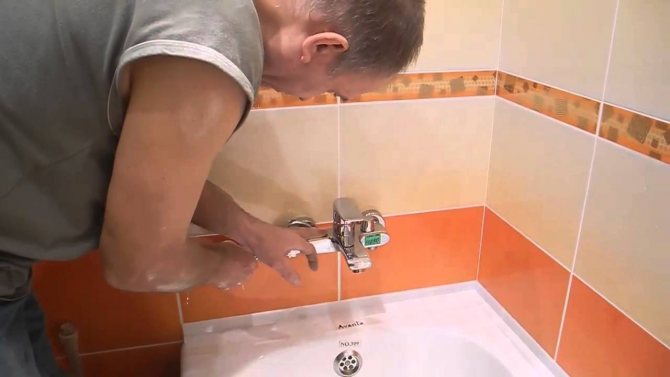
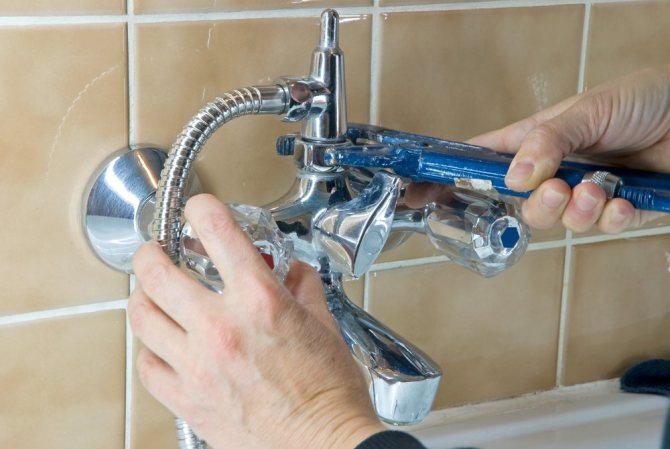
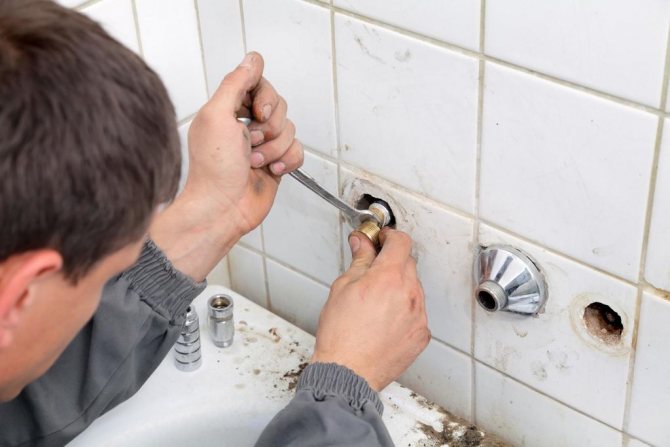
Dismantling the old mixer
Removing an old faucet in a bathroom is a fairly straightforward task. To do this, you will need pliers and wrenches - gas and adjustable. Dismantling is carried out in several steps:
- Shut off the water supplied both through the main line and from the electric boiler or gas water heater;
- Drain the water remaining in the system;
- Remove the tap from the wall. Do this very carefully, taking care not to break the thread of the fitting in the wall;
- Clean the threads on the reinforced-plastic pipes in the wall from the winding.
Output
Before you disassemble the faucet mixer in the bathroom or assemble it, you should familiarize yourself with its structure and some simple rules of operation. Modern devices are easy to install, so you shouldn't have any problems. (Cm.(See also How to install a mixer tap on a sink: features.)
The video in this article will guide you through the installation.
Did you like the article? Subscribe to our channel Yandex.Zen
Methods for installing a faucet in a bathroom
There are several options for installing the crane:
- hidden installation on the wall - the crane is placed on the wall, the pipes are covered with tiles or plasterboard;
- wall mounting with a special rack;
- installation of a tap on a bath.
Concealed installation is more difficult to make, since it is more difficult for a plumber to get to communications. If you have enough free space in the bathroom, then you can make a separate stand, connect the mixer and close the communications with ceramic tiles.
Installation tricks
How to install a mixer in the bathroom if the pipes on the wall are crooked video
- It is not difficult to use tow correctly, to do this, wrap it tightly around the thread in the direction of twisting. Be careful not to twist the tow into bundles.
- When installing plumbing along with water pipes, you will need to mark the height. It is 15 to 20 cm above the top of the bathtub.
We suggest that you familiarize yourself with How to choose the right toothpaste by strips
How to correctly install the mixer in the bathroom on the wall, which does not require a call to the master and financial costs. In addition to invaluable experience, this process will help you grow in your own eyes. Remember: if you want to do something with high quality, do it yourself!
Mixer installation methods
However, how can a mixer be installed in a bathroom? There are several main ways to do this:
- put the faucet on the wall;
- build a separate rack;
- to be mounted in the body of the bath.
The most popular and demanded is the connection of a concealed mixer in the bathroom to the wall. This type of installation allows you to maximally hide pipes that spoil the appearance of the room from prying eyes, and also does not limit the location of the crane in any way. You can install the mixer in the bathroom both along the width of the container and along the bathtub at any comfortable height.
You can also build a separate rack for the mixer, lining it with ceramics and hiding it inside the pipe. This is a rather laborious method, however, it can be used to think over an attractive interior of the room. However, such designs require additional space, which is not available in most bathrooms. A mixer on a stand-alone stand is more suitable for spacious rooms.
Installation of the mixer on the side of the bath is possible if the design of the latter has appropriate connectors in the body. This method involves the supply of special flexible hoses instead of polypropylene pipes and requires the prior purchase of appropriate plumbing.
Do not put a tap in an ordinary classic bath in this way. Flexible piping is very convenient as it avoids complicated piping.
In general, there are no particular restrictions on the installation of mixers. They can be mounted directly above the bathtub or between it and the sink. The approximate height also varies depending on the wishes of the owners - of course, within reasonable limits.
Installing a wall-mounted bathroom faucet
The height above the level of the bath should be within 30 cm, selected taking into account the size of the mixer and the preferences of the owner. The standard distance between the centers of the two fittings is 150 mm, the eccentrics make it possible to correct errors in the horizontal and vertical direction up to 5 mm.
Extract from GOST 25809-96
Single-handle bath mixer with separate connections, wall-mounted with a shower net on a flexible hose, spout with aerator
Mixer for bathtub and washbasin, two-handled with inlets in separate holes, wall-mounted with a shower net on a flexible hose
Working with fum tape
For example, consider installing a mixer on a new wall. The pipelines have already been installed, plastered and tiled.
Step 1. Study the instructions of the mixer manufacturer, check its completeness and the presence of all rubber gaskets. The pipe outlets must have an internal thread.
Single-lever wall mixer
If this is not the case, then several problems arise.
- First. We'll have to buy and screw in couplings. These are additional jobs and new places where a leak may appear.
- Second. The mixer will move away from the wall, will not fit snugly to it, the fittings will be visible. This is a major cosmetic defect.
- Third. Due to the increase in the length of the threaded connecting fittings, the risk of cracking in them increases. The shoulder increases, due to which the mechanical stress increases.
Step 2. Clean the pipes from residual materials. To do this, it is better to open the taps on the pipes with hot and cold water for a few seconds. A strong pressure will wash away all the dirt. Such an operation is much easier to do right away than to dismantle the mixer later in case of clogging.
Pipes prepared for mixer installation
Step 3. Take out two eccentrics. On the one hand, they have a ø1 / 2 ″ thread, and on the other - ø3 / 4 ″. Different manufacturers have different attitudes towards the precision of eccentrics. We advise you to check its dimensions. To do this, screw the eccentrics into the threaded outlets without a seal, pay attention to the ease of screwing.
Valve installation using eccentric adapter sleeves
Installation of eccentrics
At the same time, notice the correct position of the eccentrics. After you screw them in without a seal, attach the mixer. Pay attention to whether the clamping nuts coincide with the thread and the horizontal position of their position, if necessary, tighten / unscrew a little, depending on whether it is necessary to increase or decrease the distance between them.
Checking the horizontal position of the installed eccentrics
Keep in mind that eccentrics with already wound seals should only be screwed in, twisting will cause leaks. Once again, we remind you that during the fitting you need to roughly remember the position of the eccentrics.
After winding, press the tape along the entire diameter of the eccentric with your fingers until the thread protrusions appear.
Step 4. Screw one cam into the pipe fitting. The eccentric position is the same as in the trial assembly. Don't try too hard. If the eccentric is screwed in very easily, then you need to unscrew it, remove the old seal and apply a new one, but in an increased amount.
Step 5. Screw in the second eccentric. Don't screw it up to the end. When there is about one turn left, try on the mixer several times, pay attention to whether the clamping nuts fit exactly. Repeat the operations until the axes of the mixer nuts coincide with the axes of the eccentrics. The nuts should be easy to profit by hand.
Screwed eccentrics
Step 6. Replace the decorative cups. They are threaded and screwed onto the protruding thread of the eccentrics. Screw them all the way to the wall.
After installing the eccentrics, we wind the cups
Step 7. Insert rubber seals into the tightening nuts; they are supplied with the mixer. Screw the nuts on the eccentrics with your hands until they stop. Tighten with a wrench to completely seal.
Mixer installation
Step 8. Check the tightness of all connections, open the cold and hot water supply taps. Leaks can be so slight that they can't be noticed right away. Place a piece of paper under the joints and wait a few minutes. If wet spots appear on it - a problem.
Step 9. Assemble the spout, flexible hose and shower head on the mixer. They also have rubber gaskets, do not use too much force when tightening the nuts.
How to attach the shower hose and hand shower
During the final assembly of the mixer work carefully, do not damage the decorative outer coating of the mixer.
Watering can connected to the hose
Check if the mixer and shower are working
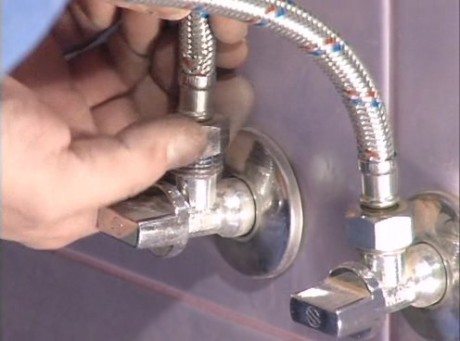
Installing a tap on a bath is possible only if it has holes for pipes and a mixer. If there are holes, then you need to choose an eyeliner - flexible hoses that connect the pipes and the outlet of the mixer.
Submarine hoses differ in material, hole diameters, length. If you haven't bought them yet, our plumber will bring everything you need with him and connect the mixer without any extra hassle for you.


How to replace a tap if it leaks: how to unscrew and remove it
Do it with your own hands in the bathroom not difficult if you follow simple recommendations and perform the work in stages:

Unscrew the nut... initially try doing it manually, since on most valves the nuts are small in diameter and can be loosened.
If it doesn't work, use an adjustable wrench: Hold the gander firmly with one hand, turn the nut with a wrench with the other. Try does not press too muchb so as not to spoil the coating.
If we are talking about a mortise mixer, then you will have to try more, since the handle of the shut-off valve will interfere with unscrewing.
Now all that remains is to turn on the water and check the quality of the work performed.
Installation and connection diagram
So, you have selected the model you need, now you can get to work. Any of the models, regardless of price and quality, must be accompanied by instructions with an installation diagram. After carefully studying it, you can independently connect the mixer. It should already be assembled, so you just have to check the seal in the spout, the fit of the oil seals, the operation of the valve head, inspect the gaskets and seals, and the valve turns.
We invite you to familiarize yourself with How to cut ceramic tiles with a manual glass cutter?
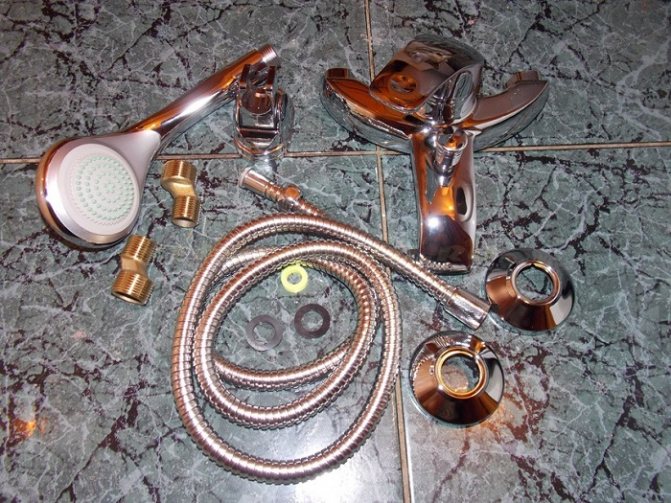
Next, unpack all the boxes and packages that come with the kit. There is a standard set: gaskets, nuts, eccentrics, wall reflectors, bushings, a faucet spout and a shower head. All this you will need to connect to the tap.
Strict adherence to the instructions will not create any problems. But do not forget about the standards: the installation height must be at least 1 meter from the floor.
Install the water sockets in the appropriate places, when removing the fittings, calculate the distance between the pipes with water - it should be 15 cm. It is very important that the fittings are mounted strictly horizontally to each other and are not too long. Having finished with the conclusions of the fittings, proceed to the main part of the work.
Installation nuances
Special attention should be paid to the installation of the mixer on the side of the acrylic bathtub - in this case, you can drill holes for installation in a convenient place and mount any mixer. It also has its own peculiarities:
- holes must be drilled with a special tungsten drill;
- you need to install the mixer before installing the bath itself;
- the side of the bathtub must be reinforced with a special gasket so that it does not bend during operation;
- the tap must be located next to the open side in order to easily and without unnecessary problems get to the pipes and valves.
Required tools
You need to immediately prepare all the necessary tools: the mixer itself and all its components, pliers, building level, tape measure, adjustable wrench, open-end wrenches. Also prepare linseed tow, silicone, sealing tape. You will definitely need a piece of soft cloth, a bucket, wet wipes, and even toilet paper.
A great option is tools without teeth, but if they are not, don't be discouraged, just cover the parts with a rag or towel. This will protect them from damage to the coating. Paper is needed in order to wipe everything and check for leaks. And if there is a leak, you will have to disassemble and reassemble the structure, and this is unlikely to give you pleasure.
Installation subtleties
It is necessary to screw the gander to the main unit, then turn the hose with a watering can. You do not need to use the keys and tighten the nuts too. Having assembled the model, you can start the installation, which consists of the following steps: wrap the eccentrics with sealing tape, then insert the fittings located in the wall, which remained from the previous tap.
This must be done very carefully. If there is no tape at hand, tow can be a substitute. Next, we screw in the eccentrics, strictly measuring the distance between the inputs on the mixer and using a level. This is done for a reason - the distance should be strictly 15 centimeters. After that, we wind the main block on the eccentrics. This should be done slowly, as it must be secured carefully.
Try not to rush, and if something does not work out, it is better to take a short break and calm down. If the block on both sides is screwed up calmly, then everything can be put correctly. Then the block must be removed and decorative shades must be screwed onto the eccentrics, which must necessarily fit snugly against the wall and close the insertion points of the mixer to the wire. If everything is exactly like that, then your work is done perfectly well. Next, we screw the block back using the reel. In order for the shrinkage to be tight, gaskets from pressure nuts must be used. The nuts need to be tightened with a wrench, but not very tightly.
We open the hot water tap and check how the mixer works. Start the test with a low pressure, gradually increasing the power of the water supply. Be sure to check how the shower works. If everything is in order, then you did it the first time. But if there is a leak, you need to find its source, turn off the water again and repeat all over again. There is a good chance that you have overtightened the nut or some fastener.
You already understood how to install a new mixer instead of a worn-out one, now let's deal with a more difficult task - installing a mixer on a new wall. First, pipes are replaced, the walls are tiled. Further, plumbing pipes are laid out, beacons for plaster are installed.
You must calculate the notches in the wall so that they exactly coincide with the distance from the lighthouse to the tiled plane.This is about 17 centimeters. If you are not sure that you can carry out all these work, then it is better to invite a specialist after all, so that later there will be no problems when installing the mixer.
After all the work done, you can start installing the fittings. In order to install them, you need to postpone the distance between the centers of the fittings - 15 centimeters. The centers should be on the same parallel, the end point should protrude beyond the wall, and the fittings should be flush with a suitable height. Once the fittings have been installed, the mixer can be attached. This is done in the same way as in the previous version.
Now let's consider another option for installing the mixer - on a horizontal surface. Such a need arises when installing a mixer on the side of the bath. Before embarking on such an installation, it is imperative to clarify whether the bearing side of the side can withstand the increased load.To mount this type of mixer, you will need a drill with a set of cutters, wrenches and screwdrivers.
At the beginning of the installation, you need to make a markup in order to then strengthen the plates along it. After marking, holes are drilled in the side of the bath. Carefully study the instructions on how to connect the mixer to the pipeline using the connecting hoses and other components included in the kit. Next, we glue the horizontal surface with masking tape to protect the surface from chips and damage, apply the markings and start drilling the holes that are necessary to install the mixer. After the holes are ready, remove it and process the edges with a special tool.
We suggest that you familiarize yourself with Installing a screen under a bath: how to install a screen with your own hands under an acrylic model, installation instructions
The next step is to collect all the parts and fix them without using keys. If the connecting hoses took their places without hindrance, then everything was done as needed and you can proceed to the final fixing of all parts of the mixer. The next step is to check the mixer for leaks.
The last method of installing the mixer, recognized as the most difficult and expensive, is to install the mixer in the floor. Before any renovation is done in your bathroom, you need to start laying two pipes for cold and hot water. In the floor, recesses are made in the size of the diameter of the pipes, pipes are laid along these recesses to the place where the bathtub will be located. After this, the grooves are closed up, the floor screed is made and the tiles are laid. Then we act according to the technology described above - we mount the mixer, check for leaks, etc.
Bathroom faucet is leaking
Bathroom faucet repair: causes of breakage and repair methods
A mixer is a device for regulating the flow rate and temperature of the water flowing out of the tap.
The bathroom faucet also adds a function to switch the flow of water from the tap to the shower. Unfortunately, mixer breakdowns often occur. But more often than not, they are easy to eliminate on your own.
The main causes of malfunctions
Perhaps the most obvious reason for a mixer breakdown is the poor quality of the product itself. Today the market is replete with low-quality Chinese and Turkish-made sanitary ware, the service life of which is short in itself. When choosing a new mixer, the desire to save money can play against you. Better to spend it once, but get a high-quality mixer that will serve you for many years.
The second reason for frequent breakdowns can be the use of short-lived consumables. For example, using a rubber gasket in combination with hard tap water will lead to frequent breakdowns. In the case of using ceramic inserts, the mixer will serve you much longer.

Incorrect installation also often leads to all sorts of breakdowns and reduced product life. When installing the mixer, it is very important to take into account its design features.
Read more about the types in our article on choosing a mixer. Here you will also find many useful tips and tricks.
Each of these types of mixers is mounted in its own way and breakdowns in them can also be caused by different reasons.
Further in the article, we will dwell in more detail on more specific reasons for the breakdown of each type of mixer and tell you how to deal with them.

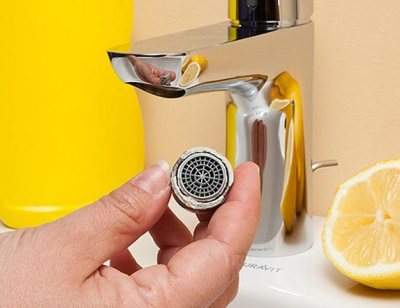
Reducing the volume of the jet from the tap
The most common problem with single-lever mixers is a decrease in the jet volume.... The cause of such a malfunction, as a rule, is the clogging of the aerator - a nozzle attached to the end of the gander, through which water flows from the tap.

This problem can be easily fixed in most cases. You just need to unscrew the aerator and clean it well either under a strong stream of water, or blow it out with a stream of air.After that, all that needs to be done is to screw it into its original place. Any housewife can do this.

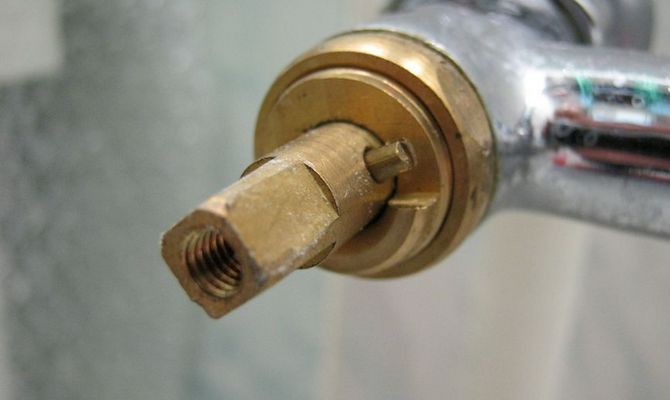
Leakage from the gander clamping nut
Another common cause of faucet breakage is gasket wear. Surely everyone imagines what it looks like - it is a small circle of cushioning material with a hole in the middle. Previously, rubber gaskets were commonly used in older mixers. Now it is possible to use more modern and reliable materials, such as paronite.
To eliminate the leak, we need a gasket of the appropriate diameter, an adjustable wrench and a tape made of fluoroplastic sealing material or flax with a special paste.
- Remove the metal ring securing the spout pipe to the faucet.
- Remove the spout pipe and remove the remnants of the worn gasket.
- Put on a new one.
- Wrap the thread of the spout pipe with tape or linen and paste so that when mounting the parts tightly press against each other.
- Secure the spout pipe with a metal ring.
- Either hot or cold water is not supplied;
- The water temperature changes arbitrarily, without changing the position of the lever.
- The tap does not work at full strength or does not close completely;
- When you switch the lever, you have to make additional efforts;
- And finally, the problem we mentioned above is the presence of a leak from under the lever.

Repair of a single-lever mixer when a leak is detected from under the lever
Such a leak is usually caused by a malfunction in the mixer cartridge. First, let's figure out what is a cartridge?
Cartridge Is a prefabricated cylinder with three holes; hot water flows into one hole, cold water flows into the other, and mixed water flows out of the third.
By the type of mechanism used for mixing hot and cold water, cartridges are divided into ball and ceramic. In addition, a rod is located on top of the cartridge, on which the mixer lever is attached. It is in this place that the leak occurs.
When to change the cartridge
The main signs that it is time for you to change the mixer cartridge:

First of all, we recommend that you remove the old one before buying a new cartridge and go with it as a sample to a plumbing store.
Choosing a new cartridge
As we mentioned above, it is important to pay attention to the quality of the plumbing you buy. Give preference to cartridges of proven European companies and try not to fall for the tricks of scammers copying the performance of famous brands.
Typically, if you are not installing the entire water supply system in a house or apartment, you have no choice about which type of cartridge to choose. The fact is that, despite the variety of models, there is only the two main types of cartridges are ball and ceramic.
The advantage of using ball cartridges is the ability to disassemble the cartridge itself and repair it if necessary.
The ceramic cartridge cannot be disassembled, it must be replaced entirely, but the ceramic plates in it are more durable and are not subject to the negative influence of hard water. If initially the water tap was installed with the expectation of using a ball cartridge, you will no longer be able to supply a ceramic one. And vice versa.
But back to the issue of repairing a single-lever mixer if a leak is detected from under the lever:
1. Remove the cold and hot water direction cap with a screwdriver.
2. Under it you will find a screw. Unscrew it carefully with a hex wrench or a suitable size screwdriver so as not to damage the threads. If you cannot do this carefully, use a drill with a fine drill bit.
3. Remove the lever from the mixer body by pulling it up.
4. Remove the decorative element from the mixer by hand or pliers.
5. Unscrew the nut that directly presses the cartridge itself to the mixer body.To do this, first use an adjustable wrench, and then carefully unscrew it by hand.
6. Everything. Now you can take out the old cartridge, feel free to go to the store with it and buy yourself a new one.
7. To install a new cartridge, reverse all the steps above.

Shower tap leak
There is another gasket in the mixer, similar to the one that is located between the gander and the mixer body, which we wrote about above. This second gasket is installed between the mixer body and the selector lever. It also tends to wear out over time.
Replacing such a gasket occurs in almost the same way as the previous one:
If you want to install a new mixer, we advise you to watch our master class on installing a mixer.
Two-valve mixer (leakage from the valve)
This type of malfunction occurs as a result of:
- damage to the crane box - a device inside the mixer that opens and stops the flow of water;
- failure of the sealing ring on the crane box.


Leakage from shower hose nut or shower hose
The basic principle of action here is the same as when replacing other gaskets: unscrew the fixing nut of the hose, remove the remnants of the old gasket, put a new one in its place, wind the FUM tape on the thread and screw everything back as it was originally.

Faulty button switch "shower-faucet"
If water began to flow from both the shower head and the tap at the same time, most likely the problem lies in the breakdown of the switch button mechanism, namely in the oil seal.

Contactless (touch)
So we got to the last existing type of mixers - contactless or, as they are also called, sensor mixers.
Their name speaks for itself: at the heart of their work is a sensor that detects movement when you bring something to the tap, and automatically turns on the water supply. You do not need to twist anything.
Such mixers are considered the most durable and their shelf life is from 5 years. In addition, they are really easy to use and help to save water consumption.

But their main disadvantage is that they are extremely difficult to repair. We do not recommend doing this yourself. It is better to try to find an experienced specialist who understands this issue. You are unlikely to be able to repair the sensors yourself - most likely, you will simply break the mixer completely.
If we are talking about some minor flaws, such as a clogged aerator, you can easily cope with such a problem on your own.
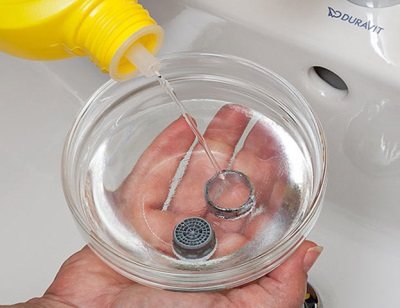
Aerator clogging is most often expressed in a decrease in water pressure, as a result of which it flows in a thin stream. To check, you need to remove the aerator and open the water. If the water pressure becomes standard, then if the aerator is rusty, then replace it with a new one.
If the aero motor is dirty, rinse it under water.In case of heavy contamination, use special products.
If you understand the mechanism of the mixer, it turns out to be not so difficult to repair it. We hope that our article has helped to solve the problems you have with the mixer and eliminate all faults.
If you haven't found a solution to your faucet breakdown problem, read our article on repairing a bathroom faucet.
How to fix a bathroom faucet if it leaks?
The most frequent breakdown of the water supply system in the house is the mixer in the bathroom leaking; how to fix it with your own hands - this question worries many owners. In fact, it is not that difficult to repair a device, especially modern models. The procedure will depend on the type of mixer: single-lever or two-valve.
Content
1 Repair of a two-valve valve
Two-valve taps with a shower are the oldest model, used for several decades. These mixers consist of two valves, one of which regulates the supply of hot water, and the other - cold. Breakdowns of such cranes are not at all complicated, they are easy to fix on your own.
The most common problem with both old and new valves is the wear of the rubber gasket. This small part acts as a shut-off element.
If the rubber gasket is worn out, then the valve cannot cope with the pressure of the water, and as a result, a leak forms.
Before repairing a two-valve tap, turn off the main tap to cut off water access. Then you need to disassemble the tap. If the gasket is indeed worn out, it should be replaced. Part size is 3/4. For repairs, you will need a new rubber gasket, an adjustable wrench and an FUM sealing tape. By the way, instead of a purchased gasket, you can use a homemade one made from a piece of rubber.

Repair of a two-valve crane
We recommend that you familiarize yourself
First, use an adjustable wrench counterclockwise to unscrew the nut that secures the switch to the body. Then the gander is carefully removed. The worn out gasket must be removed and replaced with a new or homemade one. Then an FUM tape is wound on the thread and the valve is assembled.
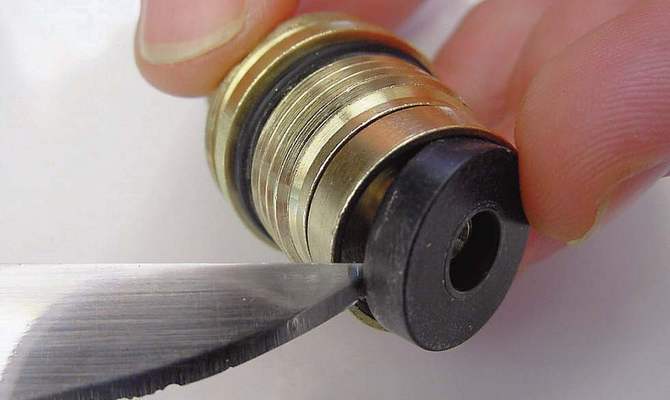
Usually replacing the rubber pad is sufficient to establish a breakdown. But if water starts dripping again a few days after the repair, the problem most likely lies elsewhere. After prolonged use, the valve seat is damaged: nicks or cracks appear.
To solve the problem, the deformed area can be straightened with a cutter. After assembly, the valve usually stops flowing.
Replacing the rubber pad
The old two-valve cranes were worm gear. Nowadays, another mechanism is increasingly being used - a crane-axle box. It consists of 2 disks of the same size with holes. When you turn the tap, the discs turn, the holes match, and water flows from the tap. If you turn the tap in the opposite direction, the holes will be closed and the water supply will stop.
If such a valve is damaged, it is worth tightening the lock nut on the valve. If it is absent, as is the case in some models, or the fastening did not bring results, it is necessary to replace the counter-axles.
2 Other causes of failure of two-valve valves
Most often, a leak occurs as a result of wear of the rubber gasket. But the reason may lie in other breakdowns. For example, water may start dripping due to breakage of the conical box. It will not work to repair the old box on your own, so the only way out is to purchase a new one and install it.
Another common cause of leakage is the wear of the stuffing box liner. In such cases, a leak occurs when the valve is open, as water flows between the gland and the stem.To fix the problem, use a screwdriver to unscrew the gland nut. Then you can make a seal insert. Sealing fluoroplastic tape can be used as a material. The new liner is installed on the rod. Then the nut can be tightened and the valve can be assembled. If the work is done correctly, the flow stops, and the valve turns easily and smoothly.

Replacing the stuffing box liner
Leaks can also be related to wear on the O-ring. It is replaced as follows. First unscrew the shower hose. Then the old worn seal is replaced with a new one. The crane is assembled in the reverse order.
If water flows out of the tap when switching the water from the tap to the hose, it is necessary to remove the tap-boxes and replace them with new ones. It is worth considering the purchase of new crane trailers carefully, since they are different: with a rubber lining or ceramic. The correct crane box model can be purchased at a plumbing store.
The best way to avoid repairs, as well as breakdowns, is to use a crane correctly. To do this, it is enough to follow simple rules:
Replacing damaged crane trailers
Initially, it is recommended to choose high-quality devices, since a good mixer will last long enough without any breakdowns.
3 Repair of a mixer with one lever
Now domestic and foreign two-valve cranes are gradually losing ground. Increasingly, customers are choosing single-lever cranes. In such devices, the supply and termination of water supply, temperature control is carried out with a single tap. If you move the lever handle up, the water supply is turned on, to the right - hot water, to the left - cold water. Such devices are considered to be simpler and easier to use.
Such a faucet in the bathroom can consist of cartridges, which can be of two types:
Unlike rubber gaskets in two-valve taps, cartridges are much more durable and require less replacement.
In appearance, ball and disc cartridge valves are indistinguishable from each other, but at the same time their structure is completely different. Therefore, in the event of a breakdown, a ball cartridge cannot be replaced with a disk cartridge, and vice versa. Therefore, before buying spare parts and carrying out repairs, it is worth determining what type of cartridges is used in the crane. Depending on the cartridge installed in the mixer, the repair method will be slightly different.
Repair of a mixer with one lever
For example, to replace a ball cartridge faucet, follow these steps. First, the water supply to the apartment is shut off. Then the bolt that secures the handle is unscrewed. The lever compartment can be easily loosened and retracted. A connection appears that needs to be unscrewed counterclockwise. First, the dome of the crane is removed, and only then - the plastic part.

Replacing the Ball Cartridge Faucet
Then check the seal. If there is dirt on it, it must be removed. The old gasket, if it is badly worn out, should be replaced. All seals holding the ball are checked in the same way.
Next, the ball is removed. It also needs to be examined carefully. If there are defects, it is better to replace this part with a new one.
After all these manipulations, you can assemble the crane in the reverse order, not forgetting to check the quality of the installation of the parts.
4 Other causes of mixer leakage
Sealing gaskets are also installed in other places of the tap, for example, between the mixer body and the shower switch. Over time, these seals invariably wear out, and this leads to the fact that water begins to drip. In such situations, there is only one way out - to replace the seal.
First, the water selector lever is separated from the mixer. Remove the fixing bolt from this lever. It should be borne in mind that in many modern models it may be absent. Then the lever itself is removed. The old gasket is replaced with a new one or one made by yourself.
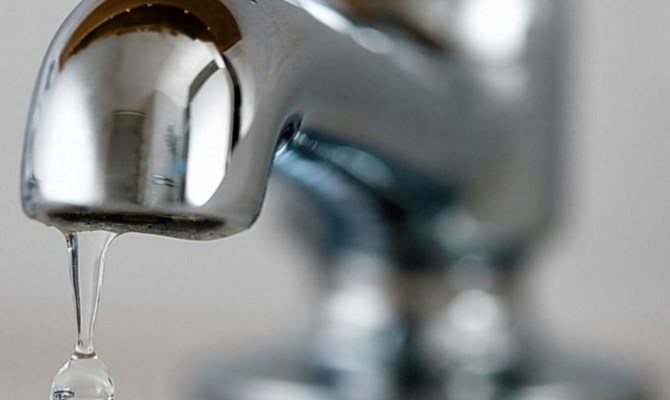
Water dripping from the tap
A sealing tape FUM is wound on the thread, after which the structure is assembled in the reverse order.
Another reason may be a poor-quality installation of the mixer, although such cases are quite rare. If the mixer has "moved away" a little at the connection point, it must be removed, check if the threads are correctly aligned and re-install.
In some cases, the leak appears even on completely new taps. Naturally, in such cases, the problem is not a worn seal. The most common reason a new mixer starts to leak is a manufacturing defect. It is not always possible even for specialists to repair a defective mixer. In such cases, it remains only to dismantle the device, take it to the store and ask for a refund.
If it flows under the tap: what to do?
It flows under the tap in the bathroom. What to do? This information will be useful to anyone who wants to fix a problem on their own. It doesn't matter if the tap is leaking in the bathroom or in the kitchen, since all the nuances depend only on the design model. How to fix a faucet? Disconnection of water can be carried out throughout the apartment in the case when there is one riser per apartment. If the kitchen and the bathroom are located at different ends of the apartment, and accordingly there are two risers, the water in which is cut off separately for the bathroom and the kitchen.
How to fix a faucet leak
What to do if the valve leaks in the closed position? If a two-valve mixer is leaking. Such a crane has been used in apartments for many decades. It's just that nowadays it has become more modern. But the principle of the device is the same, and there are exactly the same malfunctions. The two-valve mixer is designed in such a way that one valve responds to the supply of cold water, and the other to hot water. This mixer uses a worm gear. And the most common malfunction in a two-valve mixer is when water drips from the tap, that is, the tap leaks.
In this case, the gasket in the tap fails. You can replace it yourself. The required product can be bought at any specialized store or on the market. Many men know how to fix a tap. After all, not everyone wants to call a master because of such a minor breakdown. Replacement sequence:

But it so happens that a new gasket is installed, the tap in the bathroom functions normally for some time, but after a while it is discovered that the tap is leaking again.
In this case, the cause must be sought in the so-called valve saddle. After prolonged use, it can crack, serrate and wear out. Then you should walk through the problem area with a cutter, align it. And the tap will stop flowing.
In modern cranes, instead of a worm gear, a crane box containing ceramic discs is often used. In this case, if the valve is leaking, then you need to tighten the lock nut, which is in some models, more tightly.
If it is not possible to eliminate the leak, then the valve should be replaced.
How can a bathroom faucet be repaired?
If a single-lever mixer is leaking. Recently, double-lever mixers are gradually becoming a thing of the past, and they are being replaced by mixers with a single lever. Their main plus is ease of use. Turning left and right adjusts the water temperature, and up and down the supplied pressure. The main place in their design is occupied by cartridges: ball or disk. They need to be changed less often, since the valve leaks in such structures not so often, unlike rubber gaskets. The service life will be longer.

Externally, ball and disk cartridges differ little from each other, but inside they have significant differences. They are not interchangeable, that is, instead of a ball cartridge, it will not be possible to put a disc cartridge. Therefore, when buying a single-lever mixer, you need to know or ask the seller which cartridge is used in this model in case of further troubleshooting.
How to repair a faucet that has one lever and a ball cartridge as filling? It's not that difficult, just follow the instructions.
If there is a leak at the point of attachment of the lever, which switches from the mixer to the shower. Water does not always leak from the tap, sometimes drops are found in the area of switching from the mixer to the shower. A gasket is installed between the switch lever to the shower, as in a two-valve mixer, which tends to wear out over time. This explains why water flows at the point where you switch to the shower. In this case, you need to replace the worn seal, which can be paronite or rubber. When purchasing a new gasket, you need to know that its diameter should be ½ inch.
To change the gasket between the lever for switching from the mixer to the shower, you need:
If the problem is that the lever is simply poorly attached to the pipeline, and flows under the tap for this very reason, then you need to check the compatibility of the threads of all the parts to be connected, disassemble and reinstall. But such cases are rare enough.
see also
- 09/07/2016 Why does the water flow badly from the mixer?
- 07/18/2016 Modern bathroom faucets
- 06/30/2016 How to choose a faucet for the kitchen
- Bathroom faucet device Two-valve Single-lever Thermostatic Touchless For a bath With a shower The faucet is an integral part of any bathroom. ...
- How to disassemble a single-lever faucet in a bathroom How to disassemble a single-lever mixer - features and video A single-lever faucet is an innovation in plumbing ...
- Waterproofing tape for a bathroom Tape for waterproofing a bathroom / ”title =” Repair of bathrooms and toilets ”> Main / vse-vidyi-remonta /” title = ”Useful articles”> All ...
- Spare parts for the mixer Types of components Rules for choosing spare parts Repair kit What can be repaired by yourself? When is it necessary to contact a master? ...