Specifics
The main aspect that should be taken into account is this: the hood of the hood necessarily surpasses the area of the equipment above which it is located. This way the smoke is collected much more efficiently. The chimney should have a narrowing and a bend. This improves the dynamics of the extraction of combustion products and does not produce reverse thrust. The top side of the pipe is usually positioned at least 3 m from the ground. This provides the required exhaust conditions. If the calculation is incorrect, the chimney cross-section results in an ineffective discharge of combustion results.

Each owner is especially proud when, by his efforts, he creates both a brazier and an extractor hood for him.
Thanks to additional components, the extraction efficiency is developed. But this requires additional costs. These components are:
Spark extinguisher. The position is the top of the chimney. This is a tubular metal sieve. Smoke easily flows through it, and sparks are extinguished. Fat trap. This frame with an inserted special cassette (cassette - replaceable) for capturing fat. When this device becomes dirty, it needs to be rinsed well or replaced altogether.
It is important here how the model is delivered, what filtering substance is involved. Fan
It seriously develops pulling power. When installing it, it is necessary to make competent calculations with the parameter of the required equipment.
Do-it-yourself metal version
The metal structure is an exhaust hood, the operating principle of which is extremely simple. It collects combustion products and removes them through a pipe from the room. Such an umbrella must be very smooth, as any roughness will reduce its effectiveness. If you prefer a metal umbrella, you must also provide a wide opening.
To make it, you will need a sheet of steel, corners (made of metal), a riveter, rivets, screws, a welding machine, a grinder and a drill.
Now for how to do it:
- The first step is to create a drawing and apply all the dimensions on which the hood will be designed.
- Now we make the frame. First, blanks of the required length are cut from metal corners. We alternately weld the lower and upper parts of the frame, and then we connect them into one structure.
- The frame of the chimney itself is assembled from the corners.
- Treat the seams left after welding. They are sanded with a disc, and on top are coated with a special varnish against metal corrosion.
- Let's start covering the finished frame. We cut out metal sheets and make folds, having previously laid the sheets on the workbench.
- We use a drill and make mounting holes to securely fix the skin.
- Finally, a riveter will help sheathe the frame with sheets of metal.
- The final touch is the application of an anti-corrosion coating to extend the life of your structure.
Many are interested in how such a hood is attached. This can be done either with racks or with suspensions. The former are made of brick or iron. You can also add an interesting iron element - massive chains on which the hood will be mounted.
Cooker hood. Tools and materials.
- Iron sheet 3 mm.
- Metal corners 20x20x3 mm.
- Rivets, screws, heat-resistant paint.
- Angle grinder (grinder) with discs for cutting metal.
- Welding machine, electrodes, mask.
- Drill with concrete attachments.
- Riveter.
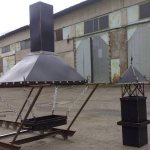
The umbrella consists of a frame made of metal corners, sheathed with metal.The height of the umbrella is 2 m, it will be installed on a brazier measuring 105x60 cm.
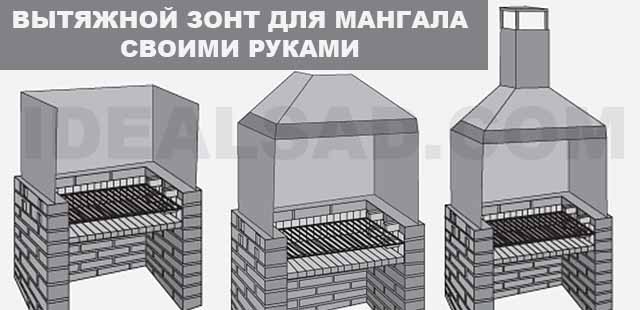

The umbrella consists of three parts: the base, which is attached to the brazier; domes with internal lintel for improved traction and pipe.
Hood for barbecue in the gazebo
This attribute of outdoor picnics can be portable and stationary. Portable barbecues, very simple designs, do not need hoods. The owners can easily place them anywhere, so that the smoke does not go towards the recreation area, and does not interfere with the guests. But stationary barbecues need a smoke extractor, especially if they are located inside the gazebo or in the summer kitchen.
There are two main types of brazier hoods: metal and brick. The first are the most widespread. They are easy to make with your own hands, you can hang or install them on supports above a brick oven, the choice of shapes and sizes is very large. Brick hoods, in fact, are an integral part of the barbecue oven, on which you can cook not only barbecue and grilled vegetables, but literally anything. Laying out a brick hood, which will become the beginning of the chimney, is already a matter for the master, the stove-maker.
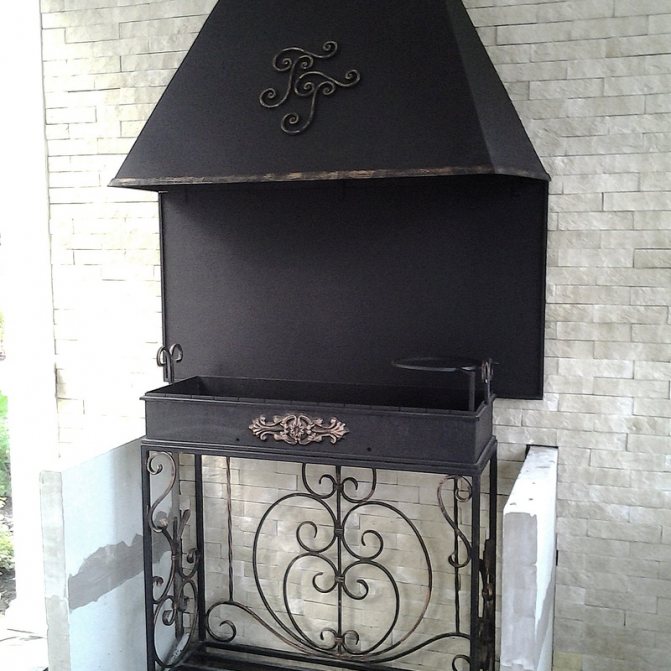
Therefore, we will focus on metal exhaust hoods, which can be in the form of a hemisphere, parallelepiped, or a cut pyramid. Such domes for barbecues are made most often from stainless steel sheet with a thickness of 2 millimeters. Factory products are covered with a protective polymer layer; at home, the metal can be simply painted to give the hood a more attractive look and extend the service life.
The design of the simplest metal hood is not complicated:
- Smooth rectangular base;
- The dome is on it;
- Chimney pipe.
The size of the dome will depend on how large your grill is. In order for the umbrella to remove all combustion products, soot and sparks, it must be 30 percent larger than the size of the barbecue. And the pipe should be located exactly in the center, above the hearth!
We give you the standard parameters of an exhaust hood:
- The width of the smoke box, dome - from 65 to 95 centimeters;
- The length of the smoke box is from 85 to 155 centimeters;
- The height of the pipe is not less than 300 centimeters, which will ensure normal traction in any weather;
- The pipe section is at least 25 centimeters, also for good traction.
You can increase or decrease these standard sizes of the smoke collector-umbrella depending on the features of your barbecue. But we do not recommend reducing the height and diameter of the chimney pipe!
The manufacture of a metal barbecue is associated with welding and flexible steel, but in general it does not represent anything complicated, a home craftsman can do it quite well. You can supplement the exhaust hoods with a fan so that the draft appears immediately after the firewood or coal is ignited, without waiting for the smoke to heat up and begin to go into the chimney in a natural way.
A spark arrestor, which is installed on top of the pipe under the chimney hood, will also not interfere. Some people put a removable grease trap inside the hood, which will have to be cleaned regularly. However, this process is familiar to all owners of conventional kitchen hoods. All of these additions will increase the cost of the hood, but make the cooking process safer and more convenient. published by econet.ru
If you have any questions on this topic, ask the specialists and readers of our project here.
Installation of kitchen exhaust systems
Any room has a ventilation system that provides fresh air inflow and polluted air outflow. However, for food preparation areas, such ventilation is not enough, because emissions, before entering the general system, spread throughout the room and mix with a clean one.
Therefore, in the food industry and in domestic kitchens, local ventilation is usually used, the main element of which is a ventilation hood. Most often this is a domed structure that is connected to a general ventilation system.


In the photo - industrial kitchen exhaust units
The umbrellas of ventilation systems are made of galvanized sheet steel so that when hot air enters the box, oxidation and even greater air pollution do not occur.
The entire structure, as a rule, consists of several basic elements:
- Box - is the main product, since it prevents the spread of emissions throughout the space of the room, and also acts as a housing for other parts.
- Filters - as a rule, all models are necessarily equipped with a grease trap. In addition, they can have additional filtration systems.
- Fan - forcibly sucks polluted air into the box. I must say that it is not available in all devices. For example, if the structure is connected to forced exhaust ventilation, then it may not have a fan.
- Air duct - the channel through which the polluted air enters the ventilation system from the box. The diameter of the duct can be different: 110–150 mm. In addition, there are square and rectangular ducts.
Note! When working with an open flame, the product must be equipped with a flame extinguishing filter.
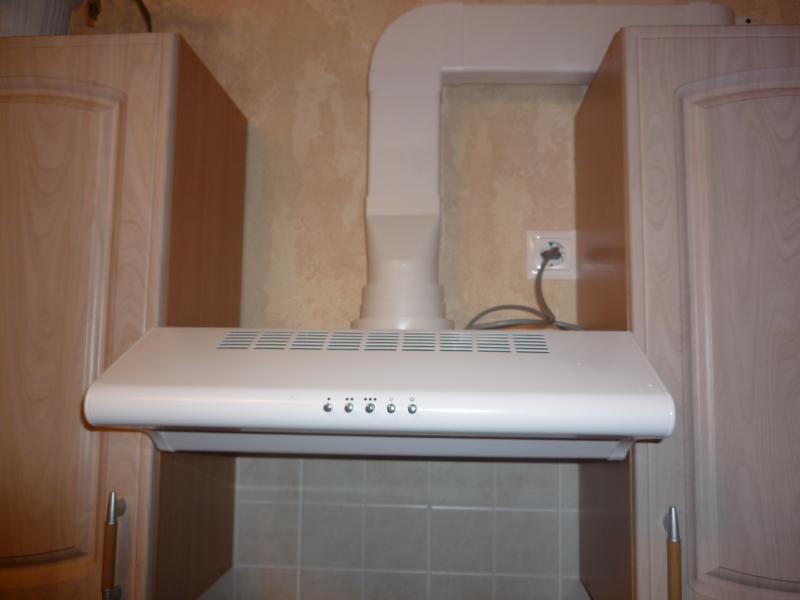

Rectangular duct for household installation
Depending on the type of device, the design may have some nuances. For example, recuperative ventilation hoods do not have an air duct, since they are not connected to general ventilation. The air in such devices is finely cleaned and goes back into the room.
Thus, the principle of operation of the structure is quite simple - polluted air is sucked into the hood, it is cleaned there to prevent clogging of the ventilation system, and then it is discharged outside through the air ducts.
Diagram of the device of the outlet and recuperation apparatus
Features and Benefits
A gazebo with barbecue will make cooking in the fresh air a truly restful, comfortable and relaxed one. Its huge advantage is that an unexpected change in weather, insects will not spoil it. The gazebo will be able to protect a large number of people from bad weather. And if the interior, for example, provides for a resting place with a rocking chair, a hammock, then many guests are definitely provided for the owner of this miracle.
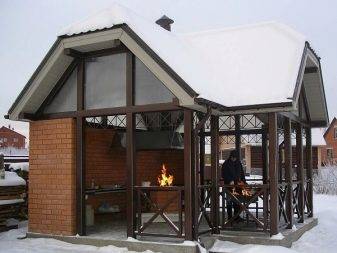

Gazebos can be temporary or permanent.
Temporary gazebos are installed directly in the warm season, by the onset of cold weather they are dismantled and stored. As a rule, they are used by summer residents whose stay on the site is seasonal. The advantage of this option is the ability to move them, the ease of construction.
Permanent gazebos are installed on asphalt pavement, piles or strip foundations, depending on the type of soil and the severity of the structure. Even in winter, such a gazebo can be used for its intended purpose. The size of permanent gazebos can be quite large, it all depends on the wishes of the owners. Often full-fledged kitchen and dining areas, a resting place are arranged there.
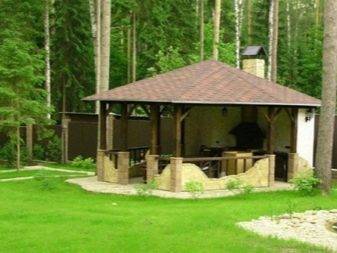

The most important attribute in such a gazebo is a barbecue, on which any dish turns out to be tasty and aromatic. The chimney is the key design element here. The presence of this design is necessary even if the gazebo is open. The chimney removes smoke and soot from the gazebo space and brings them out.
The smoke collector for the barbecue in the gazebo can be made of brick or metal. It is better to make metal hoods from stainless steel; there is practically no need to care for it.
Brick chimneys are more difficult to assemble, heavier and more expensive, therefore they are rarely used. They are used mainly for brick arbors, in case there is a desire to withstand the entire building in a single style. In small buildings, due to their heavy weight, their use is highly undesirable.
A fairly common option for a gazebo is a folding brazier. During the cold season, gazebos are usually open, and the coatings inside are exposed to the weather. The brazier suffers from them quite strongly.
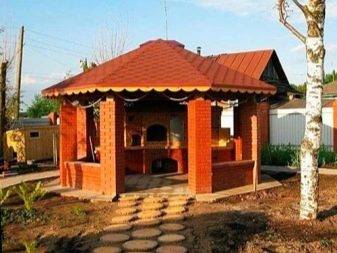

When organizing a hood in a gazebo, the following difficulties most often arise:
- The smoke does not leave the gazebo. This is usually due to the low combustion temperature. This problem can be corrected by raising the temperature in the hearth - the smoke heats up, its density changes and it begins to rise and go into the chimney.
- Combustion products accumulate in the gazebo. This is due to the insufficient length of the smoke collector pipe. The top of the pipe must be at least 3 meters above the ground. In other cases, the draft is not enough, smoke and soot remain in the room.
- After heating the wood to a sufficient temperature, the smoke does not go away. In this case, we can already talk about the wrong size calculation. The diameter of the outlet pipe must be at least 15 cm, and the section of the chimney itself must be a square with a side of at least 26 cm.
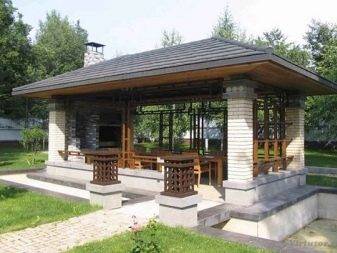

It is desirable that the gazebo is warm and protected from the weather as much as possible. Such structures can be open and closed.
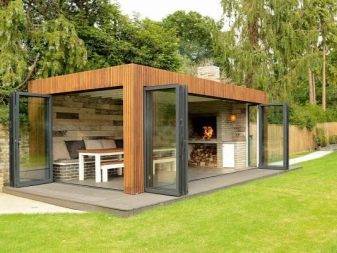
At the open gazebo, the walls are low, the roof rests on racks of various types. In case of worsening weather, they can be provided with PVC curtains or film, reinforced as roll-curtains on the openings. In the event of a cold snap, they can be lowered and the space inside from the wind and rain can be closed. A closed gazebo is a small house with a door and walls. The walls can be movable and fold in good weather.
There are times when the means or the size of the gazebo do not allow organizing the hood for the barbecue. This issue can be solved by placing the hearth outdoors.
In addition to a barbecue or barbecue, an open hearth can be equipped in the gazebo. It can be used for cooking, boiling, or braising in refractory cookware.
It is good if a comfortable firebox is equipped next to the gazebo. It is better to close it with a canopy or make it in the form of a special box with a lid.
Fire safety must be provided in full. The distance from wooden residential buildings to a gazebo with a barbecue should be at least 8 meters. Electrical appliances must be grounded, only a special outdoor cable can be used. If there are elements made of wood in the gazebo, they must be treated with fire retardant compounds against fire.

How it works?
A device of this type is a powerful hood designed for efficient ventilation of the air in the kitchen. They are most often installed directly above hobs in restaurants, cafes, canteens and other catering establishments.
Such a device can be installed not only over ordinary kitchen stoves, but also over other similar equipment: a grill, oven, etc.
The quality of the food will only benefit from the presence of a good cooker hood. Umbrellas catch water vapor, oil and grease particles, remove odors from the food being cooked. All these contaminants rise upward under the influence of hot air and enter the working cavity of the ventilation hood. Here, the polluted air passes through the filtration system, where it is purified.


The hood is a stylish and modern device that will provide effective air purification in a domestic or industrial kitchen
Then the air masses, freed from unnecessary inclusions, are returned to the kitchen or removed through the ventilation duct, depending on the type of device.
Fat contaminants move through a separate channel and are collected from the accumulating glasses, from which they are periodically removed.


Grease traps are special aluminum elements that are installed inside the hoods. They trap particles of grease and other relatively large contaminants.
To facilitate the process of cleaning the storage devices from fatty deposits, it is recommended to pre-fill the glasses with a special detergent capable of effectively dissolving fat.
The advantages of “umbrella” type exhaust structures include the following points:
- the ability to use remote control;
- high degree of automation;
- the ability to install a suitable model in almost any area of the kitchen;
- a wide selection of various models made of various materials with an attractive design;
- high level of performance.
Among the disadvantages of such equipment, first of all, the increased noise generation caused by the operation of a powerful fan is noted. In order for the unit to function properly, it must be serviced regularly, i.e. purchase and timely replace carbon filters.
These items cannot be cleaned or refurbished, so the cost of operating the instrument may be higher than expected. Moreover, good equipment of this type is quite expensive in and of itself.
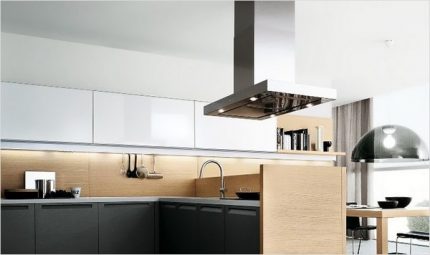

An island umbrella can be installed right in the middle of the kitchen if the size of the room allows it. In a small room, such a device can be placed above the stove installed by the window.
Exhaust equipment is always necessary in the kitchen. Grease particles, hot steam, soot, drops and other contaminants may not be visible at first glance, but over time they form a layer of dirt on various surfaces that is not easy to remove.
In addition, gas residues that can get into the kitchen air and the smell of accidentally burnt food are not beneficial to the health of others.
According to the device, the ventilation hood is a steel dome-shaped case, inside which there is a fan and a set of filtering elements. To collect relatively large particles, there is a special aluminum grill that protects the ventilation turbine.


In catering establishments, powerful hoods are required for use over hobs. Similar devices are used to remove harmful vapors in other industrial industries.
An acrylic filter is usually used to remove a significant portion of the grease. In installations with recirculation, a carbon filter is mandatory, which provides fine air purification. Spark arresting mesh protects the elements from overheating and possible fire.
It is especially necessary if the umbrella is installed over an open flame. All filter elements must be periodically cleaned or replaced. Carbon filters are replaced as soon as they become dirty, these elements cannot be restored.
Some types of acrylic filters can be washed and reinstalled, but they quickly lose their shape from this treatment, so the number of cleaning and reuse cycles is limited.
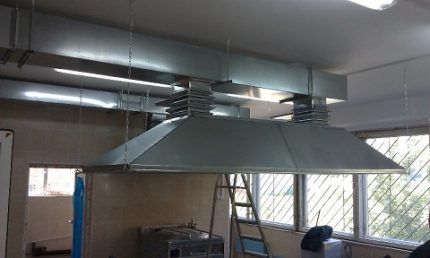

The hood must be large enough to overlap the parameters of the hob to be treated by at least 100 mm
A fan or ventilation turbine built into the umbrella ensures that the air is circulated in the right direction and at the required rate. The performance of this element ensures the total power of the hood, which should be correlated with the total volume of the room in which it will be installed.
Most of the hoods-hoods are supplied with illumination, which is very convenient. Such lamps can be used as additional lighting in the kitchen. Along with conventional incandescent lamps, halogen or diode lighting devices are built into the hoods.
The latter provide a sufficient level of illumination with a minimum consumption of electrical energy and an increased service life.
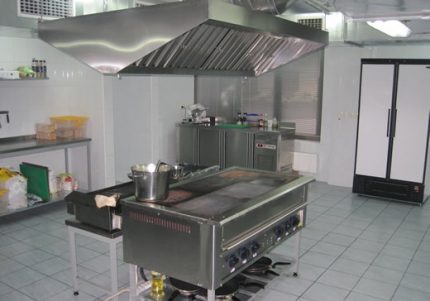

At industrial catering establishments, exhaust hoods are installed over devices of various types: stoves, grills, ovens, etc.
If the umbrella is connected to the ventilation duct of the house, it must be equipped with special valves that prevent the return of the air masses entering the device into the kitchen.
Interior decoration
The design of gazebos with barbecue is a matter of taste and capabilities of each owner. There are several recommendations, following which your barbecue corner will become a favorite place for the whole family and will decorate the site.
You need to start arranging the design of the gazebo with the idea of the structure itself, it should be harmoniously placed on the site.
The gazebo must be positioned correctly. To do this, they choose the most beautiful and quietest corner in the garden, far from prying eyes. This will allow its visitors to relax and unwind. The landscape and the summer kitchen should be compatible with each other.


If we talk about the interior, then everything is more complicated here. The space inside must be beautiful, safe and functional at the same time.
When decorating a gazebo, the scope of imagination is unlimited. This is a great way to apply things that may have lodged somewhere in the attic. For example, a horn on the walls or an old samovar can become interesting interior elements. Anything can become a beautiful element: curtains, forks hung on the wall near the barbecue, shovels and grabs for meat, jars with spices, flowers on the table.
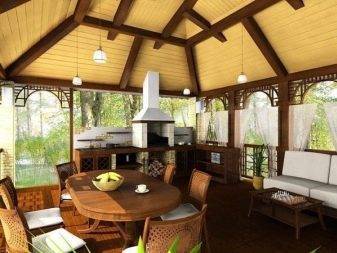

Lighting is an important element of any interior. The cooking area should be lit most brightly, and soft dim light is suitable for the relaxation area. It's good if the light level is regulated.
Design of the cooking area. The key element of this area is the oven. Depending on the size of the gazebo itself, the content of this zone will be different. For a small gazebo, it is possible to install a small table with a hand basin. The worktop material should be easy to clean and durable. It is convenient if there is a small shelf next to the barbecue where you can put seasonings, put the most necessary appliances.
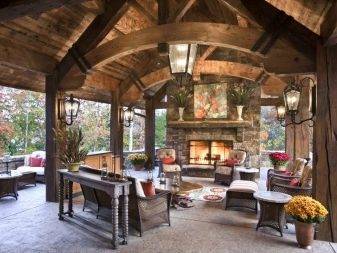

If space permits, you can make a lounger in the gazebo or hang a hammock in a secluded corner. The space next to the gazebo is equipped as much as possible. For example, you can pave the area under an additional canopy in case of an increase in the planned number of guests. You can install a large garden swing with a roof, which will become a favorite place for children and adults. For children, you can also arrange a sandbox or soft playground for active games. Here, the master's imagination can be unlimited.
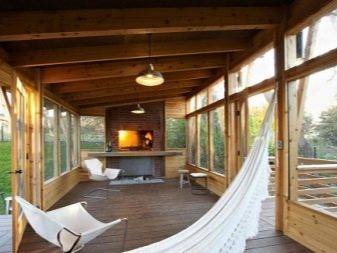

The very material of the gazebo can contribute to the creation of coziness. Here the tree will be the undisputed leader. Mats made of straw or other natural materials can be used to complement it. In a closed gazebo, you can use any kind of textiles: large interior pillow-chairs, soft bedspreads. It should be noted that the size of the gazebo affects the coziness - the smaller it is, the more comfortable a person is in it, as a rule.
All materials must be suitable for outdoor use or handled appropriately. Also, they should all be easily cleaned, since staying in the gazebo is associated with eating.
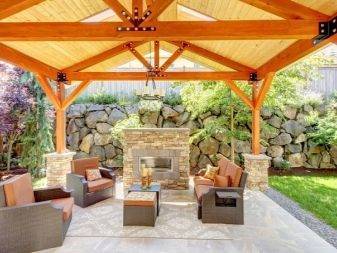

The most common and pleasing to the eye is the use of natural colors of the natural range. The gazebo should not be striking with its brightness or pretentiousness - it will quickly get bored.
The style of the gazebo is often chosen based on the preferences of the owners or from what is at hand. The Asian style involves intricate flattened roofs with multiple levels of flooring inside. Country style works well for wooden buildings. The English style with forged elements will appeal to lovers of elegance and sophistication.
When deciding on the idea of \ u200b \ u200bdesigning the entire gazebo and its interior in particular, one must not forget that this is an auxiliary structure, and unnecessary costs and difficulties in its construction are not necessary in all cases. And often they may turn out to be unnecessary and unnecessary and only make it difficult to stay inside and the process of cooking itself, which is the main one.
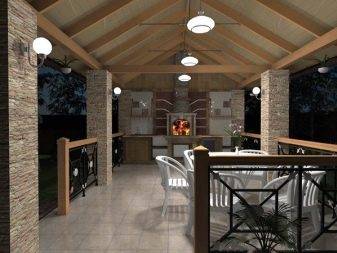

Features of installation and operation
It is relatively easy to install this type of exhaust technology, but inexperienced craftsmen are still better off entrusting these operations to professionals. If it is decided to carry out the installation yourself, then you should start with a detailed study of the manufacturer's instructions.
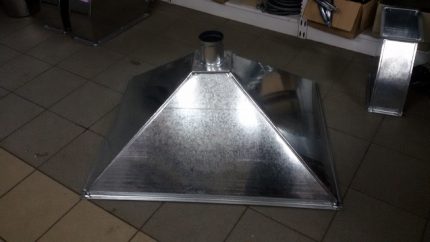

Fume hoods are usually made from durable food grade aluminum steel. For industrial enterprises, such designs are often custom-made.
After that, you need to investigate the installation site, take the necessary measurements, prepare tools, fasteners, materials, etc. An important point is the correct distance from the hob. It should be at least 60 cm for electric stoves and 70 cm for gas appliances, but no more than 85 cm.
If the umbrella needs to be hung higher, then a more efficient device should be chosen to compensate for the difference in height. To install a ventilation hood, you will need tools that are usually in the arsenal of any experienced craftsman: a tape measure and a building level for marking a screwdriver, drill, hammer, etc.
Depending on the type of device, you will need to either simply hang it over the stove, or connect it with an air duct to the ventilation duct. Either a corrugated metal sleeve or rigid plastic structures are used as an air duct.
The corrugation can be bent in a suitable way, and to make a knee made of plastic, special adapters should be used to ensure a tight connection of individual sections of the duct.
If the power cord is not long enough, you need to install an additional outlet near the device. You need to make sure that the electrical device has the necessary grounding.
Correct installation of the ventilation hood is only half the battle. For the device to work effectively, it is necessary to organize its work. For details on such matters, refer to the operating instructions supplied with each instrument.
Regular cleaning of the internal filters is essential. For example, aluminum grates should be washed with special detergents. A good result is also given by the use of tools that can be found in any kitchen: acetic acid diluted by a third with water, a saturated solution of ordinary laundry soap or a pasty mixture of water with baking soda.
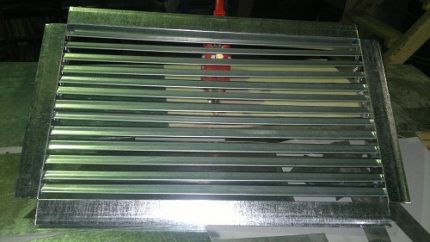

The aluminum grill grease traps of the hoods must be regularly cleaned of accumulated dirt in order for the device to work correctly and efficiently.
These recipes are useful for those who suffer from chemical intolerance. The grates should be cleaned of accumulated grease and dirt at least once every three months.
Replacing the carbon filters is usually done in the following order:
- disconnecting the device from the power supply;
- dismantling of aluminum gratings;
- removing the used filter;
- installation of a new filter element;
- installation of aluminum gratings;
- connecting and checking the operation of the device.
At the time of installing a new filter, a characteristic click should sound.If, after replacing the filter, unusual noises appear in the operation of the exhaust hood or it becomes noisier, the filter may be installed incorrectly, the work should be redone.
If cleaning and replacing the filters of the ventilation hood is not carried out in a timely manner, the quality of the device may deteriorate significantly.
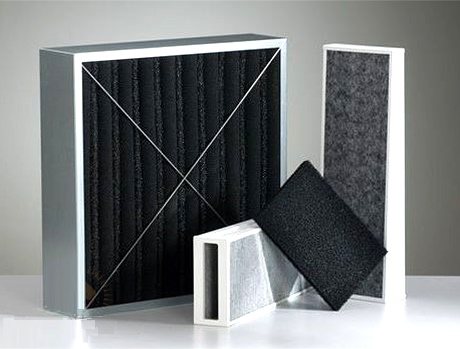

Carbon filters are necessary in recirculating hoods, they provide fine air purification and need to be replaced regularly.
Removable filters and grease cups in umbrella models used in catering should be cleaned daily as instructed. It is also necessary to constantly clean the outer surface of the hood housing. Some elements are recommended to be removed and soaked in special cleaning solutions.
At the end of cleaning, rinse them thoroughly. Another element that needs periodic cleaning is the air duct. It is necessary to remove the connecting elements and remove deposits from the inner surface of the structure.
Corrugated elements require this cleaning more often than smooth plastic channels. Some industrial models of kitchen umbrellas are equipped with a built-in cleaning system, but such expensive units are usually not used in everyday life.
A few words about folding barbecue
The folding brazier is a lightweight brazier that can be easily moved and installed in the right place, including in the gazebo. The best material for its manufacture is stainless steel, the optimal wall thickness is two millimeters.
Thinner sheets will quickly burn out, thicker ones will significantly increase the weight of the structure. To improve the combustion process, through holes are made around the perimeter of the lower part of the brazier. Through them, coals can fall onto the floor of the gazebo and ignite it.
In addition, the folding brazier is easy to tip over, so you need to use it very carefully.
Benefits
However, a folding brazier has certain advantages. These include:
- small weight for easy transportation;
- when disassembled, the brazier easily fits into the trunk of a car;
- low cost.
A big plus of a folding barbecue is the ability to use it without arranging a hood.
A small brazier does not generate much smoke when cooking meat. As a rule, a folding brazier is installed in gazebos, which are a canopy without walls. In closed gazebos, it must be equipped with an extractor hood.
Do-it-yourself barbecue hood - get rid of smoke today
Every owner of a barbecue is undoubtedly familiar with such a concept as an exhaust hood or, in a simple way, an exhaust hood. A brazier with an exhaust hood is simply necessary in closed rooms, as a rule, this applies to covered gazebos. Usually, such gazebos look like Finnish houses: they are made of wood, completely closed, and the windows are glazed, they can be either regular in size or in the floor.
Sometimes barbecues in such buildings serve not only as braziers, but also as heating appliances. A good stationary hood is not cheap, and therefore you can try to make the structure yourself. The do-it-yourself barbecue hood is very easy to manufacture, requires a small amount of raw materials and a little free time.
Important! An exhaust hood can perform not only its basic functions, but also a protective function, including. It will absorb sparks that occur during fuel combustion. Thus, your gazebo will be completely protected from fire.
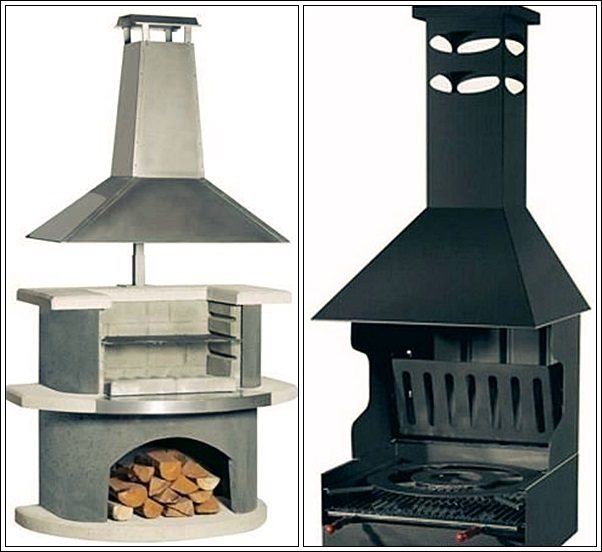

Why build a chimney
Many lazy inhabitants do not see the point in arranging a chimney for a barbecue in a summer gazebo. They rely on the wind to blow smoke out from under the canopy, but in reality this is not happening. One has only to start frying the meat - the whole gazebo is covered with clouds of smoke, and if there is a hood, it is removed outside.
If you do not do it, then after using the barbecue, a layer of soot and soot will settle on the ceiling, which is extremely difficult to clean. If you often fry meat on such a grill, the kebab will be seasoned with soot crumbling from above.
In addition, a fireplace with an open flame that is not equipped with a hood poses a fire hazard.
Some notes and recommendations
Any hood, including hand-made devices, has certain disadvantages that should be borne in mind in advance, so that later you do not have to re-install the installation.
The barbecue fan is mounted after masonry using special bricks and clay mortar. The bricks should be laid flat on top of each other. The chimney must be fitted with a shutter and the rear wall must have a bend to provide improved draft.
If you need to light the brazier, then the smoke will not go straight into the smoke box. At first, the device smokes in different directions. The smoke generated during ignition can have a fairly low temperature level. The moment the flame flares up, the thrust will become stable.
After the flame has ignited, the smoke collector may not be able to cope with the elimination of smoke, that is, the barbecue woman smokes at the same time. This sign indicates that the chimney has a small cross section. Since it must cope with its functions without any problems, the dimensions of its square section must be at least 26x26 cm.
The best aerodynamics of a vertical metal pipe is ensured only with its narrower cross-section, the diameter of which is about 15-20 cm. Since the smoke coming out of the pipe begins to interfere with the cooking process, the upper part of the chimney should be at least 3 m above the ground. Then there will be enough thrust, and the smoke will be removed to the required height, and then dispersed in the air.
What to look for when choosing a finished product?
Of course, you will not always have the opportunity to do something with your own hands, so if funds allow you, you can purchase a finished product. When you decide on the choice, be sure to pay attention to the volume of the internal chimney and the volume of the chimney. Also remember that the barbecue umbrella will be larger than the brazier itself: this is the only way it will be able to draw out all combustion products and so on. If the metal hood is smaller, then it simply may not be able to cope with the entire front of the work.
Exhaust hood design
A metal hood can be thought of as a smoke collector or a domed smoke hood. The fixture has a hole in the center and a barbecue pipe. The dome design is a smoke hood or exhaust hood. Its diameter should be 1.5 m. A popular material for creating a dome-shaped device is a metal sheet, which is 2 mm thick.
Copper hoods have a rather impressive look. The center of the dome of the device is equipped with a hole with the edges connected to a vertical pipe, the height of which is 2-3 m. Do not use asbestos-cement pipes to create a hood with your own hands. Although asbestos is a flame retardant material that has excellent thermal insulation properties, it is hazardous to health.
Rack-mounted metal hoods are suitable for barbecues and are becoming more and more popular. If the brazier, grill or barbecue is installed in the gazebo, then the hood is suspended from its ceiling on chains. In this case, the pipe usually passes through the center of the gazebo roof.
The material that is adjacent to the chimney must be fireproof. To create a hood, you will need experience with a sheet of metal. The device does not have to be domed. You can order the manufacture of hoods from professionals.
A do-it-yourself smoke collector made of metal can have not only a cone-shaped shape, the cross-section is rectangular or square. The device is functional, but requires constant maintenance. Its smooth surface makes it easy to care for. It should be good at removing smoke, having aerodynamics.
Owners of gazebos, which are lined with brick smoke collectors, claim that a rusted metal hood can contaminate food. When the stove smokes, soot and rust can drip onto the food being cooked. Brick hoods are durable.
How to do it yourself
Making a pipe exhaust hood is a simple and straightforward process. Before starting work, it is worth choosing a scheme and taking off the dimensions of the pipe itself.
Schemes and sizes
On the Internet, you can find a huge selection of schemes for installing a roof ventilation hood. Before starting work, be sure to read the size table used in the diagrams.
Before starting work, we recommend making a model out of paper and checking the correct size.
We bring to your attention one of the simplest umbrellas, which consists of a cylindrical base, a cone-shaped roof and three holding legs.


Material preparation
Preparation is an essential element of any job. For manufacturing you will need:
- galvanized steel sheet;
- a sheet of cardboard;
- pencil;
- ruler;
- compass;
- scissors for metal;
- bolts with nuts or rivets.


Choice of design
We offer two of the simplest designs, and we show them in the figure (Fig. 1). The difference between these schemes is in the form of a roof that will be manufactured. Depending on the selected pattern, use the following dimensions:
Execution 1.
| BUT | B | H | H1 |
| 25 | 45 | 24 | 15 |
| 50 | 90 | 40 | 25 |
| 100 | 180 | 81,1 | 53,8 |
Execution 2.
| BUT | B | B1 | B2 | H | H1 |
| 25 | 45 | 40 | 72 | 40 | 25 |
| 50 | 90 | 80 | 144 | 93 | 63,8 |
| 80 | 144 | 100 | 180 | 99,5 | 63,8 |
You select the size based on your pipe, we give you the main dimensions, if you could not find a suitable one, use another scheme (you can easily find it on the Internet).
Brick umbrellas
Brick umbrellas are built over static barbecues, since they are much more durable than metal ones. In addition, they have an attractive appearance that will look great on any landscape design.
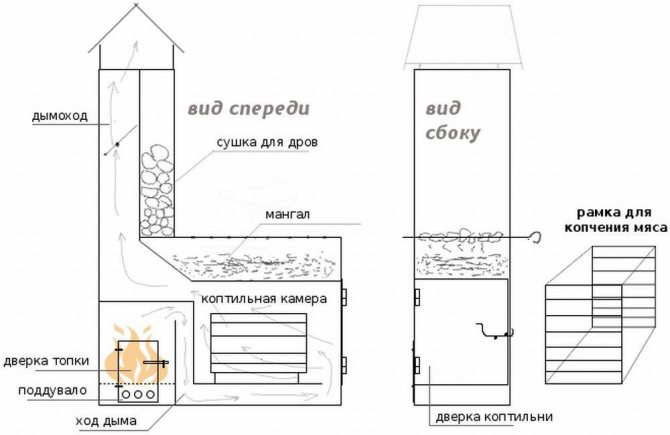

Diagram of a brick umbrella.
To build such an umbrella, you can use either oven brick or fireclay. Moreover, the area that is laid out strictly above the brazier is made only of refractory (chamotte) bricks, and the chimney itself can be made with a stove. Seams should be sealed with clay mortar. For this, it is advisable to use clean clay, diluted with water to the consistency of sour cream. Less often, sand is added to the solution, but it should not exceed 50% of the clay mass. Before starting work, the brick must be soaked in water so that the water completely covers it. After pouring the bricks, they are left to "get wet" for 2-3 hours. This is done so that the bricks do not absorb water from the solution, otherwise the structure will collapse after a while.
Before starting work, you should assemble the frame, which will be the base for the dome. It is welded from a wide steel angle, which must be primed and painted after welding.
After welding, it is necessary to wipe the welded seams with sandpaper or a file in order not to trim the brick in the future. The welded frame is installed above the brazier on the supporting walls (there should be a minimum of 2, a maximum of 3). For its installation, reinforcement tabs should be provided - to ensure the strength of the structure, a frame is welded to them. The laying of bricks begins to be done around the perimeter of the frame. Moreover, such a hood should not have a large area - the frame may not withstand. Most often, the hood is made in a stepped shape, while the outgoing chimney can be metal. Sometimes after laying the hood, the edges are rounded to improve the appearance.
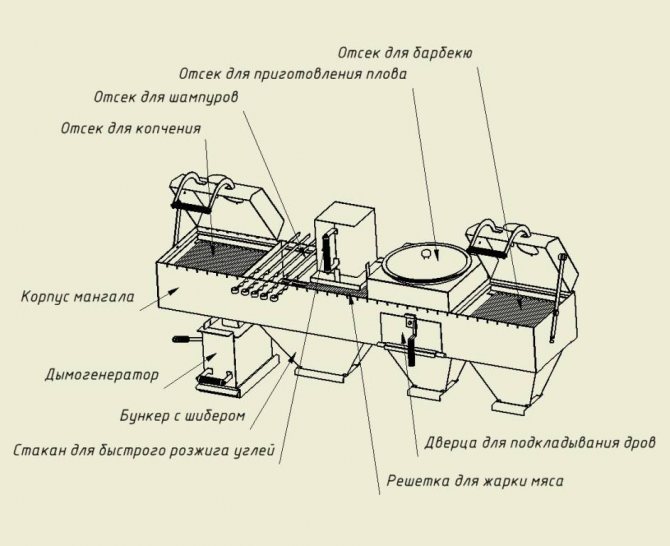

Barbecue device diagram.
After the hood is folded, it is given several weeks to dry, otherwise the wet mortar will collapse and destroy the structure. After 2 weeks, the structure is inspected and the seams are checked for moisture (one of the options for checking is to attach tissue paper to the seam and leave for a while). After the solution has dried, a test run (short-term) is carried out.
A brick cooker hood provides a comfortable stay at the grill when barbecuing. These umbrellas have the following advantages:
- Good draft resulting in no smoke from the brazier.
- Stronger construction (compared to metal umbrellas).
- Longer service life.
- Maintainability.
The disadvantages include:
- Large weight of the structure, which requires the creation of a full-fledged foundation under the barbecue.
- The complexity of the construction of such a dome.
- Much higher cost of work and materials compared to metal umbrellas.
Nuances of operation
I would like to pay special attention to firewood, which is recommended to be used in the process of cooking various products. So:
- seafood and poultry - oak, grapevine;
- lamb, pork, beef - apple tree;
- turkey or salmon - alder;
- pork, poultry, seafood - maple;
- chicken, beef - birch;
- lamb, poultry - cherry.
Video: tips on how to properly stack firewood in the grill
Each type of wood will add a special taste and unique aroma to the prepared dish. Experts do not recommend using conifers for kindling, since resins can be released during combustion. If it is not possible to prepare firewood on your own, then you can buy briquettes with ready-made charcoal in almost any supermarket, which, moreover, perfectly keep the heat necessary for cooking barbecue.
Metal hood
The easiest and cheapest way to make an umbrella is from metal. To do this, you can use the following materials:
Stainless steel. The best option for such structures, especially if the grill will be constantly outdoors. You can buy stainless steel sheets at almost any hardware store. Large diameter stainless steel pipes are suitable, which are cut to length and unbend. The main drawback of such material is the price.
Stainless steel can attract the attention of "metal hunters", so it is recommended to paint it. Galvanized. It is less durable than stainless steel, but cheaper
The disadvantages of galvanizing include the fragility of the coating, which over time will lead to the destruction (rusting) of the entire structure. Steel. The cheapest material. However, before starting the installation (after making the hood), it is necessary to apply a protective coating - a primer and paint. In this case, the condition of the protective coating should be constantly monitored, and in case of damage it will have to be primed and painted again.
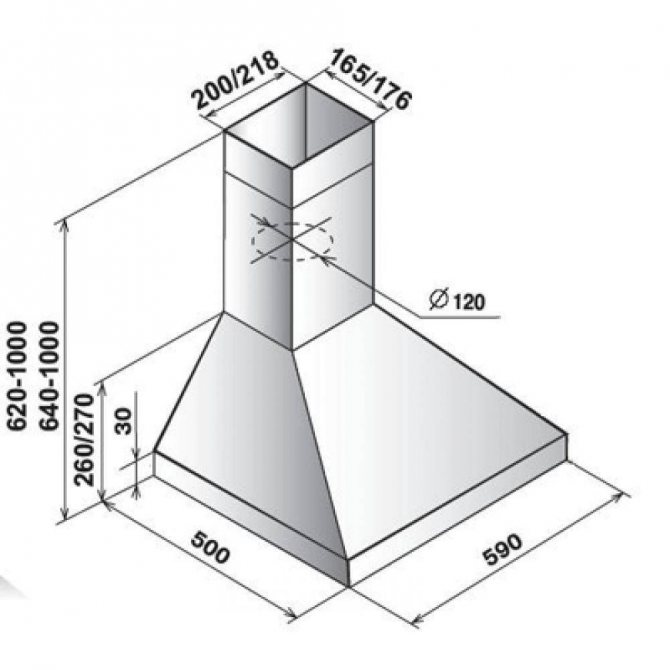

Diagram of an umbrella for a barbecue made of metal.
Regardless of what kind of metal was chosen, it will not affect the shape of the structure. As standard, all hoods are domed with a chimney opening in the center of the dome.
At home, to make such a hood with your own hands, you need a welding machine. The easiest way to make a trapezoidal umbrella. For this, 4 identical trapezoidal parts are cut out. They are welded to each other with side faces, after which the upper, narrower hole is closed with a cut out square element, in which a hole is made in the center for the chimney. The pipe itself is bought ready-made, it is welded to the exhaust hole, after which the lower part of the dome is strengthened by welding thin reinforcement around the perimeter. The size of the trapezoidal parts to be cut depends on the extrusion parameters.In this case, the length of the base of the trapezoid should be such as to ensure the flow of smoke from the barbecue. Installation is carried out strictly above the brazier.
The metal hood is installed on stone / brick supports (if a brazier is made of them) and fixed (cemented). Another way is to lay the fittings of the required length when building a brazier and weld an exhaust hood to it. Such a hood can be installed over a portable metal brazier: for this, fittings are welded to the brazier in the corners, onto which the hood is welded. However, this is not advisable as it will reduce (or even negate) portability; in addition, the effect of such a hood will be negligible.
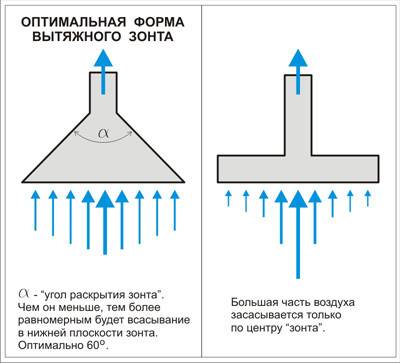

Optimal hood shape.
After the first launch, patterns may form on the metal, especially they will be noticeable on stainless steel. You should not be afraid of them - they do not affect the life of the hood and do not spoil the quality of the metal.
Such hoods have the following advantages:
- Material availability.
- Ease of manufacture.
- Fast and easy installation.
- Low cost (compared to the rest).
- Renovation and easy maintenance.
- Attractive design.
Do-it-yourself exhaust umbrella
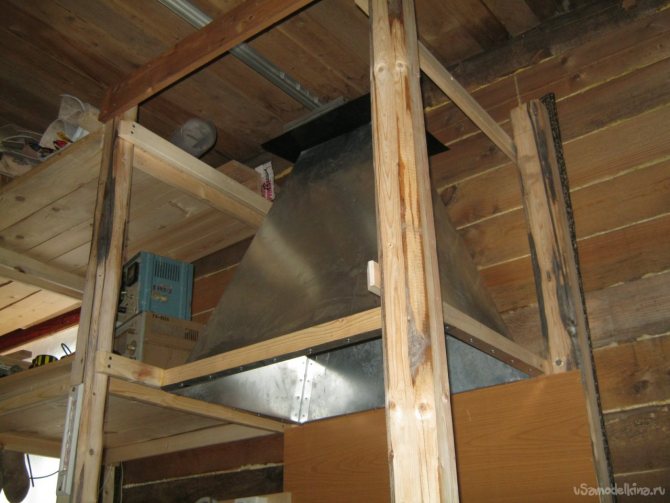

The exhaust hood provides collection and removal of contaminated air from the desired location. This can be intensive regular soldering (for example, stained glass work), setting up experiments with volatile and toxic chemicals and storing them, welding metals, using high-temperature furnaces. It is obligatory to use a hood (umbrella) for glass-blowing work (burners).
The following describes the manufacture of an exhaust hood for a glassblower workplace in a home workshop. The hood is made of simple and common materials without the use of special equipment for tinsmithing. The described umbrella has the shape of an inclined tetrahedral pyramid (better use of space), a sweep for such a shape can be built using descriptive geometry (in several ways). For a simpler shape - a straight pyramid, the unfolding can be calculated and automated. The dimensions of the umbrella were taken deliberately with an excessive margin, if necessary, all the necessary calculations of ventilation equipment can be found in the literature. The exhaust hood is built into the racks and is equipped with an integral homemade damper shutting off the air duct.
What it took to work.
Tools
A set of plumbing tools, a marking tool, a rivet tool, a powerful soldering iron with accessories and / or a small gas torch. Electric drill (screwdriver), angle grinder, goggles and earmuffs, good extension cord. Paint brush, dishes.
Materials Galvanized steel 0.5 mm thick, steel sheet 1 mm thick, flux, solder, paintwork materials, rags.
Umbrella design, sweep.
The hood was intended primarily for a glass blower. Unlike the classic ones, its mouth is much wider, and the lower part of the umbrella will not be heated, the heating of the upper part is more likely (the gate is not open enough or is completely blocked). Hence the somewhat specific design of the upper part - wooden structures are removed from the place of probable heating, the painting is made with heat-resistant paint.
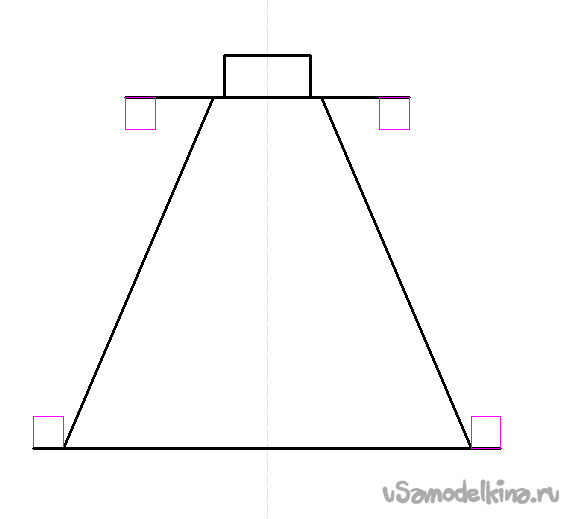

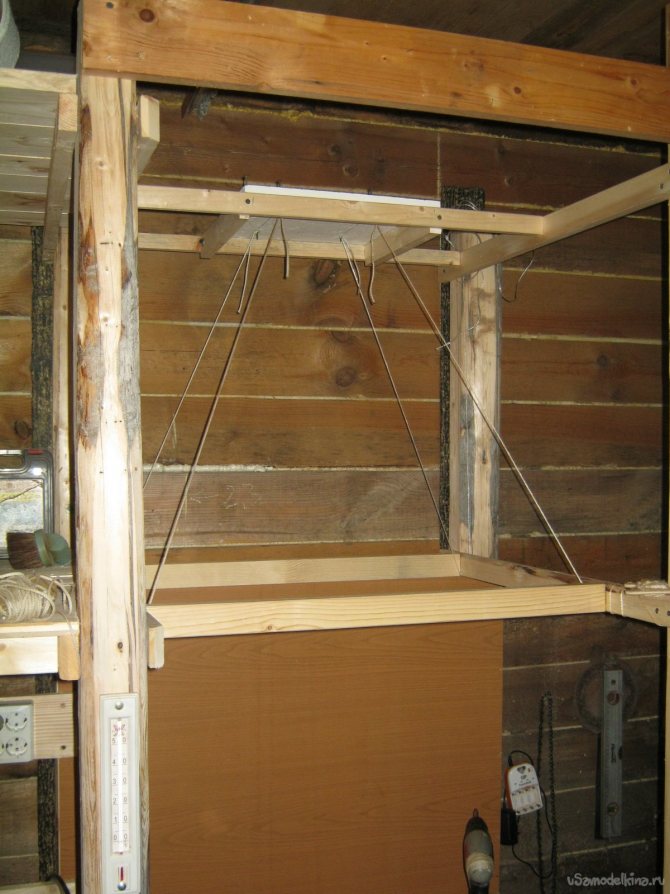
As already mentioned, a scan can be built by means of descriptive geometry without any "naturalness", only on paper or a screen, but in my case, almost everything was ready to build a model "on the ground" in full size. The lower perimeter, on which the bell of the umbrella will be attached, and the upper one for attaching the gate were already there. It remained to draw an exit hole in nature and pull on four strings. It is easy to transfer the model to the drawing and make a flat pattern.

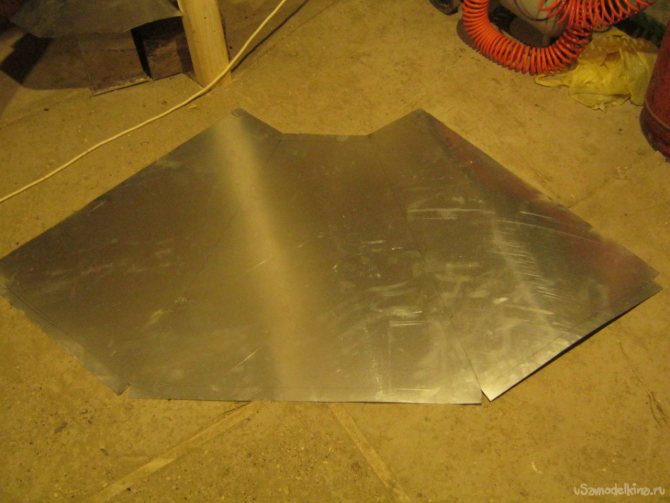
The reamer is provided with allowances for fastening elements to the gate and elements of a wooden structure.The finished reamer is divided into two parts - left-front-right sides and a separate back, for transferring to a standard sheet of galvanized steel (the whole reamer did not fit in width). Most also have allowances for connecting to the back wall.

Bending without a special bending machine is done on a rigid, even (if possible, rectangular) edge. This can be the edge of the desktop, workbench, specially installed thick board. The piece of iron along the bending line is pressed from above by a board with an even edge (metal corner) with two clamps. With moderate bending lengths and galvanized steel with a thickness of 0.5 mm, it is possible to obtain a result that is quite acceptable in normal cases. It is convenient to bend small parts between two metal corners clamped in a locksmith's vice.
He bent his tin on the bed of a homemade lathe, pressing it down with an inch board. The bend should not be done pointwise (with a mallet on the piece of iron), but through a flat long gasket (trimming the board).


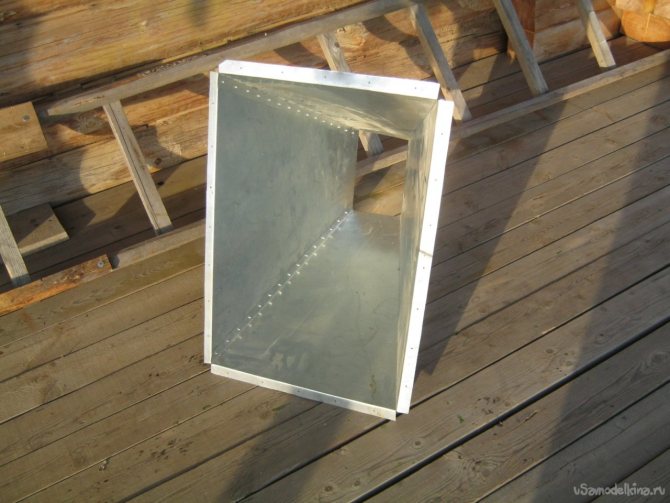
Bent in this sequence - a petal for connection with the missing back wall, the nearest rib. I turned the workpiece over and repeated. On the resulting incomplete truncated pyramid, the petals were bent from the top and bottom of the sides with the help of a wooden block of the appropriate length, the back wall was cut out separately. It was more convenient to make her folds right away.


The back wall was soldered to the main body. Soldered with a small gas torch tin-lead solder with a special "burner" flux from copper water pipes. The flux is a grayish thick paste and contains solder particles, when the surfaces reach the required temperature, they melt and the flux becomes silvery - time to inject the solder. The flux is designed to work with tin-copper solder, but works well with lead. You can also use other inorganic fluxes (organic matter burns and soot makes it difficult to solder), for example, "soldering acid" - zinc chloride. It is also possible to perform structural soldering of large parts with a relatively low-power soldering iron, heating the soldering site with a torch flame, a construction hairdryer, and electric heaters (iron, electric stove). Acidic fluxes should be washed off with warm water immediately after the parts have cooled down. When soldering relatively large box-shaped things made of thin metal, there is an unpleasant moment - the glands are strongly warped from local heating and well-fitted thin seams turn into ugly waves that are difficult to solder. The difficulty can be significantly reduced by frequent mechanical fastening of surfaces. Here, this kind of fastening is done with blind rivets.
In general, the installation in place of the back wall looked like this - mark the back wall on the piece of iron, cut it out. Bend the petals at the top and bottom, mark holes for rivets on the sides, screw, drill, countersink holes (remove burrs). Attach the back wall to the main part of the umbrella, secure. Mark the mating holes for the rivets, remove the back wall, screw the centers of the holes on the main part of the umbrella, drill, countersink. Clean the soldering points with a medium-sized abrasive paper, apply flux, rivet. Solder, remove flux residues.

Shiber
The gate has become a separate, rather laborious part of the design. It was decided to make its design in the manner of an oven valve - unlike a rotary valve, it allows for low manufacturing accuracy. The material used was a 1mm thick steel sheet available. The connections are soldered.
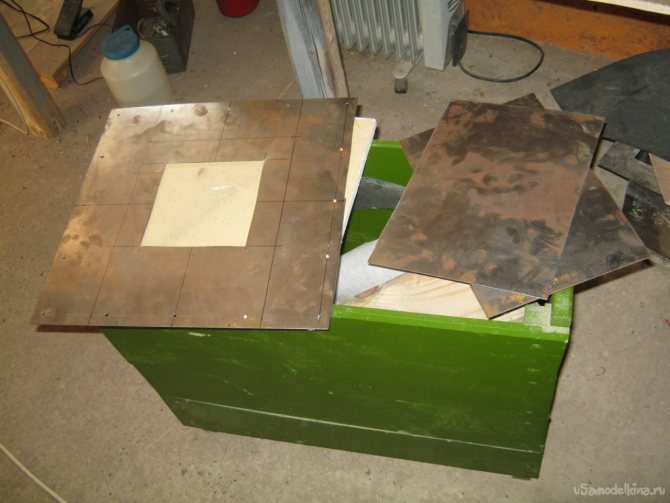

After marking, three main flat parts were cut out, a square opening of 150x150 mm in size was cut out on the base (for a ø150 mm air duct). A cover is soldered over the gate base. The lid is placed on pieces of galvanized steel wire with a diameter of 2 mm, previously, a flux is applied to the place of soldering.


A cylindrical neck is bent from a cut strip of the same steel to connect a circular air duct with a diameter of 150 mm. The neck is bent on a three-liter glass jar and carefully fitted (diameter). The ends are welded together. The finished neck is soldered onto the gate cover before the hole is cut. Thus, it was possible to somewhat reduce warpage of the surfaces to be brazed.
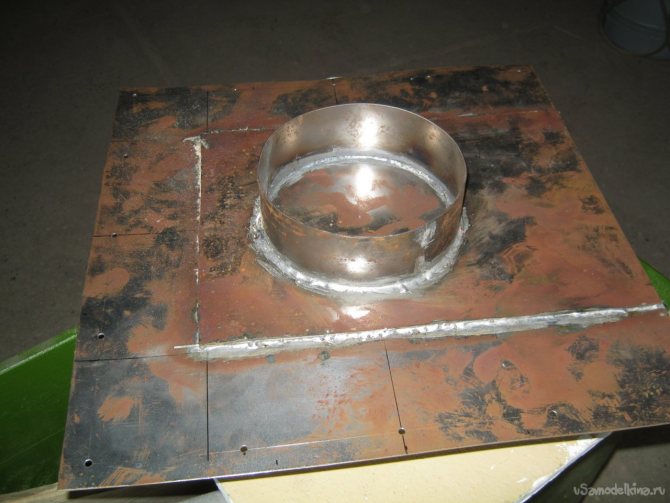

From the inside, along the circumference of the soldered neck, holes were drilled, the bridges between which he cut out with a "remnant" of an abrasive wheel of a small angle grinder. We also managed to make a large finishing of the hole with a thick grinding abrasive wheel with angle grinder, then with a semicircular file.
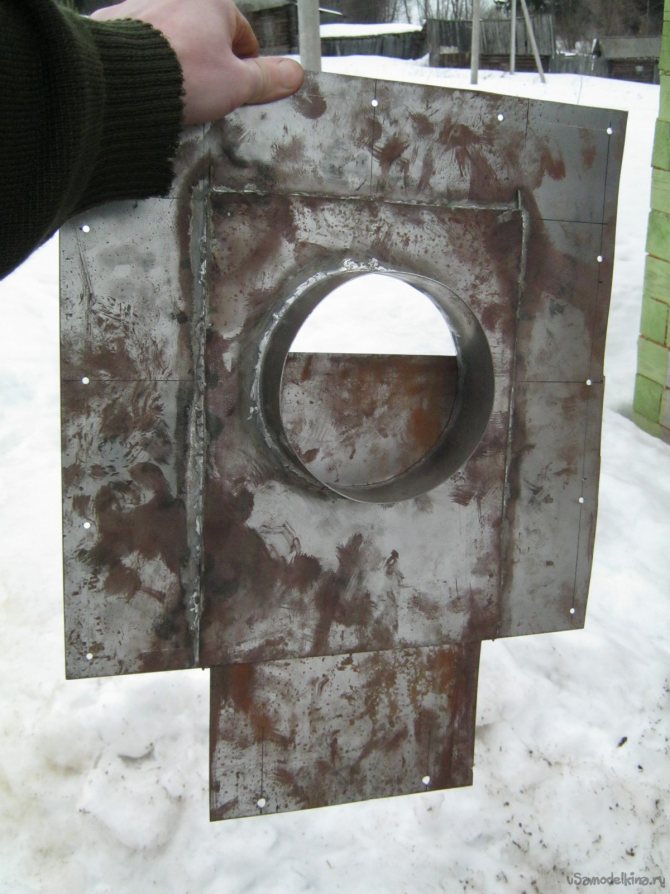

The finished gate is attached to the exhaust hood, the places occupied by the "paws" are marked, in places where possible, holes for rivets are marked, numbered and drilled. The contact points are cleaned, soldering flux applied. The gate is riveted into place, the junction is soldered. The flux is washed off with warm water, the piece of iron is dried.
After trying on the structure, the upper rusting part of the structure was cleaned, degreased with gasoline and painted in two layers with black heat-resistant paint. After drying, the four-handed exhaust hood is put back in place.


Conclusions, work on errors
In general, the design turned out without significant miscalculations, but a few small things could have been improved.
The upper belt of the external wooden fastening (gate) was not needed at all - with the standard fastening of the lower part, the whole structure stands very rigid and any reasonable efforts when opening and closing, even a heavily jammed gate valve, withstands without flinching. The wide "fields" on the gate were not useful in this case.
Soldering the side ribs when installing the rear wall was unnecessary - rivets would be enough.
Several standard hard chimneys leading to the attic (or soft corrugated aluminum duct), ending with an exhaust fan, will be connected to the hood. Air ducts outside the heated room will require careful thermal insulation.
Babay Mazay, March 2020
Become an author of the site, publish your own articles, descriptions of homemade products with payment per text. More details here.
Brick hood
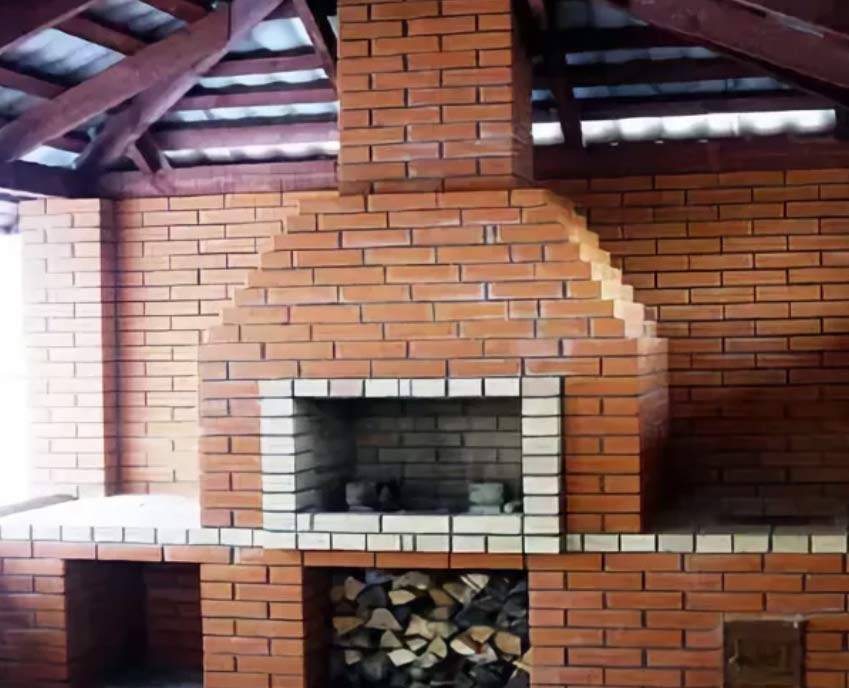

Brick barbecues are becoming more and more popular. They have their own merits. It is a monumental, durable structure. With the right device and the skill of the master, such a grill will delight and decorate the territory for many years.
Advantages of a brick hood:
- Durability;
- Low heating of the brick surface;
- Aesthetic appearance, with the help of a brick grill with an exhaust hood, you can create a practical architectural miniature on your site;
- Combines the functions of a roaster and a hood.
Making a brick hood
If you wish and have good experience in construction, you can build a brazier with a brick hood with your own hands. For this you will need:
- Brick;
- A mixture for laying bricks, or a mortar of clay and sand, in a ratio of 7 parts of clay to 3 parts of sand;
- Metal corners, to simplify the installation of the hood;
- Masonry tools, for cutting and welding metal corners.
Important: for the construction of a hood and a barbecue bowl, use only refractory bricks (chamotte) and mixtures. Otherwise, under the influence of high temperatures, the entire structure will collapse.
Instead of a heat-resistant mixture, it is permissible to use a solution of clay and sand.
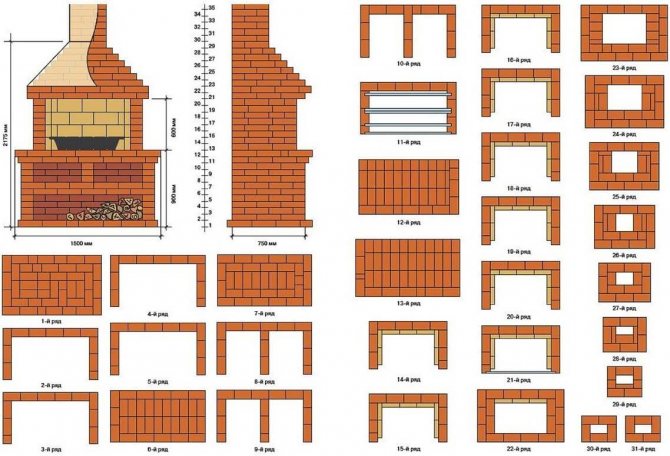

Installation sequence:
- Mark the position of the hood, not forgetting that it should be larger in size and volume of the barbecue itself;
- First, the supporting walls are laid out on which the smoke collector will lie. Back and two side;
- A metal frame from the corners is installed on the brick supports. By analogy with a metal hood, it also has the shape of a truncated pyramid. First of all, the lower part is welded, then the upper narrowed part of the frame, and they are connected by corners, also by welding.For the convenience of masonry, you can assemble the chimney frame from the corners by welding it to the hood frame;
- The finished frame is lined with bricks. The first row is exposed with a brick perpendicular to the rear support wall, the second and subsequent rows are placed in parallel, with an offset of 17 mm, creating the necessary pyramidal shape;
- The chimney is laid out on the frame or without it, subject to the minimum internal diameter of 120 mm;
- Install an umbrella cover to protect from precipitation.
Problems that may arise in the process
There are no products that are completely perfect - everything has flaws. Several problems emerge from this, which we will consider below:
The biggest problem is if the smoke does not go into the hood, but diverges to the sides. This only happens if you have not taken care that the ventilation is equipped with a fan. They are usually electric and can be turned on as soon as you start working with the barbecue. Although, as a rule, smoke can remain in the room also because it simply did not have time to heat up and its density is the same as the density of air. Therefore, as soon as the smoke heats up, it can independently go up and go out through the ventilation pipe. The chimney cross-section is about 25-27 cm. What will happen if this is not the case? Nothing special, just smoke cannot be absorbed in full.
By the way, it is also very important that the pipe is about 16 cm in diameter. Also, do not forget that the height of the pipe must be at least 3 meters from the ground. Only in this way the smoke will completely come out and disperse.
The rest is simple. Assemble the exhaust hood as shown in the drawing above and weld it to the pipe. After - just attach the product in the right place.
Of course, you can also build a brick hood, but, firstly, it is suitable only for brick barbecues, and, secondly, this design is much more complicated.
Output
Exhaust hoods are widely used in everyday life and in the food industry, as they provide high-quality removal of polluted air. In addition, the instructions for their operation and maintenance are extremely simple. The main thing is to choose the right device for each individual case, especially for industrial devices.
From the video in this article, you can gather some additional information on this topic.
Did you like the article? Subscribe to our channel Yandex.Zen
Types of smoke exhaust structures
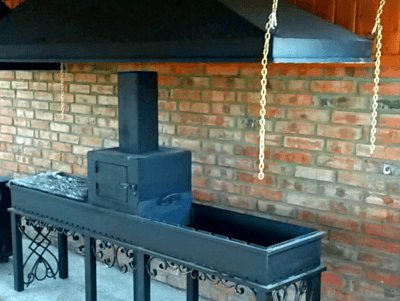

The types of smoke exhaust structures and materials for their manufacture are not very diverse. In gazebos of any type, chimneys for the barbecue are made of metal or brick. Brick structures are mainly used in stationary barbecues made of the same material.
They look very attractive, but it is rather difficult to clean them with high quality, and sometimes it is simply impossible. To build a brick chimney, you must have the skills of a bricklayer, in addition, the cost of such a structure is much higher than that of a metal product. Therefore, zealous owners most often prefer to build a metal hood over the barbecue.
Metallic
Chimneys made of metal have the following advantages:
- do-it-yourself assembly availability;
- ease of installation;
- low weight;
- smoothness of the inner surface;
- ease of cleaning;
- the ability to give the product any shape.
Almost any home craftsman with the skills to work with power tools and welding equipment can assemble a metal chimney.
In the absence of a welding machine, the structural elements can be bolted. The metal hood does not create a serious load on the base of the gazebo, its walls have a smooth surface, on which, unlike brickwork, soot contamination does not stick.If you need seasonal use or transfer to another place, the structure is easily disassembled. It can be painted in any color with heat-resistant paint.
What is the difference between an umbrella and a weather vane, a cap, a head and a chimney
A chimney, a weather vane, a cap, an umbrella and a head - rather simple and time-tested protective structures for air outlets on the roof... Steel, copper, aluminum, plastic and titanium-zinc additional elements, if properly arranged, have been in operation for ten, and sometimes more, years, providing a comfortable and safe living:
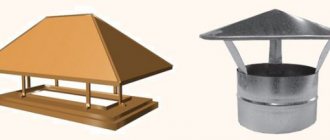
- caps - the general name for elements that prevent atmospheric precipitation and foreign objects from entering the chimney, as well as carrying a decorative load;
- chimneys - rectangular or square decorative caps designed for arranging chimney and ventilation pipes;
- umbrellas - presented by caps, characterized by a simple design and intended for round or square pipes;
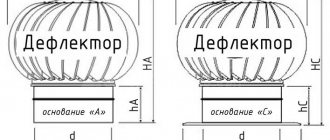
- deflectors - caps for round pipes, characterized by a rather complex internal structure to increase traction.
Wind vane also belongs to the category of complex structures. - rotating hoods directing the outgoing smoke exclusively in one direction, depending on the direction of the wind.
NOTE!
Umbrellas are used to equip a round or square head, but modern manufacturers, in addition to functionality, take into account ease of use, including the addition of a cover with a smoke divider.
