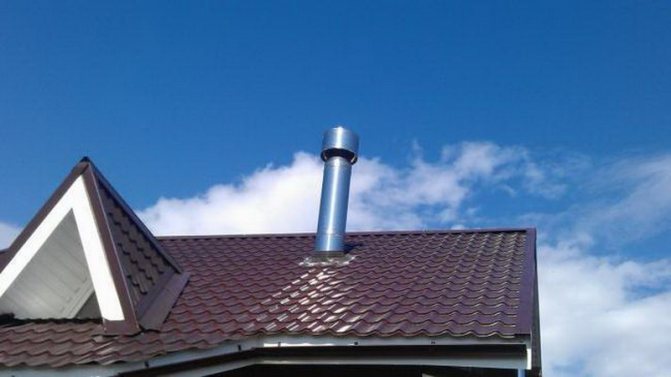
A house with fireplace heating must have a well-sealed chimney.

Neglecting waterproofing leads to:
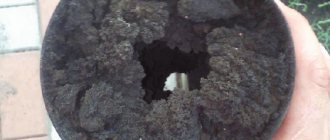
- Damage to the chimney. Brick chimneys quickly absorb moisture, resulting in cracking. Water penetrates into the smallest pores and increases when freezing. Ceramics or silicates are not plastic and cannot compensate for internal expansion.
- Increased pressure. The accumulated condensate leads to an increase in pressure, which reduces the draft and the efficiency of the fireplace.

Roof pipe waterproofing does not require specialist intervention. You can do this yourself, as it is enough to follow a few tips. If you are not afraid of high-altitude work, it is better to buy material and tools yourself. It will cost less compared to calling the installers.

Before you will be the question - "how to wrap the chimney pipe from fire and leakage?" Below are the main materials and technologies for laying insulation, which can be found in a store or on the construction market.
Where does waterproofing begin?
The fireplace heating system will work normally only if the work was carried out in accordance with the requirements of sanitary norms and rules. At the state level, rules and recommendations for builders are regulated. By listening to them, you will be able to carry out insulation work without emergency.
- The rafters and roofs must not be adjacent to each other. The distance of the gap depends on the specific material. Combustible isolates should be at least 150 mm to 300 mm apart. Non-combustible (like asbestos and rock wool) can range from 100 to 250 mm. Be careful with fuels. Some gaskets are highly flammable. When combined with a euro slate, a fire may start, which will be difficult to extinguish.

- It is important to follow the correct sequence of interlayers. Moisture should not be able to get into the layer system, as it will destroy them. In addition, it will begin to accumulate and cause damage to the brick. There must be a mandatory gap between the pipe and the inner layer. Most of the isolates are combustible even at low temperatures.
- Do not neglect the box. This is the area that sits between the roof and the insulation. It must be filled with any non-combustible material such as mineral wool.

Insulation films should be cut to fit the envelope. After that, they are pulled up to the central beam so that it is possible to fix it with hardware.
Waterproofing is mounted on a crate, vapor barrier systems are installed on frames. The joints of the box and insulation are laid with special tapes.

How is
Often, after insulation work, the owner of the house notices sudden leaks. For example, they can be in the place where the roof adjoins to the chimney pipe. The reasons for this are natural and always indicate an error.
During one of the stages, an error occurred. To avoid leakage, an apron can be fitted.

During work, the following sequence must be observed:
- Moisture will form in any case - for this, an insulating layer is needed. This can be avoided by using a discharge chute. This is a long groove into which water flows and gradually moves away to a safe place.
- Waterproofing pipes will be more productive if you install an apron inside that protects against leakage inside.
- A special backing can be cut out of the waterproofing to overlap the lower edge of the apron.For sheet roofs (profile decking, metal tiles, bituminous slate), it can be brought out between the sheets from the bottom. To drain water - install a side that will direct the flow to the drain from the roof.
- There must be a roof covering around the pipe.
- The apron can be made by yourself according to ready-made drawings. Factory models are sold in fireplace stores. The pipe must run inside it.
This instruction also works for outdoor aprons.

Waterproofing tasks
Waterproofing pipes is the last stage in the production of roofing works. If you ordered work from the brigade, you should be aware of laziness. This step is often neglected by developers and roofers as they are considered unnecessary. Indeed, you can use fireplace heating without insulation for some time, but after two winters you will feel a significant decrease in efficiency.
The procedure solves the following problems in the house:
- Enhanced security. New type houses always have wood in their construction. For example, the roof lathing is made of beams that are fire hazardous. The released heat of the fire also goes into the chimney and can reach several hundred degrees. Solid fuel stoves are capable of developing temperatures that cause the battens to smolder. The isolate will cut the wood and prevent it from igniting.

- Reduced heat loss. Due to the low temperature outside the window, the quality of the brick comes into force - thermal conductivity. That is, he tries to equalize the temperature regime and cools the room.
- Condensation protection. Condensation, like moisture in general, is the main enemy of bricks. Accumulating and freezing (the effect of thermal conductivity), it expands by ten percent, which leads to damage to the structure of the ceramic. It begins to crumble and crumble, becomes loose and after a few years the chimney falls apart.

The waterproofing procedure dramatically increases comfort, as both the efficiency of the fireplace and the appearance of the roof are improved. Interior designers and experienced builders emphasize that the right insulation makes a home complete.

Any roofing material can be equipped with a cute apron, which is selected individually in color.


Sealing a pipe on a roof made of slate, corrugated board, metal tile
The popularity of fireplaces and stoves in the arrangement of country houses did not decline after the appearance of more modern heating devices that run on natural gas or electricity. Chimneys are used to remove combustion products from furnace equipment: their passage through the roof should be as tight as possible.
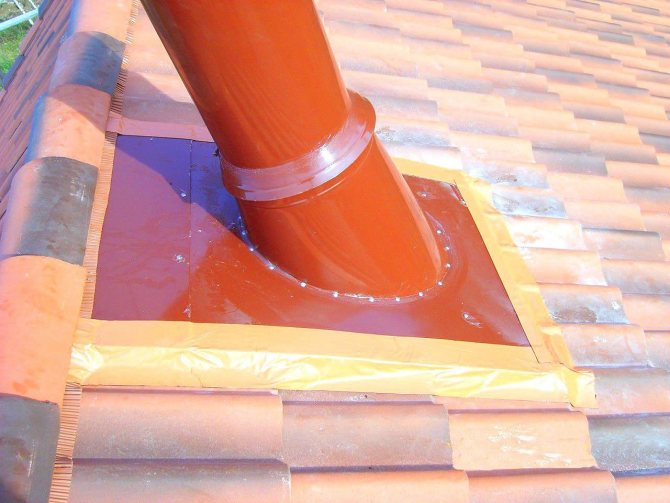
The easiest way to seal the joints on a slate roof is to grout. In the presence of an oval or round pipe, the use of this technology presents certain difficulties. You can solve this problem in the following way.
A ring is made of thick cardboard, wrapped in polyethylene and inserted into the gap between the roof and the chimney. A small semblance of formwork from plasticine or any other plastic material is formed on the slate. An asbestos-cement mixture is poured into the resulting space. After the cement has set, the cardboard and formwork are removed. An asbestos-cement ring remains around the pipe, which serves as waterproofing.
The installation of a chimney is usually not a difficult process, however, in some places, for example, in crossings through ceilings, some difficulties may arise. An important point is to ensure proper waterproofing. We will talk about this, and about other nuances associated with how to close up the chimney in this article.
Sometimes the question arises of how to close the gap between the pipe and the slate.
The technology provides for the following sequence:
- First, a round hole is cut in the steel sheet, which will be required to finish the ridge.
- Next, a ring of sheet asbestos cement is put on the pipe.
- For absolute sealing, so that in the future there will be no problems with the pipe flowing on the roof, the joint of the pipe with the roof is sealed with a solution of asbestos cement (proportion 1: 2).
- In addition, the gap between the chimney and the slate sheet is poured with the same solution. To do this, for a while, you can make a limiter out of cardboard.
The installation of the chimney is generally not difficult, but there are some places, for example, passages through ceilings, which can be difficult in the absence of experience. It is important to remember that proper waterproofing must be provided when installing the chimney.
Sealing the gap between the pipe and the roof
No matter how tightly the pipe is placed to the roof, the gap will still be present. In rainy weather, precipitation will fall into the inner layers of the roofing cake and cause irreparable damage. That is why sealing the gaps between the pipe and the roof is an important stage in the construction of the chimney, which should not be neglected.
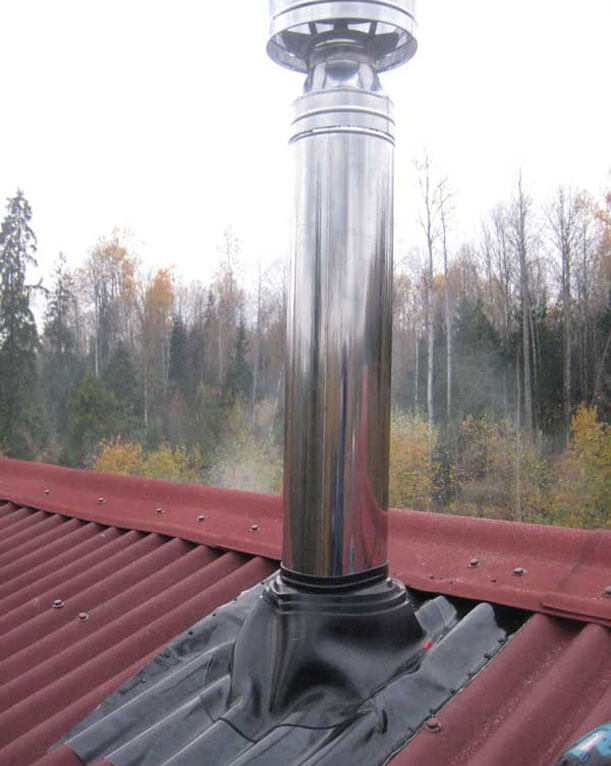
Galvanized chimney passage
If you need to seal small gaps between the pipe and the roof, a silicone-based sealant is suitable. Today, in any hardware store there is a huge selection of sealants, you must stop your choice on the heat-resistant version.
In addition to general recommendations, there is also its own specificity of sealing gaps for various roofing materials. Therefore, the waterproofing algorithm differs on slate, tiled, bituminous roofs, as well as corrugated roofs.
If necessary, an asbestos-cement mixture is used to close the gap on the slate roof. The process technology is as follows:
- A circular hole is cut in the steel sheet, which is used to finish the ridge.
- A ring of sheet asbestos cement is put on the pipe.
- For complete tightness, it is necessary to seal the joint of the pipe with the roof with a solution of cement and asbestos, which are diluted in a ratio of 1 to 2.
- It is also necessary to fill the gap between the chimney pipe and the slate sheet with asbestos-cement mortar. For this purpose, you can make a temporary stop from cardboard.
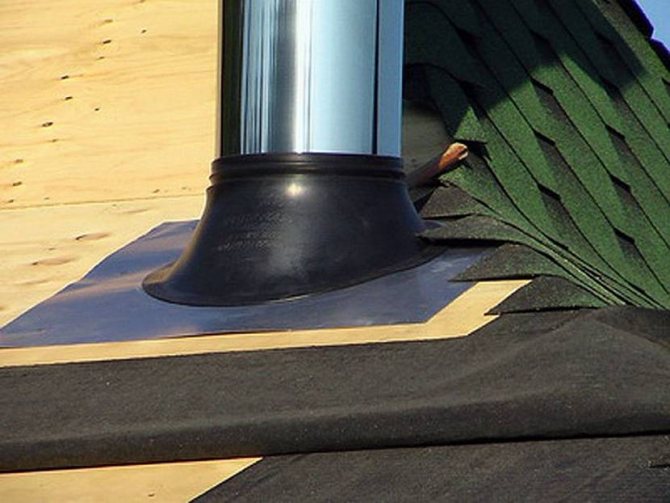
Self-adhesive tape Wacaflex is used to waterproof the chimney that rises above the bituminous roof. The stages of the work are as follows:
- Production of cutting from Wacaflex roofing tape.
- Pressing the cut with a pipe case.
- Sealing the gaps between the connected elements with special bituminous mastic.
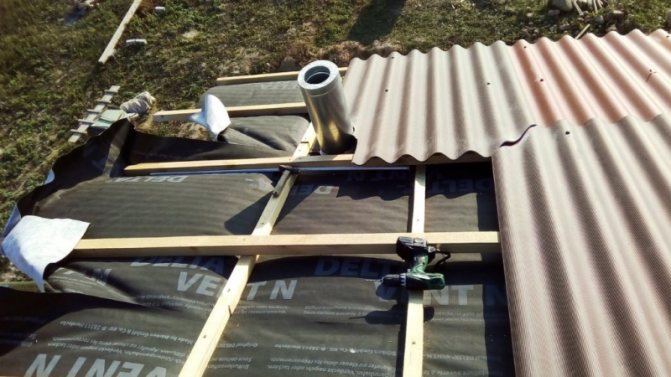
If it is necessary to remove the smoke exhaust device through the roof from the corrugated board, the ready-made pipe cutting Master Flash is most often used. This roofing element is very easy to use and can be used not only for corrugated board, but also for other roof materials.
Master Flash is an apron-cap, which is a rubber or silicone apron on an aluminum base.
Silicone Master Flash has a wider operating temperature range, but most often a rubber one is enough, which can withstand a load from -50 to 130 degrees.
Sealing cracks on the roof made of corrugated board is as follows:
- Make a hole in the hood so that it is slightly smaller than the chimney diameter.
- Dress the Master Flash on the trumpet.
- Place a gasket under the base.
- All joints are reliably sealed with a heat-resistant silicone-based sealant.
- Attach the base to the corrugated roof with screws.
Sealing the gap on the corrugated board
There are times when such waterproofing is not enough and water flows at the junction. The way out is to use a special self-adhesive tape reinforced with aluminum. It is very convenient to use, because there is no need to preheat before installation.
Choosing the right waterproofing material will help protect your roof from leaks and premature failure.Following the instructions and doing the job diligently will save you any trouble.
Sometimes the question arises of how to close the gap between the pipe and the slate.
Classical devices for heating any residential building are fuel boilers and stoves operating on solid, liquid or gaseous fuels. The products of fuel combustion are removed from the premises through a chimney, which is discharged through the roof. When it is installed and the pipe is removed above, there is always a violation of the tightness, which leads to problems of roof waterproofing.
The chimney outlet above the roof surface and its waterproofing for each roof has its own characteristics. In this article, we will consider how to install and seal its joint with slate.
Chimney installation
To carry out the withdrawal in a place that minimally needs waterproofing, and to eliminate the loss of tightness, it is necessary to solve two main problems:
- choose the optimal location for the chimney on the roof surface;
- to ensure a safe and airtight joint of the roofing layers with the pipe.
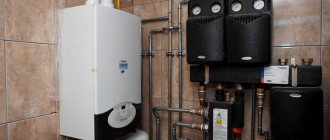
Most heating systems in private homes include solid, liquid or gaseous fuel boilers. With different characteristics of the systems, they are united by the same elements: pipelines, radiators, and, of course, chimneys.
Sealing
The best version of the chimney is vertical, towering over the ridge. However, such a device means the formation of an abutment zone on the roof and the associated sealing work.
Where the roof leaks
The modern roof has a multi-layer structure: a steam insulator, insulation and a waterproofer. Such a "pie" provides both protection of the building from rain, snow and wind, and heat preservation, and the durability of the roof itself. However, on a roof, even the most reliable one, the joints and connections of the elements will be the weak link. The chimney is one of them.
The waterproofing agent protects the insulation layer from moisture, but only if the layer is continuous. And since most of the materials of this kind are flammable, it is impossible to lay its joint with the chimney. This means that a gap must be left between the pipe and the roof.
The situation is aggravated by the fact that roofing material, especially sheet, also cannot be laid close to the pipe. As a result, subtle gaps remain, through which moisture will fall into the space under the roof.
Eliminates the danger of any of the methods of sealing
The technology for each case is determined by the device of the pipe - square or round, the material of the chimney and the roofing material: different methods are offered for a roof made of slate, corrugated board or metal tile.
We invite you to familiarize yourself with Thermal insulating paint for pipes
The content of the article
In order to bring the chimney or ventilation pipe to the roof, a hole is made in the finished coating, so a gap will inevitably form at the passage. No matter how great the skill of the roofer, it will not be possible to avoid the appearance of a gap. This article will show you how to seal a pipe on a roof in order to achieve a complete tightness of the joint and insulate the elements of the rafter frame from rain or snow.
The content of the article
To remove the chimney through the roof, a larger diameter is cut out in it, so a gap remains between the walls of the chimney and the roofing material. Regardless of the width of the gap, it is a big problem faced by homeowners and builders. To eliminate this defect and protect the under-roof space from the penetration of atmospheric moisture, seals, aprons, self-made or purchased collars are used. An unsealed gap between the roof and the chimney is fraught with the following consequences:
- Increased wear of the roofing material.Most roof waterproofing materials are better protected against moisture penetration from the outside. Moisture that penetrates through an unsealed gap enters the inner surface of the roof, destroying it over time.
- Reducing the service life of the rafter frame. The pouring water falls on the elements of the rafter frame, which are made of wood. This leads to decay, premature destruction of the rafters.
- Decrease in the effectiveness of the insulation. Roof insulation materials, when wet, lose their properties, becoming less effective.
- Increased humidity in the attic. Increased dampness in the attic causes heavy, stale air, negatively affects the interior decoration of the room.
Clearance to prevent fire rafters from heated pipe
- Any cement-based products will crack sooner or later. If the pipe is not very hot (up to 200-300 C), it is better to use a complex grout. First, treat the joint with a special sealant for hot temperatures, and then apply a cement seal. If the pipe heats up strongly, you can buy rubberized nozzles. But they have a minus - in the sun, after a few years they also begin to crack and leak.
- Do not suffer for a long time, make it easier:
just use the universal attachment. It will very well seal the abutment: not two layers (aluminum silicone).
In general, contact any fastener service!
I heard that the properties of the nozzle are preserved even at 135 heat!
Choose carefully.
- In order for the abutment of the pipe to the slate roof to be airtight, the following operations must be performed:
- a cardboard cylinder is made, wrapped in polyethylene and inserted into the space between the slate and the pipe;
- an asbestos-cement mixture is loaded into this interval;
- after the mixture has hardened, the restrictive flange and the cylinder are removed;
- an asbestos ring must be put on the pipe.
from clay or plasticine, a side is formed on an even place (steel sheet) to restrict, moreover, the distance from the side to the cardboard cylinder should not exceed ten centimeters;
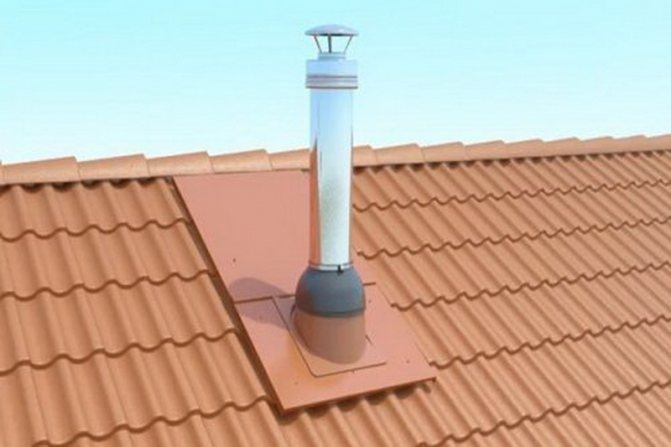
But it is better to purchase a chimney with a ready-made edging, it is a metal sheet on which a truncated cone is located at an angle, a pipe is threaded through this cone, and the cone is tightened with a clamp.
Try also to look for a special flexible termination, it is called Master Flush, according to the principle it is the same apron-cap.
For brick pipes, they consist of several separate elements.
For round pipes, the main element, this roofing passage, already has a certain hole through which it is put on the pipe. It is made of elastic material, on the bottom edge of it is a tin ring with ready-made holes for the bolts. A slate sheet is drilled over them, bolts are inserted and tightened from the inside of the roof with a nut.
On the upper end of the nozzle, where it directly adjoins the pipe, a clamp is applied and also tightened.
A husband and an eldest son installed such a thing in a suburban house, I saw it.
Here's an example of an elastic attachment:
It is put on top of the pipe and fastened with self-tapping screws to the crest of the slate or profiled sheet. The upper edge of the nozzle kit is inserted under the roof ridge.
Or here is an example of a combined nozzle, part of which is elastic, the other part is made of sheet metal:
A sheet metal skirt can be installed between the upper edge of the pipe and the insulating nozzle, which prevents rainwater from flowing down the pipe walls.
To do this, it is enough to have at home or buy aluminum foil for baking, such as sayana.
First, we seal it up around the pipe with mortar, asbestos or alabaster (gypsum), and it's okay that it will crack over time. The main thing is, after that, carefully wrap around the pipe with aluminum foil and secure it with a simple clamp or wire, then again apply a small layer of solution around the pipe so that the foil does not break, and then we put a decorative flange on the pipe. That's all.
We suggest that you familiarize yourself with How to make a slate roof
Materials used
There are many materials for waterproofing pipes in stores, but three types are traditionally used.

Cotton wool
Common types of mineral wool are stone or glass wool. Sold in rolls or slabs of various widths and thicknesses. Cotton isolates have:
- Soundproofing. An uneven structure, representing a set of dead-end corridors, absorbs sound well, preventing it from escaping. They are used in sound recording rooms, in homes and for roof insulation. Relevant if the roof is made of sheet material. By covering the passage of the pipe through the corrugated roof, you can significantly reduce the noise of the rain.
- Low material density.
- Snug fit to surfaces. It is especially important if the roof has a figured profile and denser materials are not able to ensure adhesion.

- Low heat capacity. The interlayer will not allow the brick to conduct heat, so the temperature in the room will not drop.
- Resistance to mechanical damage. It does not deteriorate with impacts, constant vibrations, even deliberate stabbing. If a break occurs, simply press the two pieces together. The finest fibers will intertwine and become one.
- Electrical insulation. If an electrician is installed under the roof, there is no need to worry about short circuits.
- Chemical neutrality. Acids, resins, adhesives will not be able to melt or decompose cotton wool.


Roll filters
A mullite-silica mixture that impregnates the fibers. The filter is sold in rolls and has the following advantages:
- Flexibility. Can be bent at any angle. It resembles cotton wool in consistency. Pliable and comfortable, does not require warming up and does not require a slot to bend. Easy to install on curved roofs.
- Any adhesives. Many isolates are sensitive to adhesives. Many require only organic adhesives, but the filter adheres well to inorganic ones as well. Does not dissolve or stick together.
- Easy to cut. To cut, scissors or a utility knife are enough. It is possible to cut with a construction cutter.
- Are tightly fixed.

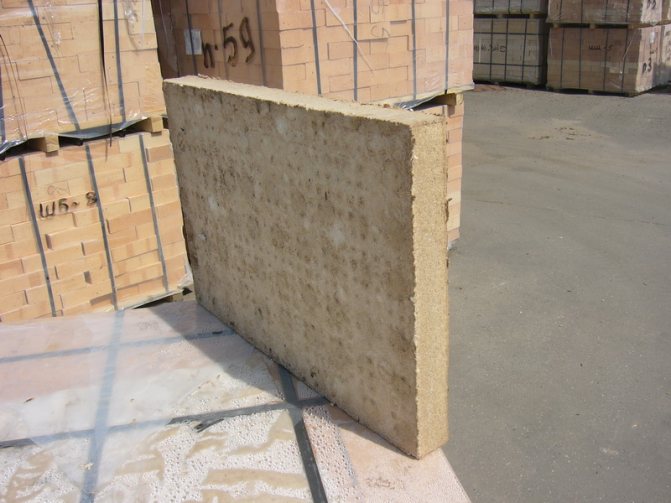
Asbestos and kaolin boards
The composition is similar to the previous materials. Recently, asbestos is rarely used due to its high carcinogenicity. That is, the constant inhalation of its dust can lead to cancer. But, in the case of waterproofing the pipe on the roof, it will not be able to get into the air and harm health.
- Noise suppression. Copes with structural and spatial sounds, which is important if the pipes on the roof are made of metal.
- Low thermal conductivity. Asbestos and kaolin are good heat insulators that can be used in any type of home. Will keep the brick from freezing, which prolongs the service life.
- Resistance to mechanical and chemical influences. The only susceptible to asbestos are alkalis and acids. Mechanically (shock and vibration) cannot damage it.
- Electrical insulation. The insulating properties of asbestos will remain up to 800 degrees Celsius.
Consequences of poorly executed pipe waterproofing
The installation of a chimney is usually not a difficult process, however, in some places, for example, in crossings through ceilings, some difficulties may arise. An important point is to ensure proper waterproofing. We will talk about this, and about other nuances associated with how to close up the chimney in this article.
Even if the pipe on the roof is placed as tightly as possible, there will still be minor gaps. During rain, moisture will constantly enter the attic through them, which over time will lead to damage to the roofing structures. This is why sealing the pipe on the roof is so important.
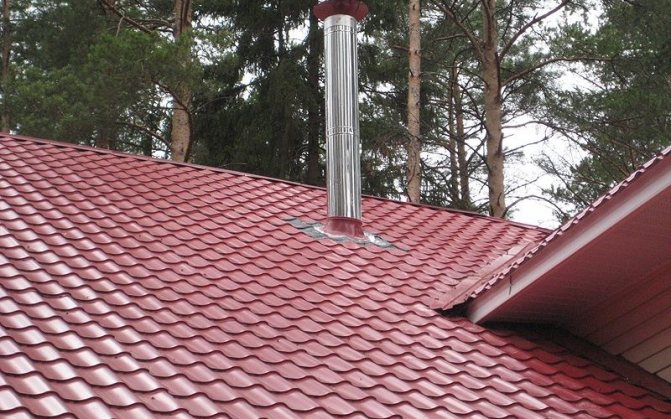
The easiest way to solve the problem is how to close the gap between the pipe and the roof - to install an apron on top. You can do it yourself, in which case it will be necessary to provide for the strips in advance for connecting to the pipe.There is also an easier way - to buy a ready-made stainless steel roof passage. Often, round passages are made for the chimney, and they are made of stainless steel. The passage is pushed onto the pipe, and the joint is fixed with a steel clamp.
If you need to cover up minor gaps formed between the pipe and the roof, then for these purposes you can use a silicone sealant (read: "What sealants for chimneys are better to use - types. Characteristics"). You can find a huge variety of them on sale, but we need a heat-resistant look.
The process of how to seal the roof around a round pipe will differ slightly depending on the type of roofing, that is, in addition to the basic recommendations, there are also algorithms that will differ somewhat.
Sometimes the question arises of how to close the gap between the pipe and the slate.
The technology provides for the following sequence:
- First, a round hole is cut in the steel sheet, which will be required to finish the ridge.
- Next, a ring of sheet asbestos cement is put on the pipe.
- For absolute sealing, so that in the future there will be no problems with the pipe flowing on the roof, the joint of the pipe with the roof is sealed with a solution of asbestos cement (proportion 1: 2).
- In addition, the gap between the chimney and the slate sheet is poured with the same solution. To do this, for a while, you can make a limiter out of cardboard.
Among the options for covering the pipe on the roof, if it rises above the bitumen roof, the most optimal is the use of Wacaflex self-adhesive tape.
You can perform isolation in this way:
- First, cutting is performed from the Wacaflex tape.
- In the next step, this cut must be pressed with a pipe case.
- At the end, all remaining gaps between the parts to be joined are sealed with bitumen mastic.
The part of the chimney protruding above the roof is exposed to negative external influences, so you should worry about its protection. The aesthetic appearance of the chimney must correspond to the architectural concept of the building. In addition, the sealing of the roof around the chimney must be done with good quality to prevent the roofing cake from diminishing in functionality.
The negative factors affecting the chimney include:
- atmospheric influences (wind, precipitation, ultraviolet radiation);
- difference in ambient temperatures;
- high temperature workloads.
Due to the difference between the temperature of the working pipe and the temperature of the air in the chimney, condensation forms, which provokes the destruction of the pipe during the combustion of heating oil. To avoid the formation of condensation and to protect the pipe from external influences, it is required to provide for reliable insulation of the chimney due to the lining.
Various materials are used to cover the protruding part of the pipe. When choosing, you should consider:
- resistance to external factors, wear resistance;
- appearance and color scheme (matching the roofing or wall decoration of the building).
We suggest that you familiarize yourself with Linden broom for a bath, what is good and how to prepare
It is recommended that the chimney cladding be done prior to laying the roofing material to avoid damage or contamination of the roof covering.
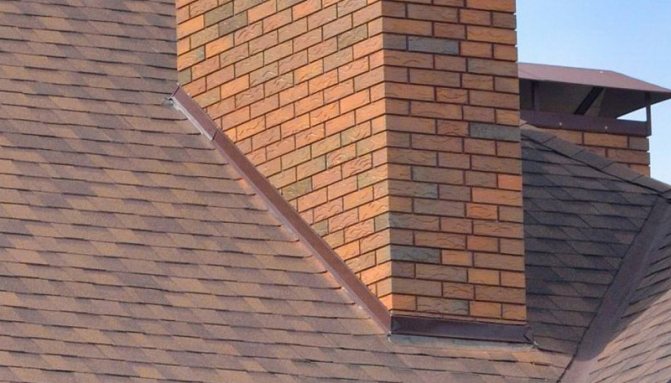
Roof chimney decoration is most often done using:
- clinker bricks or tiles;
- plaster;
- fiber cement boards;
- roofing material (corrugated board, slate).
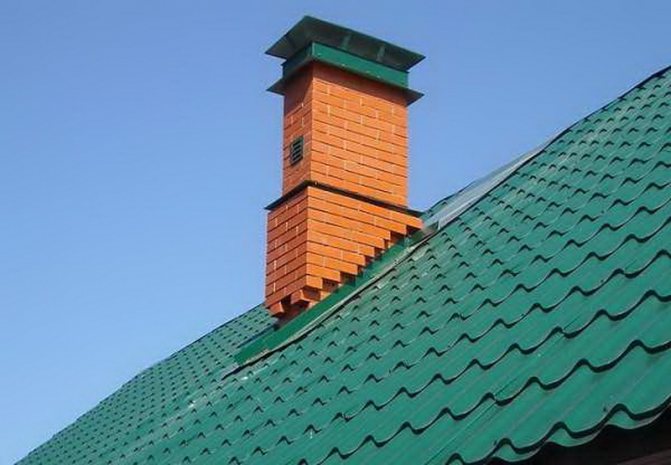
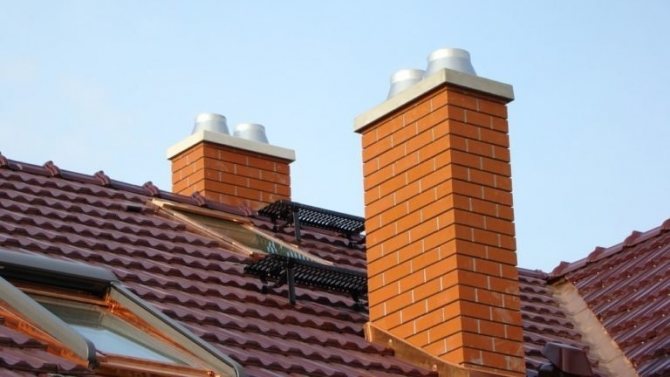
Clinker bricks or tiles are a practical option for finishing the chimney, since dirt is not noticeable on such material. The advantages of clinker materials also include the aesthetics of the masonry; such a chimney is perfectly combined with any type of roofing. It is worth noting the resistance of tiles and bricks to weather conditions, temperature extremes, as well as the strength of the material.
Finishing the chimney on the roof with plaster is characterized by:
- affordable cost;
- simple installation;
- versatility (suitable for any roofing);
- the ability to implement any color solutions (plaster can be painted with silicone paint).
Plastering of pipes is carried out using the same technology as finishing of facade walls. Traditional cement or lime-cement mortar can be used, but a more durable option is to use mineral, silicone, silicate or acrylic plaster. Painting the dried surface increases the wear resistance and durability of the finish.
Small-format cement-fiber boards are durable, resistant to ultraviolet radiation, moisture, temperature fluctuations, and have a low weight. It is an environmentally friendly, non-flammable material. Smooth or structured boards can be used for lining the chimney; the material is available in a wide range of colors.
If slate is used to cover the roof, the lining of the chimney on the roof is usually made of the same material. Slate slabs can be in the form of an arc, scale, rectangle or octagon. The color of this natural material depends on the deposit. This is usually a graphite, green, or magenta color.
A fairly simple and budgetary option for finishing the pipe is the use of corrugated board. It is used if the roof covering is made of the same material. A chimney finished in the color of the roof is aesthetically pleasing.
Manufactured at the factory, the elements of the chimney for the roof passage have an aesthetic appearance and are quite simple to install. They are equipped with a steel chimney duct and can have a ready-made external cladding made of any material, or be prepared for independent finishing so that the chimney is outwardly in harmony with the roof. The modular steel structure is not additionally finished, it is enough to mount it in the place of passage through the roofing pie.
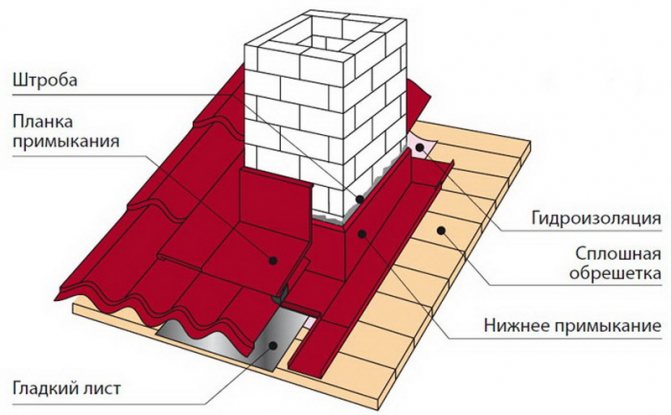
When performing a node of passage through the roof, it is important to comply with SNiP standards. A gap should be left between the elements of the roof and the chimney, the size of which is regulated by the documents. At the place of passage through the roof, a box (wooden or galvanized metal) is usually mounted, in which all the free space around the pipe is laid with a non-combustible material - stone or glass wool.
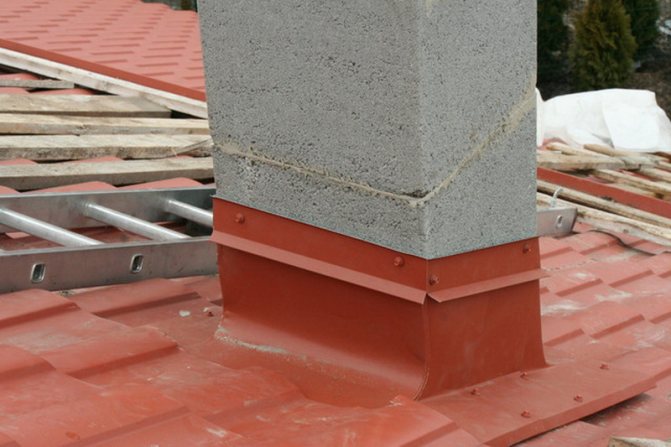
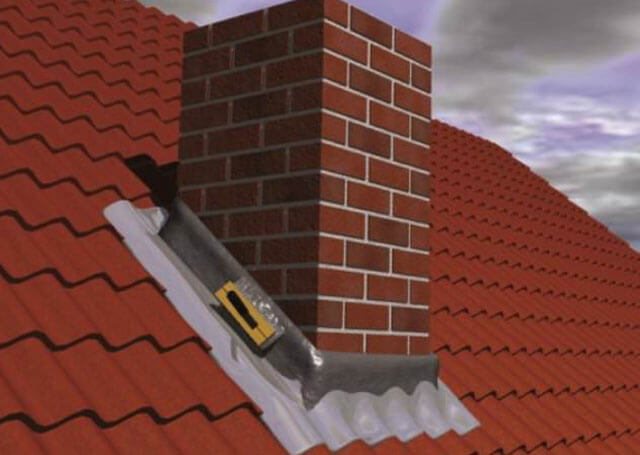
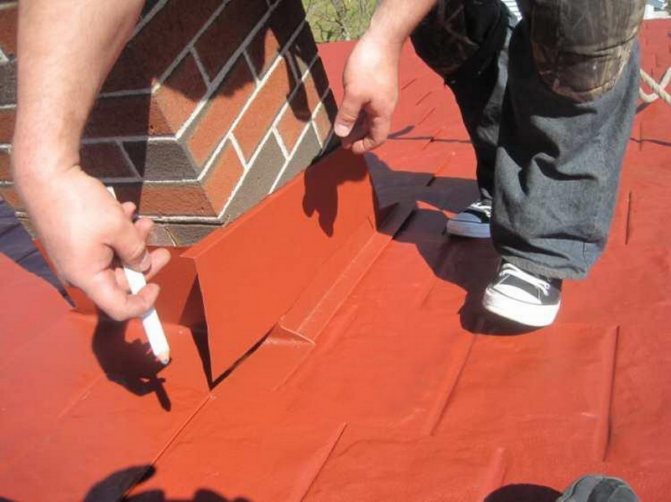
Sealing the chimney on the roof can be carried out using improvised means or using standardized elements. Around the chimney, a so-called collar, or flashing, should be made - a trim of metal strips, about 40 cm wide, in accordance with the dimensions of the pipe. The bending angle of the steel strips must correspond to the angle of passage of the chimney through the roof. To calculate the length of the compartment, you need to take into account:
- slope angle;
- chimney dimensions;
- chimney finish type.
We offer you to familiarize yourself with the Box for the chimney pipe on the roof
If the frames are made of galvanized sheet, then they are overlaid and soldered. Sheet steel elements are connected with a double standing seam. The reclining seam connection is used to seal the passage assembly on corrugated board and tile roofs. If the angle of the roof slope is more than 30 degrees, a special bar - "bumper" should be installed behind the chimney, which will protect the pipe from rainwater flows and excessive snow pressure in winter.
Protective elastic chimney apron can be made:
- from flexible metal tape (lead or aluminum);
- made of galvanized metal with a polymer coating.
The apron is installed around the pipe in two layers along the entire perimeter. The lower layer of the apron is put under the roofing, and the upper one is mounted on top of the roofing material. To close the top layer of the apron, a waterproofing film and metal profiles are used.
The top folded edge of each apron must fit into a groove cut along the perimeter of the chimney. After mounting the edge into the groove, the joint is filled with polymer sealant or silicone for the roof.
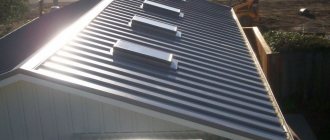
The roofing cake will be airtight and reliable if you choose the right place for the outlet of the ventilation ducts and chimney through the roof. The finish of the joint will depend on the location of the passage. For a roof made of profiled sheet, the pipe is output in the following places:
- At a certain distance from the roof ridge (50-70 cm). This location of the pipe outlet prevents roof leaks and reduces the likelihood of snow pockets. Also, with this arrangement of the pipe outlet, there is no need to violate the rafter system. To protect the joint between the roofing and the pipe, elastic penetrations are used, as well as additional elements necessary for assembling the apron.
- On the roof ridge. This place of the pipe outlet is considered the most suitable. This arrangement eliminates the likelihood of snow pockets, condensation and leaks. But there is one significant disadvantage - violation of the integrity of the ridge beam. In this case, when waterproofing the chimney on the roof, the joint between the roofing material and the pipe is poured with silicone sealant, and then sheathed with a decorative apron.
If the place of passage of the pipe or ventilation duct on the roof is performed poorly, then the following problems may appear in the future:
- Leaks. In case of poor-quality waterproofing of the chimney, leaks appear on the roof.
- The rafter system starts to rot. The flowing water flows onto the wooden elements of the roof frame. These elements become damp and then rot.
- Corrosion of roofing material. The inner part of the profiled sheets, in contrast to the outer, is not covered with a protective polymer film. Therefore, the ingress of moisture under the profiled sheets causes their corrosion.
- Dampness of the insulation layer. When moisture gets on the insulation, its thermal insulation properties are halved.
Possible ways to eliminate gaps
Even a small gap can completely eliminate the usefulness of waterproofing. If they are discovered or reinsured, they can be eliminated. There are three ways to do this.

- Apron. You can buy ready-made in fireplace stores or make your own. For inexperienced DIYers, a purchased one is better suited. Sizes are standardized but need to be measured beforehand.
- Roofing passage for chimneys can be steel. In this case, leaks are eliminated thanks to the clamp, which physically does not allow water to get inside. This makes work easier and easier.
- If the gap is small, it can be closed with silicone sealant. The sanitary type, designed for constant exposure to moisture, is better suited. In some cases, you can use homemade mixtures based on PVA with classification D
Depending on the material of the roof, the method of eliminating leaks also changes. Roof pipes made of metal tiles can only be completed with an apron.


Exiting the pipe through the roof
The key to installing chimneys is to run them out through the roof. In the course of this work, two tasks must be completed:
- Protect the interior from moisture that can penetrate through the opening into which the pipe will be led out. This requires effective waterproofing. If this is not done, then your room and you yourself will get wet under melt and rain water.
- Make the exit so that it is not fire hazardous.
The execution of the abutment node when withdrawing pipes will not be a difficult task. This is ensured by the fact that snow will not collect on it, and the risk of leakage is much lower. You will need to install the truss system without a supporting ridge girder, or with a ridge girder covered where the pipe will exit to the roof. In the latter case, it will be necessary to install supports that will support the rafters, in addition.This can cause some inconvenience if you have a mansard roof type.
To avoid certain inconveniences when performing work, you can place a pipe near the ridge. With this arrangement, the threat of snow accumulation is also absent, and the junction is much easier to perform.
It is strongly not recommended to carry out the outlet of the chimneys to the roof at the points of convergence of two slopes at an internal angle. For example, a chimney cannot be placed in a valley. This placement reduces the likelihood of achieving a high-quality abutment of the pipe to the roof at times. Rainwater can enter the hollow and accumulate snow, leading to constant leaks. Please note that the minimum distance between the roof and the rafters should be 25-30 cm.
If you have a roof made of combustible material, then you definitely need to leave a fire gap of about 13-25 cm. When using non-combustible roofing materials, you can limit yourself to a few centimeters. In this case, it is necessary that the chimney be removed from the lathing.
The "roof-pipe" scheme is complicated in the first place if the roof is made like a roofing pie, that is, it includes steam and waterproofing with a layer of insulation. Protection of the thermal insulation layer from water vapor and moisture can only be ensured if the vapor and waterproofing is continuous. However, they are combustible materials for which a clearance is required.
Sealing a square pipe on a slate roof
Slate is an inconvenient material in terms of work, as it has a pronounced waviness. In this regard, any method of sealing will not lead to success.
The only exception is a cement-sand apron made according to the following algorithm:
- All visible cracks must be closed with collars. They must be made of non-corrosive material. Better to take stainless steel or aluminum, as they generally do not react with water. If you want to save money, galvanized steel will do. When working with it, it is important to prevent damage to the zinc coating. The slightest scratches will lead to rust and further decay.
- Fill. Make the usual mixture. It should be the consistency of sour cream - convenient for pouring, but not liquid. The apron level should be above the roof. To make it convenient, you need to make a cylinder in advance. It can be made from cardboard.
- Water drainage. Tilt the ledge so that the water flows out smoothly.

Pipe release methods
After the construction of the stove, it is necessary to proceed with the equipment of the chimney. The pipe is installed up to the ceiling without hindrance. But further difficulties arise. It is necessary to bring it out through the roof. There are certain requirements for such a process, including fire safety measures:
- between the structures protected from fire and the pipe itself, the distance should not be less than 25 centimeters;
- if the structures are not protected, then the distance to the pipe increases by another 10 centimeters.
Valuable information. It will be correct to have an air gap around the pipe, but this is fraught with heat loss, and therefore this option does not apply. Therefore, the gap at the bottom is covered with non-combustible materials such as metal or asbestos cement. From above it is covered with fine expanded clay.
After that, the pipe should go out through the roof. Fire safety requirements state that the distance between wooden structures and a pipe cannot be less than 30 - 35 centimeters. Everyone wants to minimize the diameter of the pipe outlet through the roof, making it the same as the pipe diameter. But it is forbidden to do this, since the presence of roofing felts and roofing felt in the immediate vicinity of a sufficiently hot pipe can lead to their fire. Therefore, the presence of a gap is imperative.
The hole in the roof must be made correctly and in the right place. There is an elementary way. Take thick cardboard and wind it on top of the pipe.Then the cardboard tube is lifted up until it hits the roof. Appropriate notes are made. After that, part of the cardboard is cut off with scissors and the pipe rises again. Such actions are done until the moment the correct hole is drawn. This method is perfect for round pipes.
Sealing round multilayer chimneys
Round chimneys are the most convenient to work with. Their termination is as follows.

- The edges of the pipe are primed with a special compound for metal.
- A hole is made in the waterproofing. After that, it is attached to the pipe with mastic. It is advisable to take bituminous. Despite the discomfort during work, it does not bind with water and will not allow it to reach the pipe.
- The sheet is fixed to the roof lathing. The pipe is passed through the prepared cap. There should already be a clamp and a temperature-resistant gasket inside.

If a cap is missing, then any pipe fittings will do.
Varieties of chimney caps
Before you make a chimney cap with your own hands, you need to decide what shape it will have, and then make a drawing. The most common shapes that a chimney cap can have:
Chimney caps differ in design features and material that is used in the manufacture of the product, but they all serve to enhance traction and protect the chimney from atmospheric phenomena.
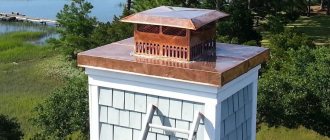
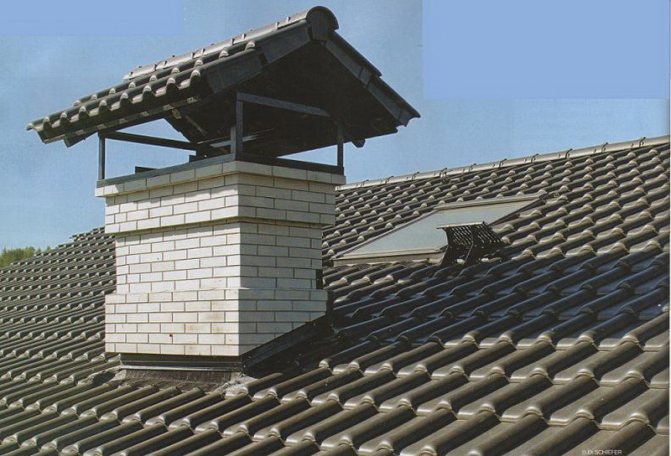
When choosing an option, you should take into account the overall architectural appearance of the house. So, a chimney cap with a flat copper top is usually installed on Art Nouveau houses. For a European-style home, it is better to make a visor over the chimney with semicircular tops. Weather vane with a gable roof serve for effective ventilation and protect the structure from being filled with snow.
A special flap can be placed in a weather vane with a built-in weather vane, which in windy weather allows the combustion products to escape freely. Chimneys with an opening lid are very practical, they allow you to clean chimney channels without much effort (see How to clean a chimney).
Sealing a pipe on a bituminous roof
The passage of the chimney through the roof of the euro-slate is not an easy task. Its specificity is softness, so it will be quite difficult to use it. The best way would be a Wacaflex ribbon. This is an adjoining joint strip.

It is installed according to the following algorithm:
- Cutting from the tape is made in advance.
- Pressed with a case.
- Any gaps are removed with bitumen mastic.

Please note that bituminous roofs are best repaired during the cold season. Under the scorching sun, it softens and becomes dangerous. If you move on the roof, there is a possibility of damage to the ondulin.
Principles of sealing gaps ↑

The slots are closed using various materials at hand. They can be schematically divided into two groups:


Chimney waterproofing: photo gallery


The principle of operation of the hood on the chimney
- The air flow, striking the walls of the upper cylinder, bends around it from all sides.
- The air jet, sliding along the surface of the cylinder, turns upwards, thereby sucking in the smoke coming out of the pipe.
- The movement of air inside the pipe becomes more intense, therefore, the draft increases.
- When the wind flows do not go horizontally, but vertically or at an angle, the wind vane also helps to increase traction. Wind flows enter the upper cylinder through the gap and suck smoke into the chimney.
- In the case of a downwind, vortices are formed under the hood of the weather vane, which slow down the release of smoke.
Note! A reverse cone should be installed under the hood; in case of a downwind, it helps to reflect the flow of air with smoke, dissecting it and leading it out.
High-quality and competent organization of traction in the chimney system is, first of all, not only the safety of people living in the house, but also a prerequisite for the correct operation of the heating system. Therefore, it is worth taking the time to make and install a chimney umbrella with your own hands. This simple device will help not only to organize the correct operation of the heating system, but also to eliminate weak draft in the pipe.
Decorating chimneys with artistically designed and very simple caps is a long-standing Russian tradition. This is especially striking when visiting country cooperatives. Even the chimneys of the most modest houses are decorated with carved tops and weathercocks.
This device is not only a decoration - it has a purely functional purpose and more than one.
The hood is not the only name for these devices, they can also be called:
- chimney umbrella;
- fungus on the chimney;
- chimney;
- head
- pommel;
Of course, this is not a complete list. There are many more different designations.
A similar design is also called "vane", speaking as a stand for.
However, first of all, the functional purpose of these devices is important:
- Protecting your home from moisture
of various origins. - Chimney protection
from getting inside of foreign objects, birds, debris, etc. - Strengthening the draft in the chimney
due to the targeted direction of air flows.
The topping on the chimney pipe can be arranged in the form of an umbrella or a house with various shapes of roofs, it can generally be presented in the form of bizarre structures. If only it performed its protective and auxiliary functions.
Weather vane
The design of the hoods depends on the shape of the pipe
which can be square, rectangular, or round. Also, the shape of the roof, the angles of inclination of its elements and even the prevailing direction of wind flows ("wind rose") matter.
Caps can be conditionally divided into the following types:
- Standard vane
(resembles a house with a 4 pitched roof). - Umbrella on chimney pipes
- it is used as a pommel for round chimneys. - with a flat top.
- Weather vane
with a gable roof. - Cap
with a semicircular roof. - Cap
with opening lid.
Various constructive solutions for caps are possible, various materials are used for their manufacture. But their protective function is important from falling into the pipe of snow, water, foreign objects, birds.
DIY making

Chimney making scheme
We will set ourselves the task of making a vaulted cap for a pipe. The simple design of such a chimney is accessible even to a person who rarely held a tool in his hands.
You need to make only five simple parts: the arch itself - a sheet of metal bent by an arc, and four supporting corners.
How to do it:
- Cut a rectangle from a sheet of metal
, the dimensions of which in a bent form with a noticeable margin overlap the opening of the chimney. - On the long sides of the sheet
a line should be marked at a distance of about 20 mm from the edge. Using metal scissors, make cuts from edge to line, beveling the cut slightly so that trapezoidal shapes are obtained. Bend the figures alternately in opposite directions through one. - Prepare four racks from the corner
by bending them as shown in the illustration. Make sure that the distance between the uprights is not more than the chimney opening.Mounting holes must be drilled at the ends of the corners. - Rivet studs
to the manufactured rectangle. - Holding on to the racks
bend the rectangle so that the pillars go inside the chimney. - Through the holes in the racks
drill holes in the masonry and fix the cap on the pipe.
Such a cap is a pyramid formed by four isosceles triangles.
Manufacturing:
- Using a cardboard pattern, mark and cut a sheet part with metal scissors.
Folds on metal are best done on a workbench with a surfboard (a surfboard is a piece of a corner attached to the workbench tabletop through the holes). - Bend the tent
in the same way as the cardboard pattern was bent, and perform a fold on the butt folds of 6 and 12 mm, as shown in the sketch. When making folds and folds, you need to use a wooden mallet. When using a hammer, dents may form on the surface of the part. - Bend the outer edges
, forge them. To increase the rigidity of the structure in the folds, it is better to chain steel wire with a diameter of about 3 mm. - Bend four racks
and rive them to the tent with steel rivets. - Fix the chimney
in the pipe with steel pins.
Round pipe cap
The diameter of the sheet metal blank for the chimney should be about 1.5 times the diameter of the pipe.
The work is done in the following order:
- Cut a circle out of a sheet of roofing iron
diameter depending on the pipe diameter. - We measure the distance R along the contour of the circle
... Along the AB arc, this will be 1/12 of the circle. - Cut a sector.
Leave the edges to form a fold. - Bend the flanges at an angle of 90 °.
Bring them together and form a fold as in the previous example. If the value of the taper does not suit you, you can increase the cut along the arc, then the angle will decrease. In an amicable way, it is better to first model a cone out of paper, make sure it meets expectations, then do it in metal. - Craft three or four legs
from the roofing metal in half and fasten them to the cone with rivets. - On a metal pipe
it is better to fix the finished cap with rivets, running the legs inward, you can fix it to the asbestos-cement pipe by making a clamp from the same roofing metal and tightening it with a screw.
Tools
:
- locksmith scissors;
- hammer;
- mallet;
- electric drill;
- drill;
Materials:
- rivets (short pull-out rivets can be used);
- screws, nuts, washers;
This operation is performed, as a rule, when installing the roof in the process of sealing the chimney.
When repairing or replacing a cap, you must first of all take care of safety during work:
- It is forbidden to perform such work
in adverse weather conditions - in rain, wind, snow. - When carrying out work
it is imperative to use a special roof ladder (it must be securely attached to the ridge of the roof). - The presence of an insurer is mandatory
on the ground. - Anyone working at height must have a safety harness
and hook it onto a reliable object (the same pipe). - Before starting work
make a blind area around the pipe with a width of at least 80 cm.
Having raised the cap to the blind area, you need to install it on the pipe. As a rule, caps are made with a base in the form of a cap. In this case, the fastening is done for laying the pipe. It is necessary to drill holes and fix the cap with dowels.
- For fixing copper heads
you need to use copper or copper-plated fasteners. - For fixing the titanium zinc alloy hoods
galvanized fasteners are used.
The cap on the chimney will not only protect it from the effects of atmospheric influences and improve the draft in the chimney, but will also decorate the house.
A fireplace and stove in your own cottage, bathhouse or gazebo is a complex engineering design that must meet all fire safety requirements.For the stable removal of combustion products through the chimney pipe, you will need a deflector that redirects air masses and prevents water and snow from entering. How to make a chimney cap with your own hands, determine the most practical shape and draw up drawings?