Chamotte clay - a synthesis of natural and human
Chamotte is a word borrowed from the French language, which recently sounds with renewed vigor. Tired of unnatural delights and plastic gloss, people tend to natural materials, among which fireclay occupies a prominent place. However, it is not possible to obtain such material without human participation - special white kaolin clay must be burned in rotary kilns at a temperature of about one and a half thousand degrees Celsius, since it is in such extreme conditions that it completely loses its plasticity, loses all the water associated with its molecules ...
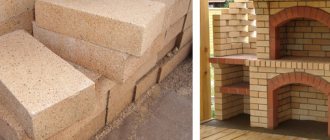
Thanks to this, chamotte acquires properties close to those of a stone. The resulting pieces of chamotte are crushed in special mills and already in this form are sold in the form of building dry masses or are used for the production of chamotte bricks. It should be noted that not only builders, but also designers are not indifferent to chamotte. Chamotte clay has some kind of inexplicable restrained beauty, special texture, natural spirit, thanks to which things made of this material are able to decorate even the most sophisticated interior, so this method of application is not uncommon. In a creative environment, fireclay clay is used to make ceramic dishes, tiles, and figurines.
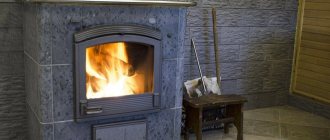
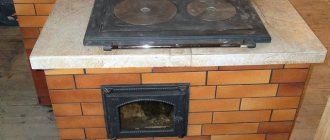
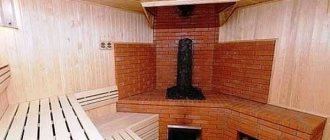
Builders, in turn, try to use textured fireclay not only for facing surfaces exposed to high temperatures (all the same fireplaces and stoves), but even for the facades of houses!
Chamotte clay is also found in hardware stores under the name kaolin - the essence of this does not change. The color of this material ranges from creamy white to gray-brown. Chamotte is actively used both for creating a mortar for laying bricks, for mixing mortars, and for plastering. When buying, make sure that the clay has not been stuck on the shelves for a long time - otherwise it could lose its properties, because the stores do not always withstand the conditions it needs. Prolonged exposure to humid air can completely ruin the chamotte, just like it happens with cement. It is more expensive to use such material.
Preparation of materials for the preparation of mortar for laying the furnace
The easiest way is to prepare the sand. It is dried because it is impossible to sift raw. And then they sow on a grid with a mesh size of 1.5 - 2 mm. The task is to remove stones and impurities.
Clay is more troublesome. In the classical version, they did this. They dug in clay in advance, formed ridges about a meter high from it, moistened it and left it for the winter. Water, penetrating into the pores of the clay, freezing, destroyed the structure of the clay, crushed it. After such exposure, the clay easily dispersed in water, creating a homogeneous suspension - clay milk.
Then the clay was mulched. Stirred with excess water in a tall barrel and left. Heavy impurities (stones, sand) were collected at the bottom of the container. Light (roots, grass, other debris) impurities simply floated up. They were easy to collect and remove. After waiting a little (a day or two), the clarified settled water was removed from above, and the middle layer with clean clay was collected and used for further preparation. If the clay turned out to be skinny or heavily contaminated, the mulching procedure was repeated several times. Today, they also resort to it, but in full only in case of extreme need - when there is no oily or normal clay.
After that, the clay was left to "perep".They just filled it with water and waited for all the organic matter to rot. The process is quite fetid and lengthy - about one and a half to two months. The "rancid" water was not changed. Smell served as a marker for the completion of the process. As soon as the stench disappeared, the clay was considered ready. This meant that all organic impurities in the clay were removed.
Today, few people allow themselves such the luxury of long preparation of clay. Therefore, the preparation process is shortened as much as possible.
First of all, the clay is soaked for several days, stirring daily with a mixer. Floated grass and roots (or wrapped around the mixer auger) are removed. As soon as the water settles, the excess is carefully drained, and the soaked clay dough is scooped out to prepare a solution. The stones are removed from the bottom, and the remaining lumps of clay are again filled with water.
If there are a lot of lumps and foreign inclusions, it is filtered through a sieve with the same mesh as for sifting sand.
Prepared clay milk in consistency should resemble heavy cream.
Chamotte clay - how to breed and what to mix with?
To say that this material is easy to work with would not be entirely correct - many beginners using fireclay complain that the plaster based on it cracks and crumbles, and the masonry on fireclay mortar does not hold firmly. It should be remembered that during firing, clay almost completely loses its plastic properties, and our task, when mixing a solution, at least partially returns these characteristics to it or gives them to the solution using other components, for example, special glue or ordinary quartz sand.
How to establish the quality of the solution
After preparing a solution of normal fat content, you can start laying
Only normal solutions are suitable for laying a stove in a house or in a bath. Fatty ones crumble after hardening. And since the oven is actively being used, this happens very quickly. Lean solutions do not guarantee wall strength, which is unsafe.
Since it is difficult to accurately measure the indicators of materials without instruments, they resort to another method. Mix 5 solutions with different concentrations of sand and clay and determine the suitability of each composition. The technology is as follows.
- Prepare 5 equal portions of clay. The first one is left unchanged, 10% of sand is added in 2 sample, in 3 - 25%, in 4 - 75%, and in 5, clay and sand will be in equal volume.
- Add enough water to each portion so that a thick dough is obtained from each sample.
- Balls 4-5 cm in diameter and plates 2-3 cm thick are sculpted from portions. Leave for 10-12 days to dry. The sample should dry in a closed room at room temperature.
- If the balls and plates crack during drying - the composition is oily, more sand must be added to it. If the plates are colored, and the balls break when they fall, the mixture is lean, you need to put more clay. If the clay handicraft does not crumble when it falls, the solution has the required fat content and plasticity. When making a mixture, sand and clay are mixed in the same proportions as in this sample.
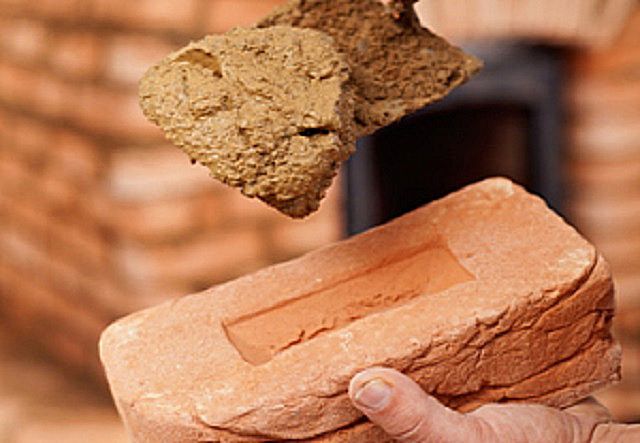
At the stage of making large portions, attention is paid to the density of the composition. If gaps remain when the trowel is carried out over the surface, the mixture is too thick. If the traces from the trowel are quickly filled with liquid, the mixture is liquid. She needs to settle, and drain the excess water.
The quality of the solution is checked by a variety of methods. The most accessible is the draining of the material from the shovel, which is performed right during cooking.
The tactile test gives a reliable result. The normal composition creates a rough layer on the fingers. Oily forms a film, sticks to the palms. Skinny leaves no trace.
You can visually assess the quality of the mixture using an ordinary wooden stick. After immersion in a normal solution, traces and particles of the mixture remain on it, in a greasy one - a dense film. The thin solution does not leave traces, the wood remains wet.
The safest practice is to lay a layer between bricks. If the mortar is thick and greasy enough, after 5 minutes the bricks do not come off from each other. If it is oily, this effect is observed even when a very thin layer is applied, no more than 2 mm. If skinny - the bottom brick will fall.
We suggest that you familiarize yourself with: How to cover up cracks on the stove: a mixture for coating, how to repair cracks in a brick oven, putty, how to coat, how to coat with clay
How to breed and what to mix with fireclay clay - step by step scheme
Step 1: infuse the powder on water
To prepare a solution of chamotte clay for plaster, we need a pack of chamotte powder. Pour the powder into a container, gradually adding water, until the powder is completely covered with water. Before diluting the final solution, chamotte clay should be infused for at least three days.
Step 2: making the final batch
After we have stood for the right time, stir the resulting mixture again, adding a little quartz sand and water, if necessary, if necessary. If the solution turns out to be liquid, you can sprinkle more powder, dilute too thick with additional water. By its consistency, the ready-to-use solution should resemble sour cream - with such a density, it will not drain from the surface and adhere well to the wall.
Of course, you can also purchase a composition for instant mixing - it does not need to be insisted for three days, but it also costs more. In any case, PVA building glue should be added to the resulting composition, it will not hurt to reinforce such a solution with crushed fiberglass. For plastering with such a solution, special skills are not needed - just prepare a large and small spatula in advance and apply the solution evenly to the surface.
Step 3: preparing the surface
Based on the reduced plastic properties of chamotte, it is imperative that the surface that you want to plaster be provided with a mesh, and to improve adhesion, walk with a good primer. Since we are talking most often about plastering stoves and fireplaces, then the primer must be heat-resistant, and the mesh must be metal. In this case, you compensate for the plasticity of the chamotte and achieve the highest refractoriness of the plaster.
Clay solution
Clay solutions are characterized by their fat content... Their plasticity, resistance to high temperatures, strength and shrinkage depend on this.
Clay solutions can be:
- fattythat have good ductility, but crack strongly when dry;
- skinny, which have non-plastic and fragile properties, crumble when dried;
- normal- plastic, when dried, they hardly crack, give a slight shrinkage.
For reliable brickwork, a normal level of mortar plasticity is required, since it can withstand temperatures of 100 degrees.
To prepare the solution, we collect materials :
- Water
- Clay
- Sand
Cooking is carried out with clean, slightly mineralized water that does not contain silt. If a lot of mineral salt is dissolved in the water, it is more likely that stains will appear on the surface of the stove plaster, which appear through a non-one-time whitewash. In ancient times, furnaces were traditionally used for laying rainwater.
They clean the sand from gravel, grass, sifting roots through a sieve. Sifted fine sand will provide thin masonry seam. The amount of sand required to mix the mortar depends on the quality of the clay used.
The plasticity of clay can be determined in several ways, which will be described later in the article. We sift the clay through a sieve so that it is homogeneous consistency and free of debris.
Solution preparation options
Consider several ways to prepare a solution for masonry.
The first way
Soak the clay a day before laying, then add water, bringing it to the thickness of sour cream. We filter the solution, add sand and mix thoroughly. Puddles of liquid clay should not appear on the solution, and if they do, then add sand and mix again.
Second way
We make a mortar for laying bricks. We mix chamotte sand with refractory clay in an equal ratio, then add water, which makes up a quarter of the clay, and carefully mix... This is a very easy method to follow.
Third way
You can make a mortar for laying a stove from loam. To get the correct ratio of components, we mix ten solution options (each with a match box). The first option is ten parts of loam, one part each of sand and cement; the second - nine parts of loam, 2 parts of sand, one part of cement and so on until the tenth option - one part of loam, a tenth of sand, one part of cement. We fill boxes with solutions and we dry for a week. Then we choose a solution that not cracked and has more clay... Such a solution dries quickly and burns when heated. By sintering a clay-sand mixture, ceramics are formed. This solution can withstand temperatures up to 600 degrees. At higher temperatures, it collapses... You can put fireboxes from it, which will work on wood, peat.
Fourth way
If the clay is clean and has no stones, add fine sand and ¼ volume of water to it. In this case, it is necessary to thoroughly mix the clay and sand.
The clay solution should be creamy density, do not spread and slide well from the shovel. Salt or cement can be added for strength. Add 100 - 250 grams of salt to a bucket of mortar, and ¾ liters of cement. Dissolve the salt in water, and pour the cement with water until sour cream is thick, and then add it to the solution. A high-quality solution will provide good adhesion of masonry and filling the unevenness of the brick, which will make the joint tight and gas-tight.
Clay plasticity test
To check the quality of clay, we recommend several proven methods:
The first way based on clay of different plasticity, which shrinks in different ways on the surface of wood. Pour ten liters of water into a bucket and add clay until a creamy solution is obtained, stirring it with a cleaned board. If a thick layer of clay remains on it, then the solution too plastic... It is necessary to add sand at the rate of one liter can per bucket of mortar until it is of normal plasticity. A solution is considered normal plasticity when a 2 millimeter layer of clay remains on the board and sticks to it in clots. If the plate is covered with a thin layer of 1 millimeter, then the solution is low plastic.
The second way is mechanical testing of the solution after drying... We clean the clay from large pieces and with a jar with a capacity of 1 liter, we measure out five even portions. Add sand to medium plastic clay in proportions: leave the first without sand, mix the second with ¼ cans, add ½ to the third, add a whole can to the fourth, and 1.5 cans of sand to the fifth. We dilute each mixture with water so that the clay does not stick to the hands, but kneads well. Balls are molded from the resulting solutions, which then need to be crushed into cakes. These cakes must dry, the main thing is not to confuse which solution is. Those in which there is little sand will crack, and in which there is too much - crumble. The optimal composition is the composition from which it turned out dense and not cracked cake.
For the third method, it is necessary, as for the second, cook balls... After they dry, two cut planks are taken. The ball rests on one of them, and the second is pressed down on top. Where the optimal composition of the solution is, it will begin to crack when it is compressed by 1/3 of the diameter. A greasy solution will crack at half the diameter, and a skinny one will practically crumbles immediately.
Checking the quality of the solution
In order for the brickwork of the oven to hold well, the mortar must be prepared with high quality in an optimal ratio of components. As mentioned above, the amount of sand depends on the level of plasticity of the clay. In this regard, it should be determined how much sand needs to be added.
Five separate cans of oily clay must be mixed with sand in proportions: leave the first portion, add half a can of sand to the second, one can in the third, one and a half in the fourth, in the fifth - two. Mixing clay with sand, water is added to each portion. The solution should not stick to your fingers. Then from each type of solution rolls down in five balls, with a diameter of three to five millimeters. You need to take two balls of each mixture, make thin cakes out of them and leave to dry for 12 days in the room. From dried balls and cakes, we carry out the test in this way: we take balls and cakes, and throw them in turn from a height of one meter. If the balls and cakes do not crack or break when falling, then this quality solution... The main thing is to remember which mixture each ball is made of.
You can check the clay solution using harnesses made from it. We roll out the clay, make bundles about one and a half centimeters in diameter and fifteen to twenty centimeters long. Then we stretch the harnesses and wrap them on a wooden round stick with a diameter of five centimeters. If the tourniquet breaks off at the moment of decreasing the thickness by fifteen to twenty percent of the original diameter, then it is made of good clay.
Clay Mortar Preparation: Video
Clay fat content
To check the solution, a ball is molded and pressed down
Clay is a micro-grained mineral of complex composition. Differs in elasticity, water resistance, good adhesion to stone. For the masonry mortar, take red clay. The material is pre-cleaned.
The main characteristic of the mineral is fat content. This parameter determines the quality of the future stove. Excessively greasy, when solidified, actively evaporates moisture and cracks. Over time, such a solution crumbles. Overly skinny material is not flexible enough and does not hold bricks together.
We offer you to familiarize yourself with Clay for modeling with your own hands: a simple recipe for crafts
Before kneading the clay for the oven, determine its fat content. There are several ways:
- A handful of dry material is soaked in water and kneaded in a fist. If the composition has taken the consistency of plasticine, the clay is oily. If it crumbles, she is skinny.
- The mineral is mixed with water - for 0.5 l, 100–150 ml of water, knead and make balls 45–50 mm in size. One of them is flattened into a cake. Crafts are left to dry for 2-3 days. If after 3 days cracks have formed, the clay is too oily. If you drop a ball from 1 m to the floor, and it does not break, the fat content of the mineral is normal. If she breaks, she's too skinny.
- The most accurate way: a ball is made of clay dough and squeezed between two plates until cracks form on it. By their size, the mineral is judged. If the ball crumbles even with slight compression, it is skinny. If fine cracks appear when the ball is compressed in half, the material is greasy. Clay is considered optimal, the balls of which crack when flattened by 1/3.


