The choice of insulation for a pitched roof
On the market of modern building materials, there is a huge amount of all kinds of thermal insulation materials of various origins, made using a variety of technologies.
To decide on a suitable insulation for a pitched roof, it is worth considering the following indicators:
- Low thermal conductivity, no more than 0.05 W / m × K.
- Minimum weight so as not to overload the roof. To determine the mass of an insulating material, it is enough to know its density. For insulation based on mineral wool, 45-50 kg / m3 is enough, and for fiberglass - 14 kg / m3.
- The material must be water-repellent. If it gets wet, it will lose up to 60% of its useful qualities.
- Resistance to sharp temperature fluctuations, including severe frosts and various natural influences, which seriously affects the durability of the material.
- Environmental cleanliness - namely, the release of harmful substances into the space during operation.
- Fire safety. It is very good if such a material does not burn and does not support combustion.
- The ability to maintain its shape for a long time, which affects the quality indicators of the heat-insulating layer.
- Durability. Modern thermal insulation materials are distinguished by enviable durability. Insulation for pitched roofs must have a service life of at least 50 years.
The following modern heaters satisfy similar requirements:
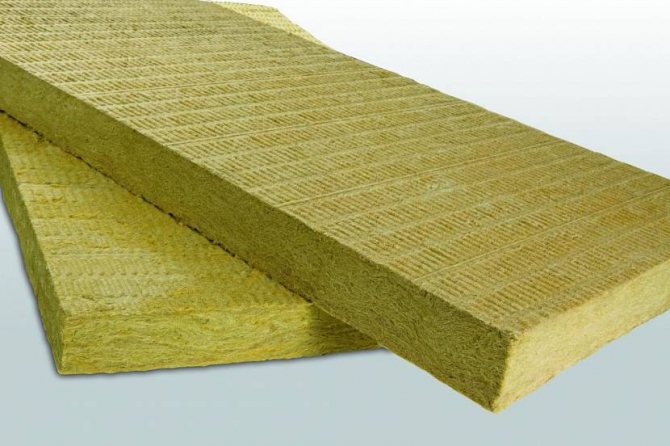
- Mineral wool produced on the basis of basalt rocks: PAROC, eXtra, ROCKWOOL Light BATTS, ROCKWOOL Light BATTS SCANDIC, ISOROC ISOLIGHT, TECHNOLIGHT Extra, TECHNO Rocklight.
- Mineral wool produced on the basis of fiberglass: URSA Pitched roof, ISOVER Pitched roof, ISOVER Roll frame - M40-TWIN-50, KNAUF Pitched roof Thermo Roll-037, KNAUF COTTAGE Thermo Roll-037, KNAUF COTTAGE Thermo Plate-037.
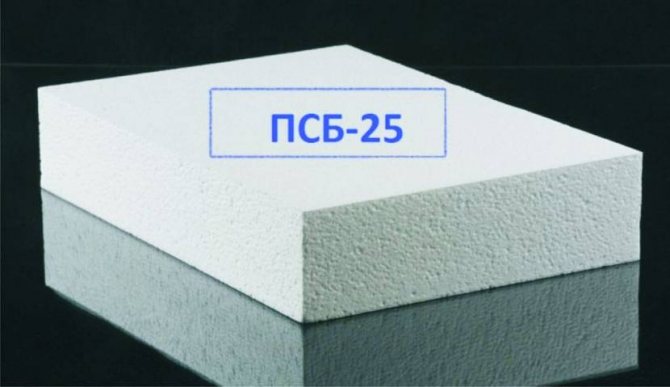
- Expanded polystyrene (polystyrene) is suitable for insulating non-residential attic spaces. It is laid on the floor, and then poured with a cement-sand screed. This is due to the fact that the material burns and emits a whole list of harmful substances.
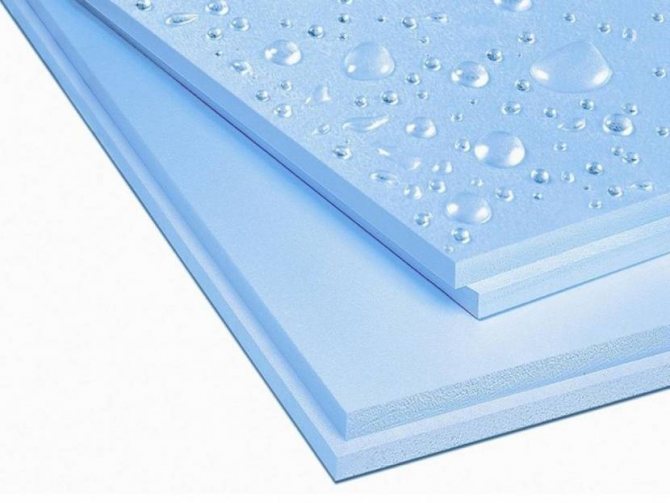
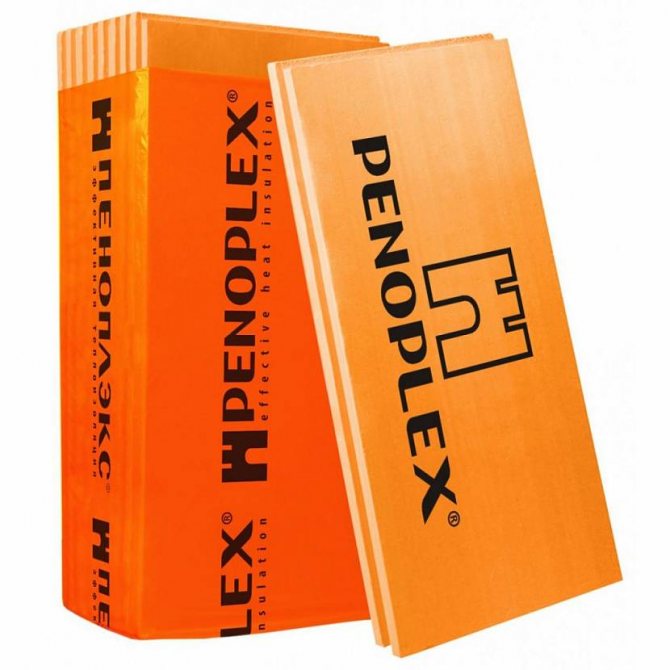
- Extruded polystyrene foam, like PENOPLEX, is also used in conditions where there is no contact with fire (presumably).
- Polyurethane foam - insulation in liquid form. It is applied by spraying or filling the free space.
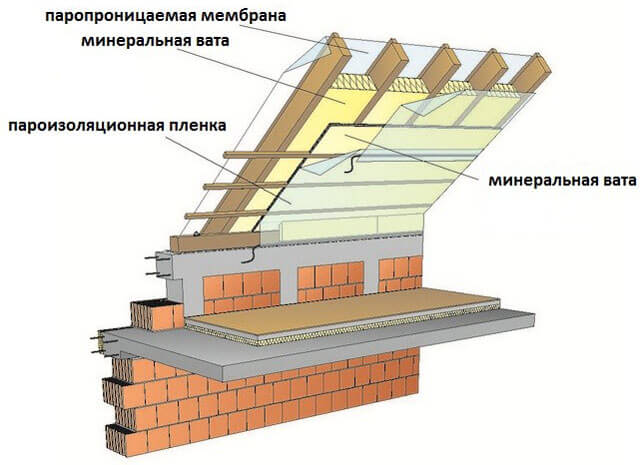

It should be noted that almost all wool, of any origin, absorb humid air. In this regard, the installation of such heaters is accompanied by the installation of special waterproofing films. Plain polystyrene or extruded polystyrene foam is also used as insulation for pitched roofs, although many experts do not recommend this.
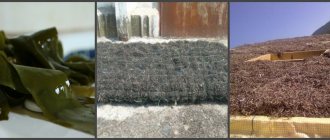
This list includes some of the most demanded heaters of our time. At the same time, one should not discount environmentally friendly insulation based on natural materials such as seaweed, roof insulation based on flax, straw, hemp, as well as cork. Almost all of them are flammable, although there is one plus - they do not emit toxic substances during combustion.
Therefore, it makes sense to consider the most famous and affordable ways of insulating pitched roofs based on modern insulation.
Installation process
Installation of roof insulation is an important process. It can be very different due to this or that type of material, so I will describe the process using the example of the highest quality and universal insulation - basalt wool.
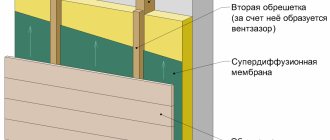
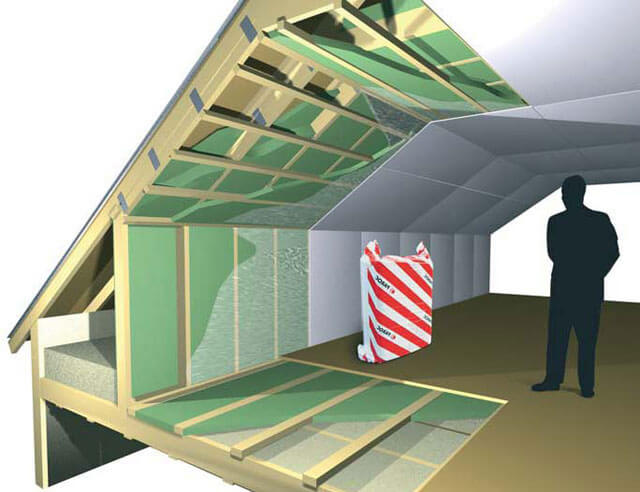
Consider, using the attic as an example, the structure of a roofing pie with insulation:
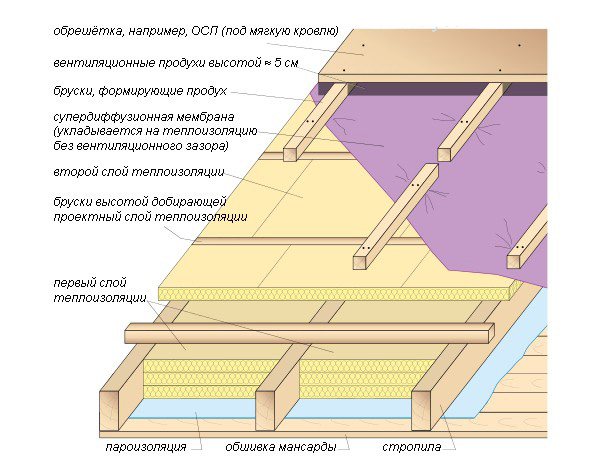

The technology of a pitched roofing cake with basalt insulation includes the following steps:
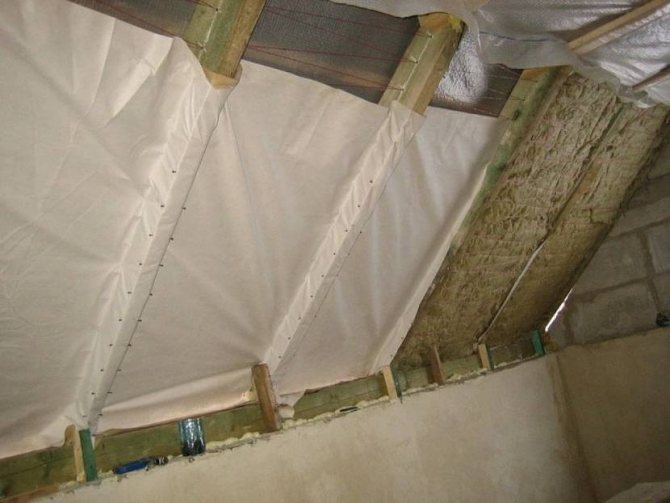
1. Waterproofing - this is an insulating film that should be installed over the roof structure. Its tension should not be extreme, since in cold weather or in frost, the film is subject to compression, which will lead to its rupture. The sag should be at least 2 cm. The fastening is done with nails with wide heads;
2. Lathing - made of bars of the same size (20-25 mm). Installation takes place over the waterproofing film. Fastening is carried out with self-tapping screws, which are not subject to corrosion and rust formation;
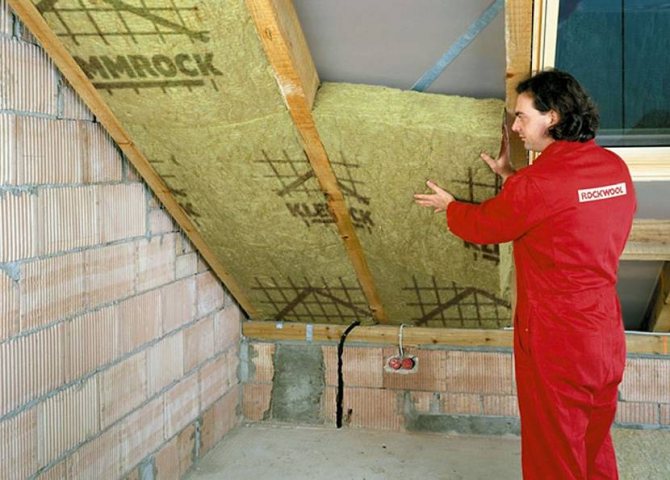
3. Installation of insulation - made from the inside of the roof. Before the process, I always recommend giving the basalt cotton wool a "break" from the packaging - it opens and remains open for about an hour. This allows the material to regain its original shape, which will help with its cutting and fastening. The installation itself does not present any difficulties.


Blocks with cotton wool are stacked between the rafters close to each other.


Before that, they are measured and cut to the required size;
4. Vapor barrier film - is attached over the finished insulation layer to avoid moisture accumulation in it. Installation of the film is carried out with a construction stapler directly to the roof overlap;
5. Finishing lathing - fixed over the vapor barrier film. The lathing will serve as the basis for the final finishing material;
6. Roof - installation of the roof on the lathing. Depending on the material, it has its own characteristics. If it is a profiled sheet, slate or tile, the beginning of the roofing is carried out from the very bottom row and goes up overlapping.
Insulation of a pitched roof has many small nuances, ignoring which can lead absolutely not to the result that was expected. It is always safer to entrust this business to professionals
My installers have vast practical experience in this matter. If you are planning to build a roof, then I invite you to use the services of my team. Just call - then we will do everything ourselves.
+7(495) 241-00-59
Installation and repair of roofing and facade coatings from economy to VIP class
Calculate online


my experience is your saved money and nerves.
I advise everyone who turns to me, even if you then leave the construction for another brigade. Ask questions, do not hesitate, I answer everyone - it's free
+7 (495) 241-00-59 I am available for calls 7/24 - I will be glad to help you, please contact me!
Roof insulation based on "Ursa - pitched roof"
Thermal insulation for pitched roofs, produced by a German company using URSA Spannfilz technology, is widely used in the construction of all kinds of construction, both residential and non-residential buildings.
Insulation URSAGlasswool Pitched roof
The advantages of this insulation:
- the elasticity of this insulation allows it to be held in the spaces between the beams without sagging and the formation of cracks;
- lightness of insulation;
- the presence of soundproofing characteristics;
- low thermal conductivity - 0.036 W / m × K;
- excellent flexibility of insulation, which allows you to fill difficult spaces;
- there is no need for additional fastening elements, it is held in the openings by itself;
- under the packaging, the insulation is compressed 5 times, and after unpacking it quickly returns its volume;
- the material practically does not burn.
Prices for URSA Pitched Roof insulation depend on the size of the mats and start at $ 50. for 1 cubic meter. The thickness of the material is 150 and 200 mm, but mats with a thickness of 150 mm are considered the most demanded. As a rule, this thickness is always sufficient for insulating pitched roofs in most cases.When calculating the thickness of the insulation for a specific climatic zone, you will have to use the SNiP 11-3-79 manual. The material is produced with a width of 1200 mm, with a length from 3900 to 4200 mm. It fits seamlessly between the roof rafter system without joints and gaps.
Video description
The video shows what the expanded polystyrene crumb is, and where it is used today:
As for the insulation of the pitched roof on wooden rafters, the crumb is used almost like ecowool, filling the space between the rafter legs with material. They only do it manually in stages. I.e:
- the rafter system is closed from the attic side to a height of 1-2 m, for example, with plywood;
- fill up the space bounded by plywood sheets and roofing material;
- coating, expanded polystyrene granules;
- set the next sheet in height;
- carry out filling;
- and in this way to the very top.
You can also fill in granular insulation from the side of the roof. To do this, you will have to close the rafters with boards or sheets from the inside of the attic, and fill the material itself from the street. And only then, after the end of the process, begin the installation of the roofing and other necessary layers.
Today, the process is mechanized and automated, that is, the material is fed using pressurized air and hoses.
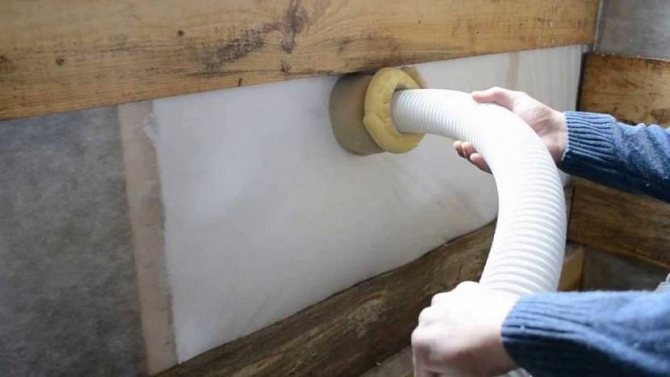

Filling the space of the roof structure with polystyrene chips Source besplatka.ua
This might be interesting!
In the article at the following link, read about a prototype of a floating island with a living tree launched in Copenhagen harbor.
Roof insulation technology "Ursoy"
Thermal insulation for a pitched roof requires a special laying technology due to the possibility of condensate penetration into the material, as well as steam rising from the room. Basically, such insulation is used in conditions when it is necessary to insulate the roof in order to create a part of the room under the roof for living.
To carry out the operation to insulate the roof slope with Ursa "Pitched roof", you will have to take some steps.
Before starting the installation of the roof itself, a waterproofing film is laid on top of the rafters. The type of film depends on many factors, such as the characteristics of the insulation, the material of the roof and the film itself. The film is laid across the rafter system with an overlap of 100 mm. The joints of the film are connected using special tape. The material is fixed to the rafter system with a stapler or nails with a wide head.
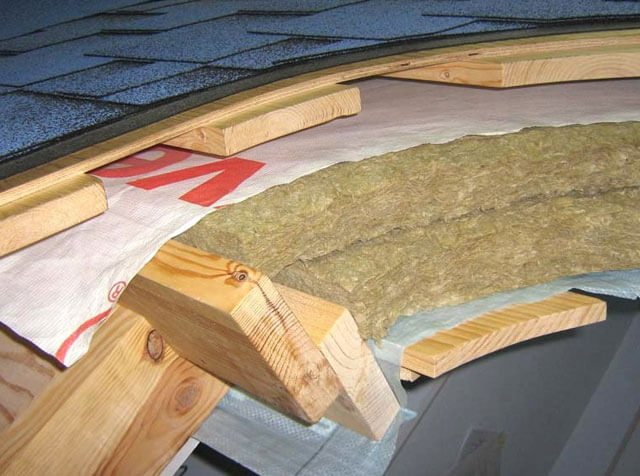

It should be noted that the waterproofing material should never be tightened. There must be a sag, but no more than 2 cm per 1 meter. This is due to the fact that in the presence of subzero temperatures, the film will stretch even more and may break.
A lathing of bars with a section of 25x25 mm is mounted on top of the film, although it can be larger, depending on the calculated data. The thickness should be sufficient for the under-roof space to be ventilated very actively. It turns out 2 ventilation gaps between the insulation and the film, as well as between the film and the roof, which prevents condensation from appearing. This means that the crate is also mounted on the other side of the waterproofing film.
Before insulating the pitched roof, roofing material is laid. It is attached either directly to the lathing, or on chipboard or OSB sheets, which are previously mounted on the lathing.
After that, you can start laying Ursa Pitched Roof. To begin with, the material is unpacked and left in this state for 20 minutes so that it straightens out and takes on a working state. After that, the insulation for the roof is cut into separate sheets of the required size, adding 2-3 cm to the width. In this case, the material will fit tightly into the space between the rafters. To straighten the edges, press lightly on the canvas.
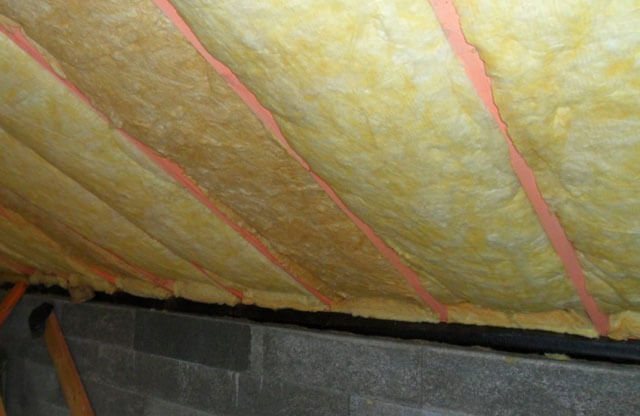

Good to know! In order not to cut the insulation and not waste precious time on this, the distance between the rafters is made slightly less than the width of the insulation by 2-3 cm.
A vapor barrier film is spread on top of the insulation (from inside the attic), which is attached directly to the rafters. After that, the attic space is finished (if necessary). Before finishing, another lathing of wooden blocks or a classic metal frame for a plasterboard system is mounted.
If the attic space is not supposed to be used as a living space, then such an insulation scheme is not entirely suitable, since in this case it is necessary to isolate the attic space by laying the insulation on the attic floor.
In the case of buying a ready-made house, where the attic insulation is not performed, you can resort to some work. Since there is a ready-made pitched roof, the waterproofing film is laid on top of the rafter system, and so that it repeats the relief of the structure. After that, the insulation is mounted in the gaps between the rafters. It turns out that the wooden structure is not protected from leaks, and the insulation is protected.
There is one more method, similar to the first one, but of a higher quality. The space between the rafters is not filled with insulation, but a waterproofing film is filled. Suspension elements used in plasterboard systems are attached to the rafters. The insulation is wound up behind the hangers and attached. After that, the insulation is closed with a vapor barrier film.
A similar method of insulating pitched roofs is applicable for any type of mineral or glass wool insulation.
Pitched roof
Optimal insulation for pitched roofs


The thermal insulation of a pitched roof, like other building structures, should be characterized by low thermal conductivity and practically zero water absorption, as well as high strength and durability, so that the owner of the house would forget about roof repairs for a long time.
All these characteristics are inherent in high-quality PENOPLEX® boards made of extruded polystyrene foam, the thermal conductivity of which is a maximum of 0.034 W / m-K. This is one of the lowest rates among thermal insulation materials used in construction today. Also, the material is characterized by zero water absorption, compressive strength - 15 t / m2 or more, and durability is over 50 years according to the results of tests at the Research Institute of Building Physics.
In addition, PENOPLEX® is safe for human health. Extruded polystyrene foam is produced from general-purpose polystyrene. This polymer is widely used for the production of consumer goods - children's toys, packaging for medical products and food products, as well as other products that are subject to stringent sanitary requirements.
At the same time, PENOPLEX® is characterized by absolute biostability - it prevents the development of fungus and mold, does not decompose under the influence of bacteria.
In private housing construction, PENOPLEX®KOMFORT is widely used for thermal insulation of pitched roofs.
Methods for insulating a pitched roof with PENOPLEX® slabs
Pitched roofs can be insulated in two ways:
- outside, on top of the rafters (supporting structures of the pitched roof);
- from the inside, under the rafters.
The first is preferable for new construction, the second - in an existing building if it is necessary to replace the insulation during reconstruction or additional insulation.
Installation of a pitched roof with thermal insulation with PENOPLEX® boards over the rafters
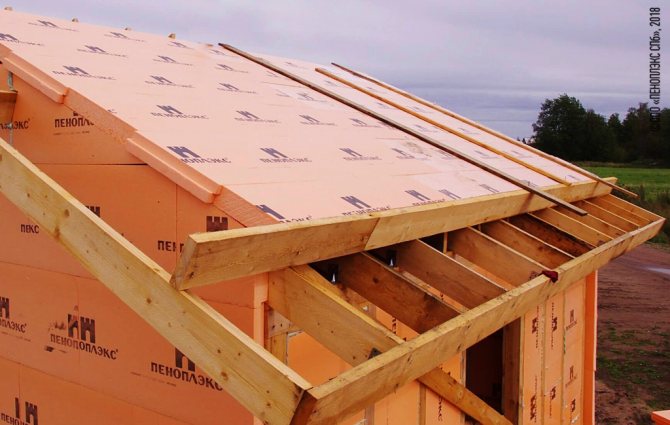

We will analyze the installation sequence, and then - the features of the pitched roof insulation in certain areas.
Installation sequence
- Installing the rafter system
- Installation of insulation for a pitched roof
- Installation of counter grill
- ∙ Installation of battens
For the manufacture of supporting elements of the rafter system (mauerlats, girders, rafters, racks), wood is used with a quality of at least 2 grade.
First, along the upper perimeter of the bearing walls, an extreme lower support for the rafter system is installed - the Mauerlat. For this purpose, a bar of straight section 150x150 or 200x200 is usually used.
Rafters are installed with a step according to the design calculation, as a rule, 0.6-1.0 m.
The connection of the supporting structures of the pitched roof can be carried out using brackets, fastening plates and corners made of perforated steel. Brackets are made of 2 mm thick steel with anti-corrosion zinc coating. The fastening plates are attached to the wooden beam and rafters with self-tapping screws, nails or anchor bolts.
To hold the slabs in the lower part of the roof (at the border of the thermal circuit), using the starting profiles, a fixing rail is installed, having a height equal to the thickness of the slabs.
PENOPLEX® boards are laid out from bottom to top in a checkerboard pattern, starting from the installed rail. The thickness of the plates is taken depending on the climatic zone and the results of the heat engineering calculation. To ensure greater heat engineering uniformity, it is recommended to glue the joints between the boards with PENOPLEX® FASTFIX® polyurethane adhesive.
During the installation of PENOPLEX® boards, you need to make sure that there is a ventilation duct between the waterproofing and thermal insulation - a prerequisite for the normal operation of the roof. As a result, the functioning of the roof is ensured without ice freezing and condensation.
The laid PENOPLEX® boards are fastened with upper longitudinal strips. The height of the slats should be at least 30 mm, which is a prerequisite for normal ventilation of the roof over the slabs. Before fastening, holes are drilled in the rail to prevent cracks. The slats are fastened with structural screws with a pitch of at least 50 cm.
The lathing is necessary for fixing the finishing roofing (metal tiles, soft tiles, etc.). For its manufacture, wood is used not lower than the 3rd grade. The lathing can be different depending on the type of topcoat. For metal or ceramic tiles, longitudinal slats are used, the size and pitch of which is selected based on the convenience of attaching the finishing material to them.
When using roll-up waterproofing materials or flexible shingles, a continuous flooring of oriented strand board (OSB) or plywood of increased moisture resistance (FSF) is used as a counter-lattice. The joints of the flooring elements should be staggered at a distance of 3-4 mm. Differences in height between the elements of the base should not exceed 2 mm. In winter, when installing the flooring between the sheets, it is necessary to leave at least 3 mm gap to compensate for linear expansion in the warm season.
Features of mounting the ridge part
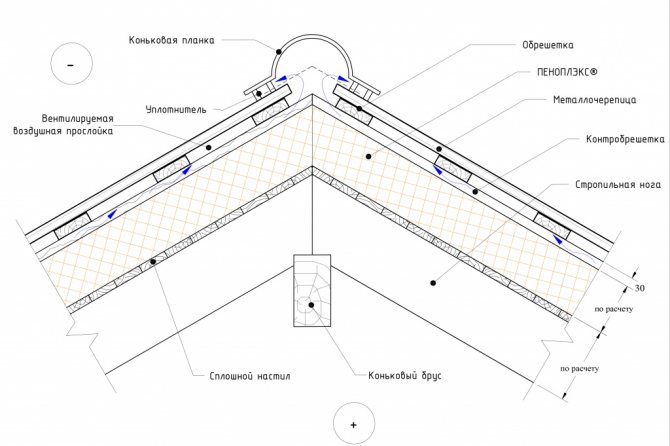
In the ridge part, PENOPLEX® slabs are stacked closely. The gap at the junction of the boards is filled with a polyurethane-based adhesive, for example, PENOPLEX®FASTFIX®, or polyurethane foam that does not contain organic solvents. When laying tiles (or other roofing material), the necessary ventilation gap is left and the roof ridge is mechanically fixed. When using roll materials, ridge tiles (shingles) are fused to the main coating.
Skate insulation scheme

Features of mounting the valley
PENOPLEX COMFORT® insulation boards are stacked closely. The gap at the junction of the boards is filled with PENOPLEX®FASTFIX® polyurethane-based adhesive or polyurethane foam that does not contain organic solvents. A continuous crate is performed under the lower bar.To do this, on both sides of the junction of the slopes, a flooring of boards 30 cm in each direction from the axis of the valley is mounted.
Waterproofing is laid on top of the boards. An industrial end carpet can be used as a waterproofing material.
Installation of the lower bar is carried out. It is attached to the flooring with self-tapping screws with a pitch of 30 cm.If the valley consists of several parts, they are laid from bottom to top so that the upper edge of the element located below is overlapped by the lower edge of the element located 15-20 cm higher.All joints are coated with sealant.
A porous sealant is placed between the tiles and the lower plank.
The shingles are laid 8-10 cm on both sides of the valley axis and fixed simultaneously with the lower plank to the crate. Fastening is performed in the lower wave.
To give the roof structure a finished look, attach the top bar. It is mounted in the same way as the bottom one - from the bottom up with an overlap of at least 10 cm. A sealant is not placed between the decorative strip and the roofing material.
Features of abutments to walls and protruding parts of a pitched roof (chimneys, hoods, etc.)
Adjoining PENOPLEX® boards to chimneys is prohibited! A fire belt made of non-combustible heat-insulating materials is arranged around the chimneys at a distance of at least 200 mm from the edge of the chimney. The belt width must be at least 150 mm. Entrust the installation of this type of structure to specialized teams. When installing a fire belt, follow the recommendations of the manufacturer of the chimney system.
It is not recommended to install the chimney at the intersection with the valley (the inner corner formed by the slopes of a complex roof), since serious complications are inevitable when sealing the joints to the roof.
So that the adjoining of the tiles to a square or rectangular pipe is airtight, an apron of galvanized or polymer material is arranged around it. The apron is attached to the crate with self-tapping screws and the tiles are installed on top.
For adjoining places that exclude operation with elevated temperatures (hoods, aerators, etc.), a diffuser made of non-combustible materials is not required. All joints of PENOPLEX® boards are filled with polyurethane foam or PENOPLEX®FASTFIX® adhesive.
The joints on the pipe walls are tightened with metal clamps in their upper part and treated with a sealant.
When adjacent to the wall on multilevel roofs, an apron made of galvanized material is also arranged, mechanically fixed to the lathing and to the abutment wall using a clamping bar.
The apron is closed from below with decorative elements made of roofing material, from above the mechanical joints are treated with a sealant.
Features of the device of the gable overhang of the pitched roof
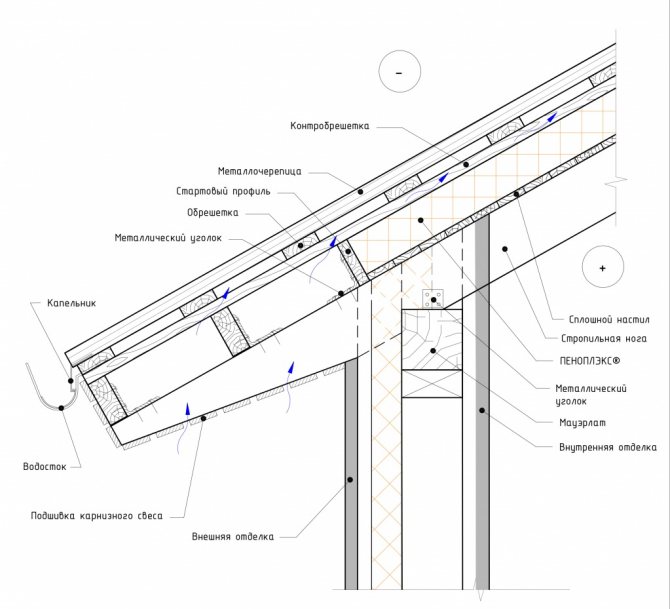
Behind the insulation contour, additional thrust beams are installed to ensure the specified roof slope. A gable profile is installed on top of the roof covering, which is mechanically fixed to the rafters and lathing.
Diagram of a gable overhang on a pitched roof:

The process of installing a pitched roof with insulation over the rafters is clear:
Installation of a pitched roof with thermal insulation with PENOPLEX® plates from the inside, under the rafters
- In the case of roof insulation from the inside, PENOPLEX® will act as an additional vapor barrier with the function of protecting the roof structure from moisture when water vapor migrates through its thickness.
- PENOPLEX® boards are attached to the rafters using disc-shaped rondolas and self-tapping screws.
- Interior decoration can be sheet material (gypsum board, chipboard, plywood) or plank sheathing, which is attached to pre-installed guide rails (bars).


- Roof covering
- Rafters
- Lathing
- PENOPLEX®
- Counter-bracing
- Vapor barrier
- Sheet cladding
More about insulating a pitched roof under the rafters
Installation of Penoplex boards on top of the rafters
As a rule, it is used in cases where it is not possible to use another insulation. This is possible if a residential building is being built from scratch. Penoplex boards can have a thickness of 60 to 120 mm.
Stages of work:
- After installing the rafters, a rail is attached from below, the width is the thickness of the insulation. This will prevent the plates from sliding down.
- Then the insulation is laid out in a checkerboard pattern.
- A vapor-permeable waterproofing film is laid on top.
- A lathing made of wooden blocks, with a section of 40 × 40 mm, is mounted to ensure an air gap. The bars are fastened with self-tapping screws, but before fastening, holes should be drilled in the "penoplex".
- Roofing material is mounted on top of the lathing.
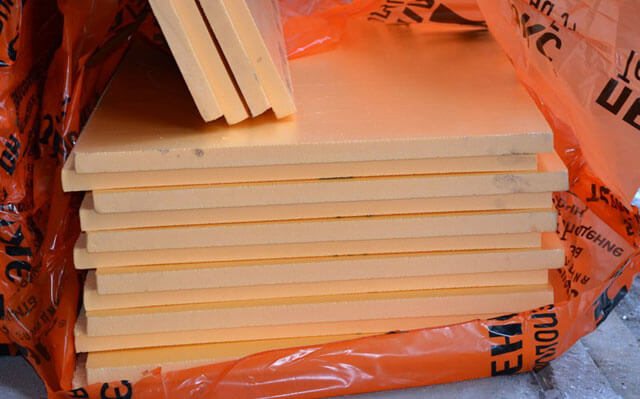

Penoplex does not require additional protection.
Common materials for roof insulation
All materials used for roof insulation are divided into two types:
- Cotton (or fibrous). This group includes basalt (stone) wool, glass wool, slag wool. Products of this type have different characteristics of stiffness, density, crease resistance and are produced in the form of rolls or slabs. Wadded insulation is considered non-loadable materials.
- Foamy. These materials are made from foamed polymers and are available only in the form of slabs. They have high rigidity and are loaded materials.
Features of cotton materials
Wadded insulation has the ability to pass moisture vapor, but should not get wet at the same time. To prevent water condensate from lingering in the thickness of the material, its fibers are covered with a water repellent. Due to this, moisture is not absorbed by the fibers, but flows out or is eroded by air currents.
Mineral wool
Due to its vapor permeability, mineral wool is considered the best material for insulating roofs with wooden rafters, since it promotes the natural exchange of moisture between wood and air.


Basalt wool is produced in the form of slabs, which are conveniently mounted in cells between the rafters.
But the ability to pass moisture vapor also has a negative side: you have to use a waterproofing film to protect the insulation from the side of the roof and a vapor barrier film to protect against warm humid air from the side of residential premises.
Condensation will accumulate on the waterproofing film. If it lies close to the wadded heat insulator, then moisture will penetrate into its thickness. This will lead to wetting of the insulation and the appearance of mold in it. Therefore, when using conventional vapor-proof films for waterproofing, a gap of 2-3 cm on each side must be left between the insulation and the film. This space is called the ventilation gap. After condensation, moisture from the surface of the waterproofing membrane will be removed by natural air circulation.
A super diffusion membrane can be used instead of conventional waterproofing films. This material allows you to do without a ventilation gap, which will simplify the process of installing insulation. Such a film will save space and allow you to lay the insulation to the full height of the rafter bar, completely filling the cells.
Basalt insulation
Basalt insulation is often meant by mineral wool. However, due to the special arrangement of the fibers, basalt wool has higher thermal protection rates and is practically not susceptible to the formation of fungi and mold. This dense material does not crumble over time, does not compact and does not burn.


Basalt wool keeps heat better and does not react with oxygen, which usually causes mold
Basalt wool is most often used to insulate pitched roofs by mounting it in the cells of the truss structure.The advantage of all wadded materials with this method of installation is the ability to fully fill the cells without cracks and cold bridges.
Glass wool
This material is also widely used by analogy with basalt insulation. It is produced both in rolls and mats of various thicknesses (up to 150 mm). Therefore, you can always choose the material in accordance with the configuration of the cells of the roof frame to minimize waste when cutting. But in terms of density, thermal conductivity and resistance to compression, glass wool is inferior to basalt insulation.
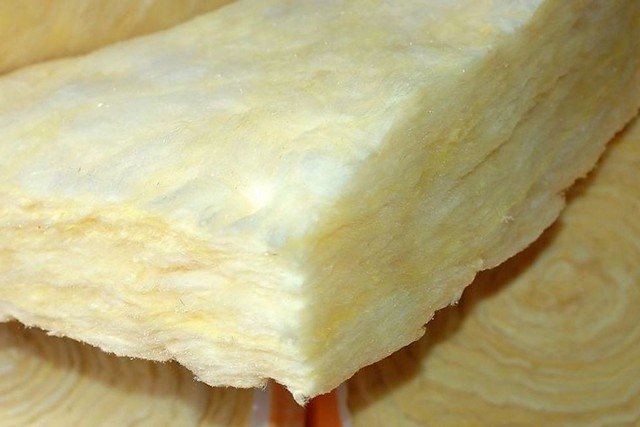

Glass wool has the worst performance in terms of thermal insulation, but is cheaper
The main argument that allows glass wool to compete with basalt insulation is its low price. Therefore, many craftsmen prefer this material, despite the well-known ability of glass wool over time to slide down the slope with the formation of cracks and greatly irritate the skin when working with it.
Slag wool
It is produced from blast furnace slag. Of all cotton materials, it has the widest operating temperature range (up to 300 oC). Slag wool also has the highest hygroscopicity, so it is not used to insulate facades.


Slag wool absorbs water well, so it must be carefully protected with a waterproofing coating
Slag wool has the most "dirty" base, therefore it is not recommended for use in residential premises. This material is usually used to insulate industrial buildings and pipelines.
Slab materials
Different types of polymers are used for the production of board materials. These are polystyrene, polystyrene, polyurethane.
An important characteristic of board materials is rigidity and vapor permeability. The technology of using insulation in the cake of a warm roof also depends on this. The ability to pass moisture vapor depends on the method of forming the foam boards in production:
- Extruded materials are highly rigid and moisture resistant. They do not need vapor barrier films. The weak point for continuous laying is the joints between the panels. Therefore, many slabs are produced with shaped edges, which, when joined together, form a lock and make the surface monolithic. This type of insulation is used for laying in a continuous layer over the rafters when insulating pitched roofs or for arranging the upper part of a multilayer pie on flat roofs.


When installing slab insulation, waterproofing is not required - Materials for which extrusion has not been used. A typical heat insulator of this type is foam. The cells in the thickness of the material do not adhere tightly to each other, so moisture is able to penetrate through it. Such materials are always installed with ventilation ducts.
For insulation of the roof between the rafters, slab foam materials are not used, since it is difficult to cut out the material clearly according to the size of the cell. Inevitable gaps will become cold bridges. In addition, if the rafters are not assembled according to the size of the material, there will be a lot of waste when cutting.
Insulation for pitched roofs in the form of expanded polystyrene
Since this material is cheap compared to other types of insulation, it is used quite often.
When working with him, you should take into account the following nuances:
- the foam is poorly cut, so it is not very convenient to work with it;
- it burns and emits harmful substances when it burns.
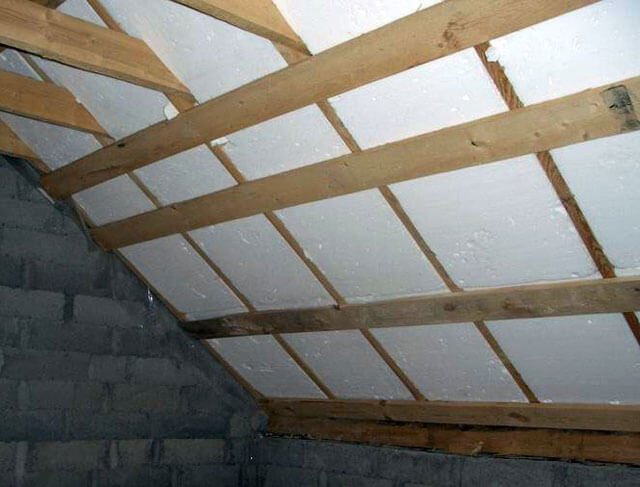

Naturally, the technology of its installation is the same as the installation of Penoplex, with the only difference that after the styrofoam is laid, many cracks are formed, which then have to be foamed, for example. It is advisable to protect the foam from direct sunlight.
In conclusion, it should be noted that the insulation of a pitched roof is a serious process that takes a lot of effort and money. Before starting work, it is better to consult which of the materials is better or more economical.
The traditional method of insulation. Installing insulation between the rafters.
Thermal insulation, usually mineral wool, is installed between beams or rafters, which are cold bridges.
- the thickness of the rafters must correspond to 4 times the thickness of the insulation (due to the low thermal insulation capacity of the wooden rafters). In fact, the thickness of the rafters does not exceed 150-200 mm. At the same time, the area of such cold bridges in the roof area is 7.7% (with a rafter pitch of 650 mm for 600 mm slabs)
- complex correct installation of thermal insulation between rafters installed with a non-standard pitch
- Mineral wool, with sufficient roof slope angles, can creep over time, sag, forming voids not filled with insulation - a direct path to heat loss
- fiber insulation needs to be insulated from water vapor in order not to accumulate water in itself
- fibrous insulation has an irritating effect on the skin of small fibers when working with it, and in a poorly ventilated attic space (for example, when installing insulation from the inside) - on the eyes and respiratory system
As a result, the thermal insulation barrier of the roof is not continuous, which, in addition to increased heating costs, can negatively affect the interior decoration of the premises over time.


Installation of waterproofing film ↑
IMPORTANT: when installing waterproofing, it is imperative to leave a gap between the insulation and the film. Usually its size is at least 20 mm.
The ventilation gap is designed for free air circulation between the roof and the waterproofing membrane. It protects the roof from the formation of condensation, and excess moisture is easily removed by evaporation or flowing down the gutter. If you insulated the attic, then this 50 centimeter gap is exactly what the attic used to be.
In order to maintain the required amount of the ventilated gap, it is worth performing an auxiliary crate. To accurately calculate its ventilated gap, it is enough to measure the length of the slope and divide the resulting figure by 500. The result will be the gap height (minimum value 20 mm).
The sheets of the waterproofing film are fixed with a construction stapler with an overlap (1 cm or more), across the slope, while the upper sheet is applied to the lower one. The canvases are also fastened with adhesive tape.
IMPORTANT: Sagging of the blade is an integral part of its correct installation. Do not tighten too much or fasten the waterproofing sheets too weakly. The optimum sag of the film should not be more than 20 mm.
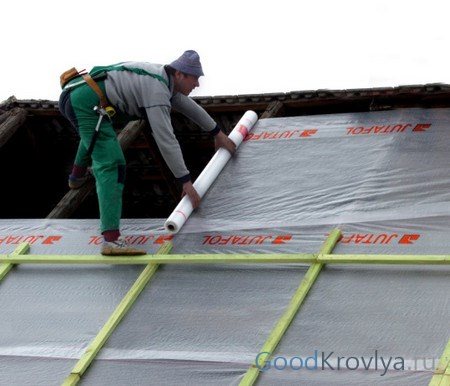

After laying the insulation, it is important to immediately cover it with a waterproofing film.
Where does roof insulation begin
The main goal of insulating a pitched roof is to ensure its maximum service life while maintaining its functional characteristics. The constant change of temperatures, the formation of condensation on the outer and inner sides of the roof lead to rapid aging of materials, loss of heat and excessive humidity in the premises. Thanks to competent insulation, such problems can be avoided.
A thorough inspection and analysis of the condition of the surfaces, especially the rafters, must be carried out at the initial stage. While the roof was exposed to sharp temperature changes and atmospheric precipitation, its materials could be damaged. For example, excess moisture could cause wood to rot or pests may have damaged the structure of the rafters. A thorough examination will help you assess the condition of these important elements.
IMPORTANT: the under-roof space is not for nothing considered a zone of increased complexity: hard-to-reach places, various communications, an area of increased risk - all this can complicate independent work on the roof.
After inspecting the rafters, it is necessary to check the condition of the wires, and possibly the water pipes.If defects are found, we put everything in order: we replace the damaged elements, repair some of them (eliminate the leak, restore the insulation), and clean the whole ones. This applies to both rafters and communications. We treat the peeled and sanded wood with an antiseptic composition.
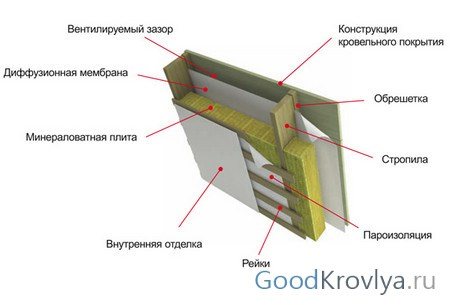

Visual scheme of roof insulation
It is difficult to calculate the approximate terms of work, but it is possible. If you have to change wires and pipes, it will take several weeks. Add to this the estimated deadlines for other work, multiplied by 2. The figure that came out is very close to reality.
The sequence of installation of insulation
The approximate sequence of thermal insulation works for a pitched roof is as follows:
- The vapor barrier film is laid in the spaces between the rafters in the direction from the eaves to the ridge. The width of the roll should be 10-15 cm wider than the free span in order to ensure a reliable connection between the film and the rafters.
- The vapor barrier is hermetically glued to the rafter legs using double-sided connecting tape or synthetic rubber or polyurethane glue. After that, the abutment must be fixed with a pressure bar.
- Insulation is laid between the rafters.
- Cover with an additional layer of plywood.
